
This section will guide you through installing, activating, and setting up the WPLP Compliance Platform on your WordPress site. By the end, you’ll have the plugin running with your subscription connected and ready for configuration.
Installation
1. From WordPress Dashboard
Log in to your WordPress Admin panel. Go to Plugins > Add Plugins.
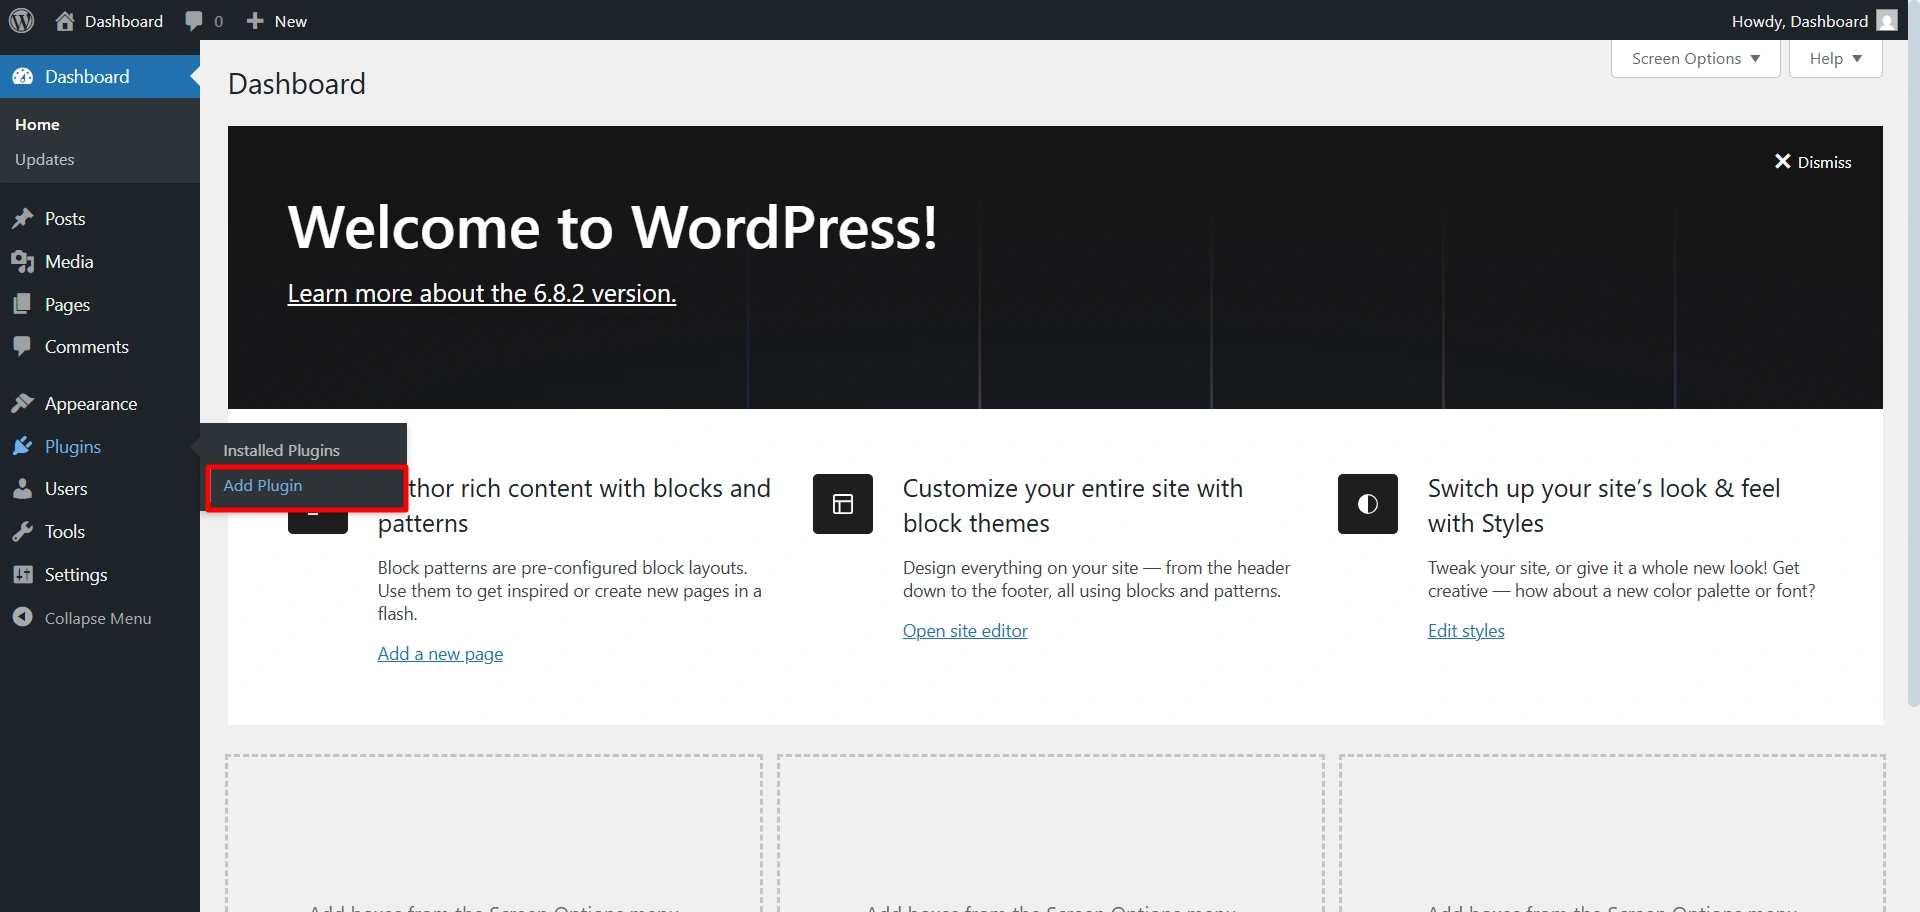
In the search bar, type WPLegalPages. Install Cookie Consent Manager for the cookie banner.
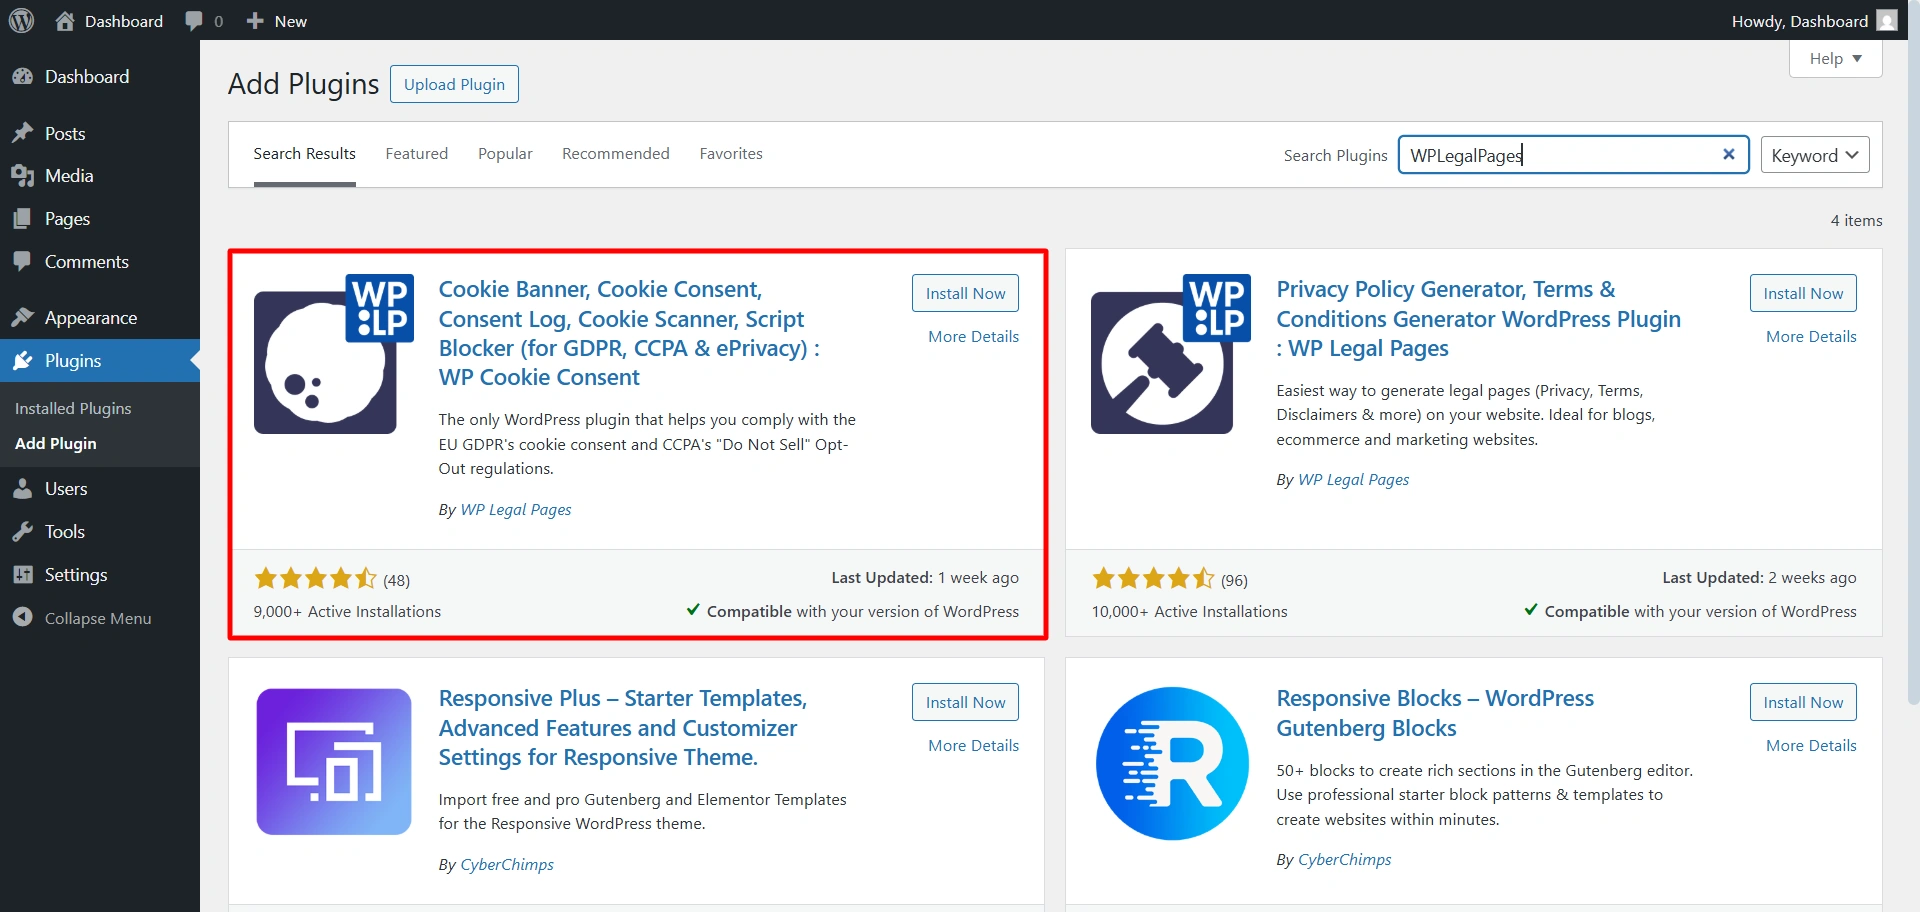
Install Legal Pages Generator for legal pages.
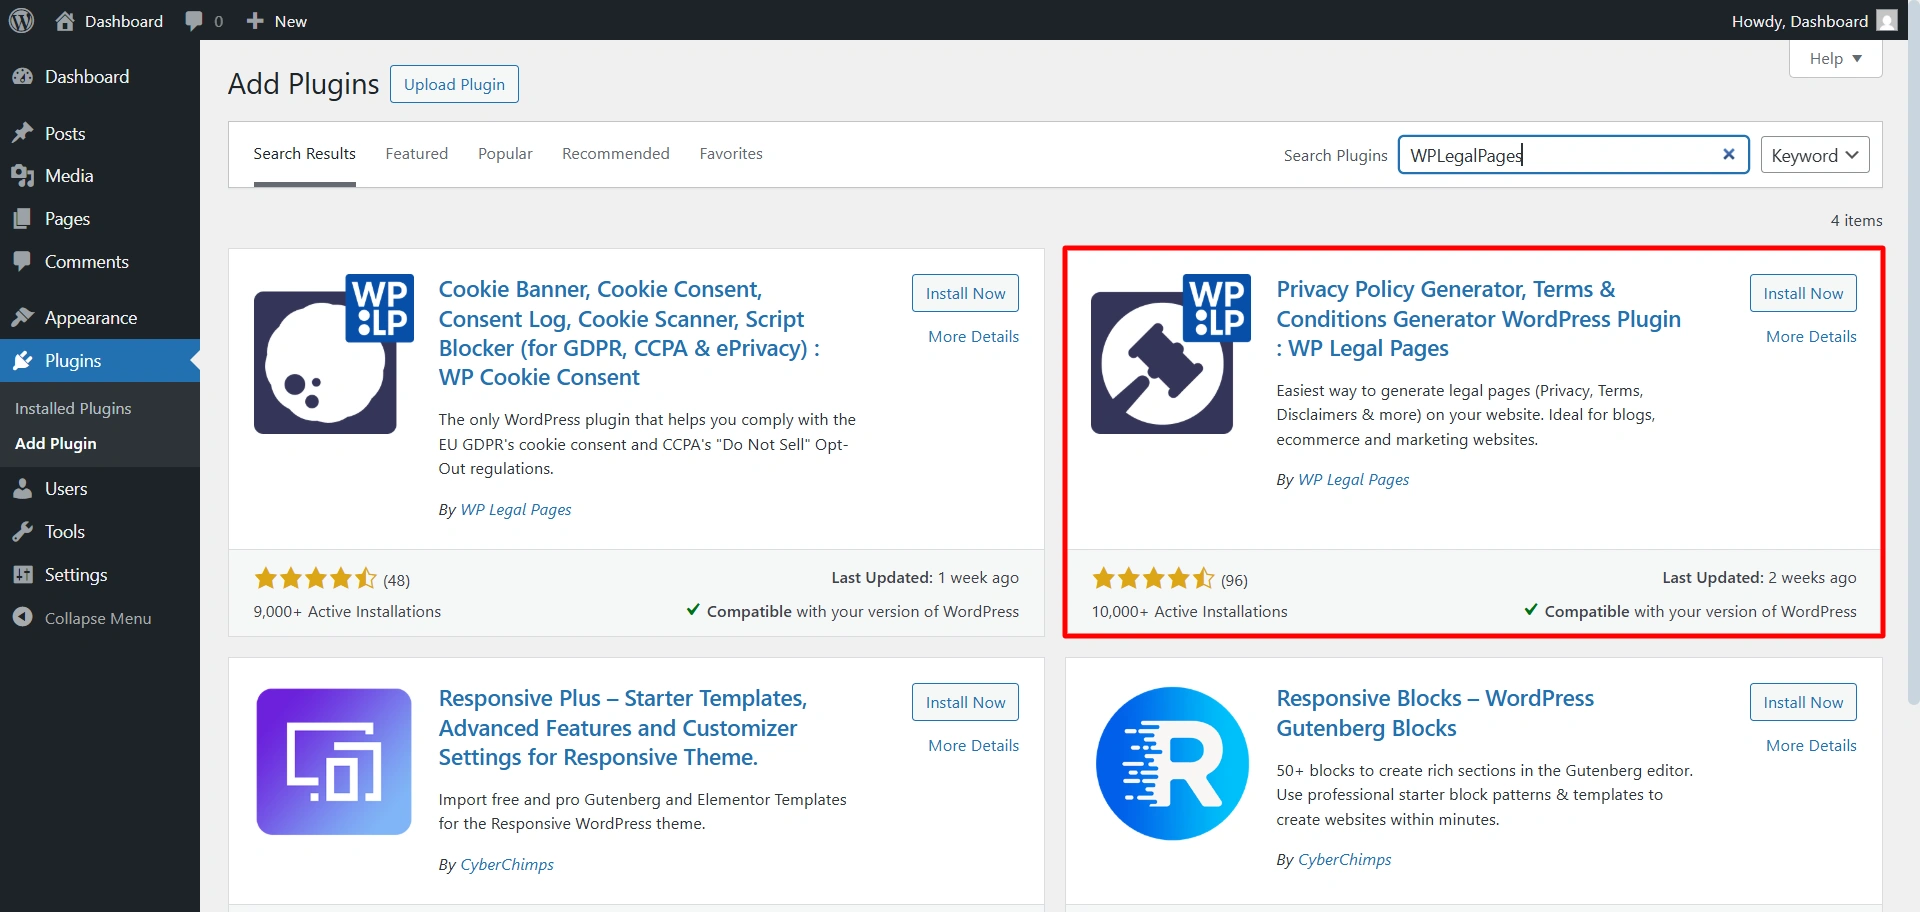
Click Install Now and then Activate.
2. Manual Upload (Zip File)
When you log in to the website or create an account, you’ll get access to downloadable ZIP files. Download the file.

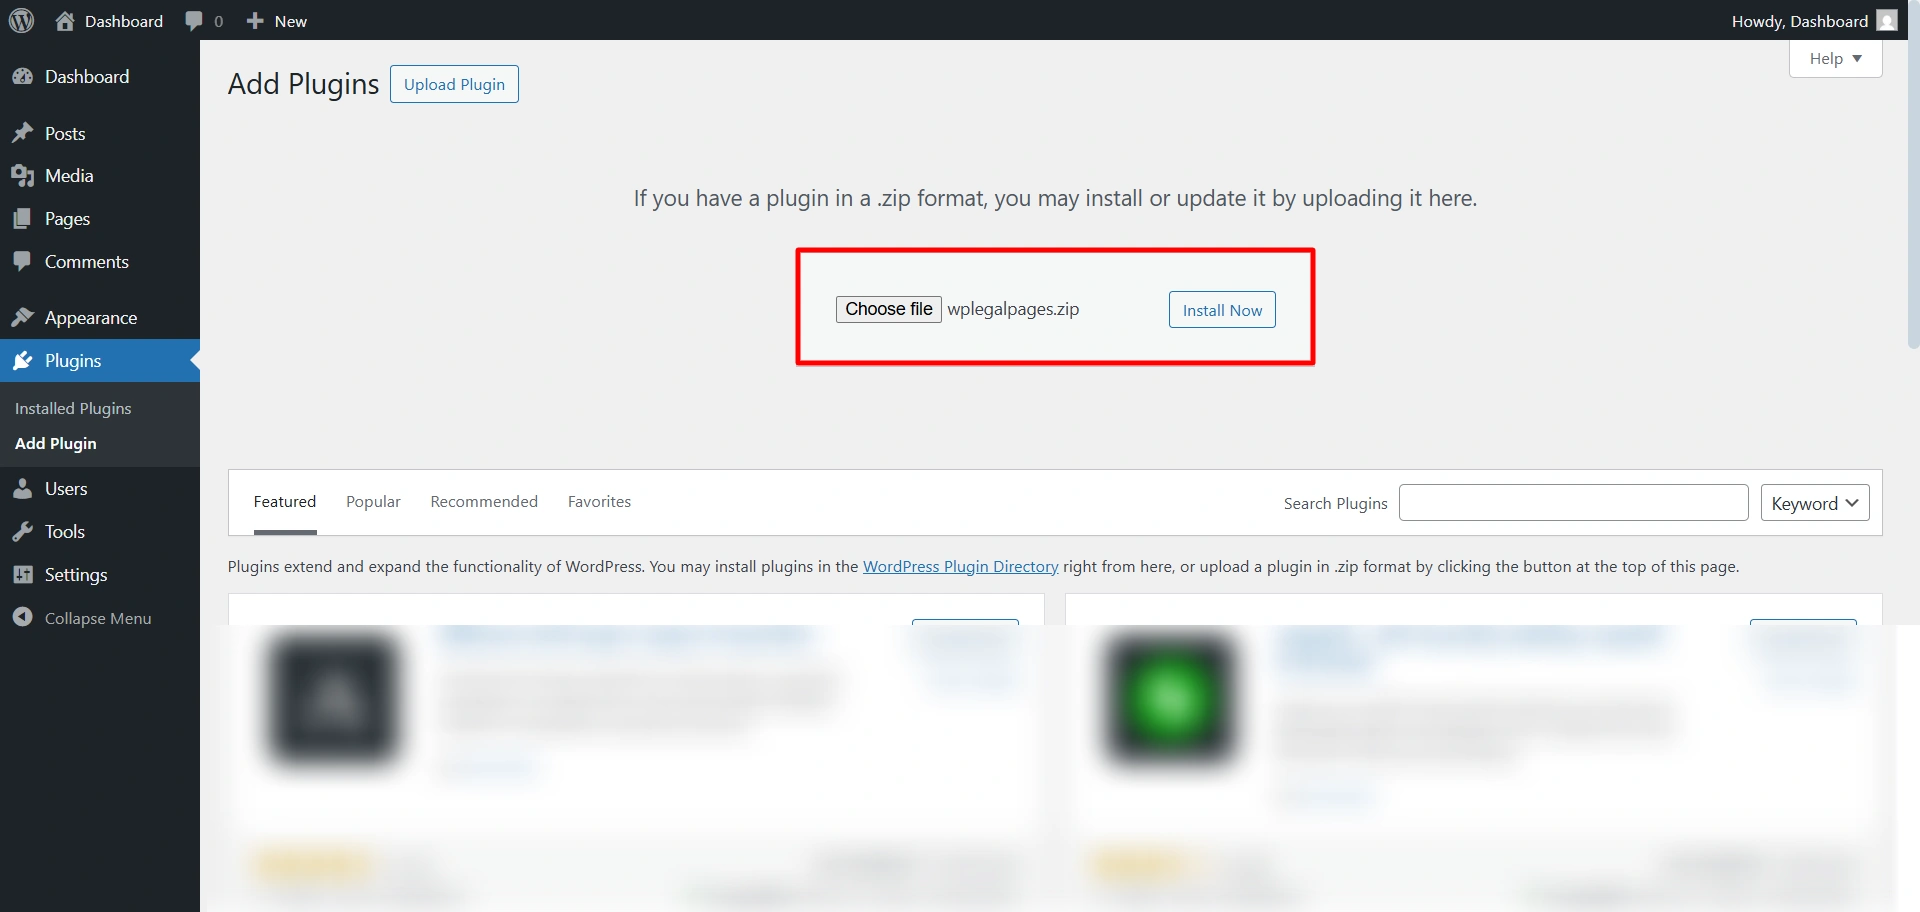
From your WordPress dashboard, go to Plugins > Upload plugins.

Upload the zip file. Click on Install Now.
Click on the active plugin.
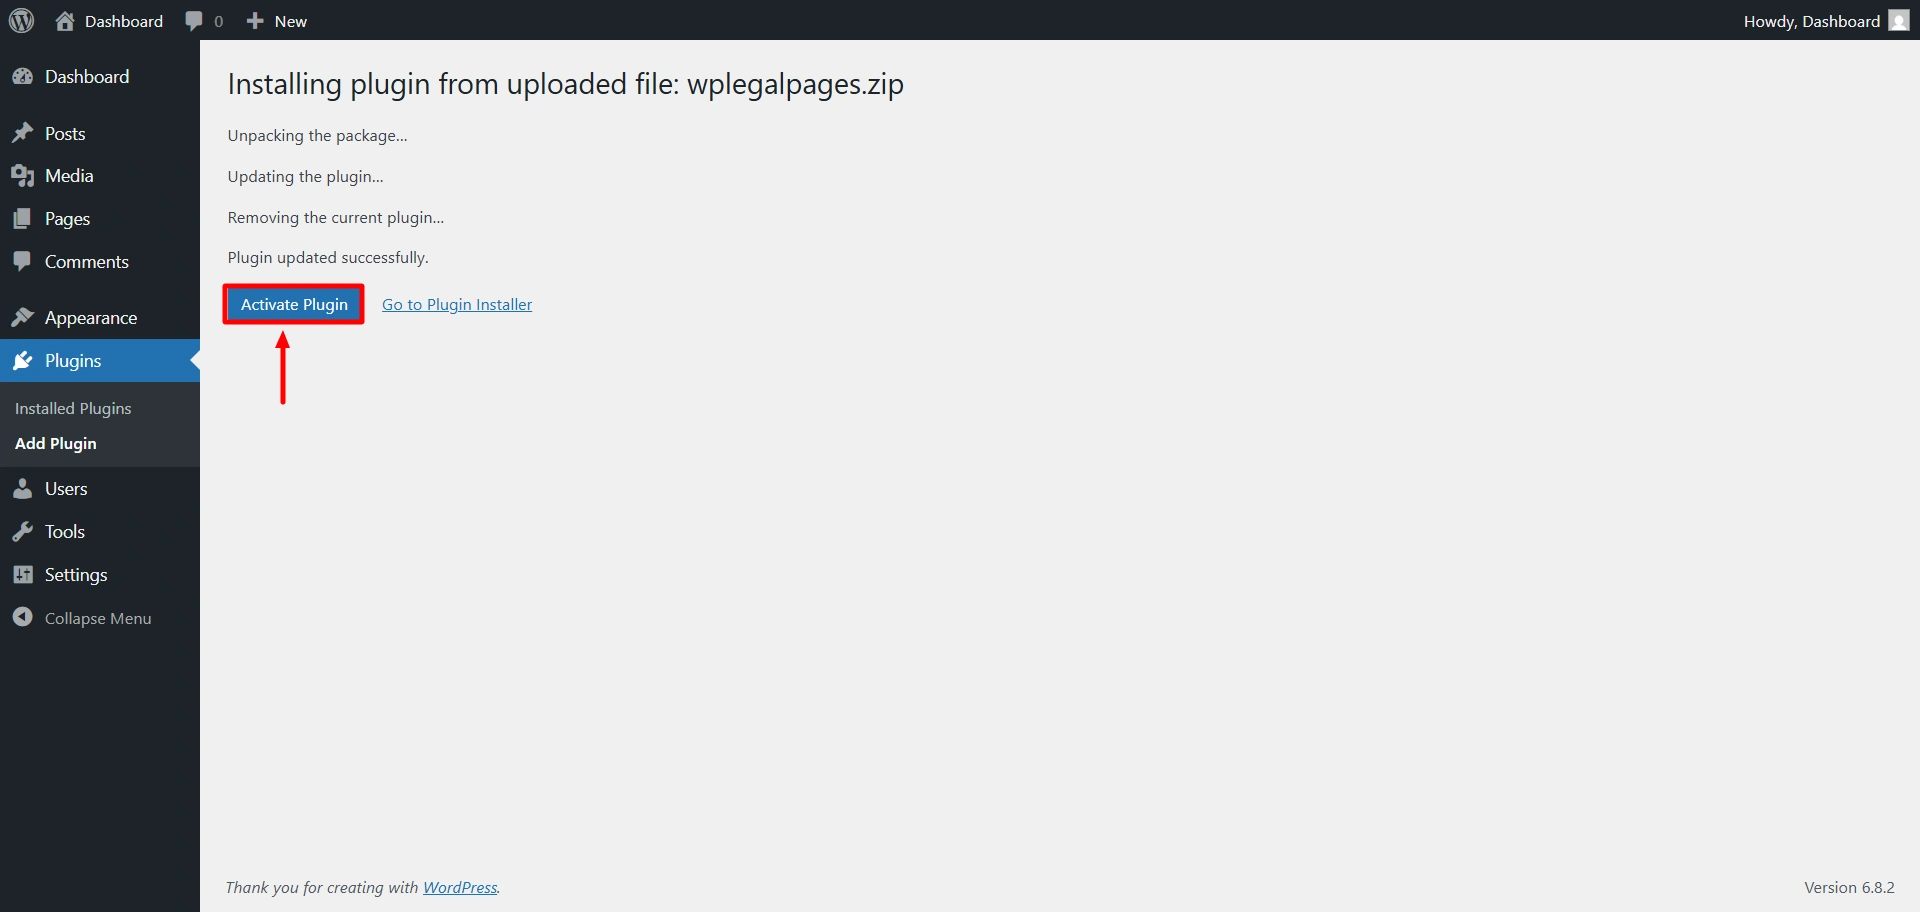
Once activated, a new menu item called WPLegalPages will appear in your dashboard.
2. Connect Your Site Through app.wplegalpages.com
The WPLP Compliance Platform allows you to connect your WordPress website directly from the dashboard at app.wplegalpages.com.
You can generate legal pages, manage cookie consent, and monitor compliance for all your websites from one place.
After logging in to your WPLP account, go to My Sites from the sidebar.
Click on the Connect New Site button.
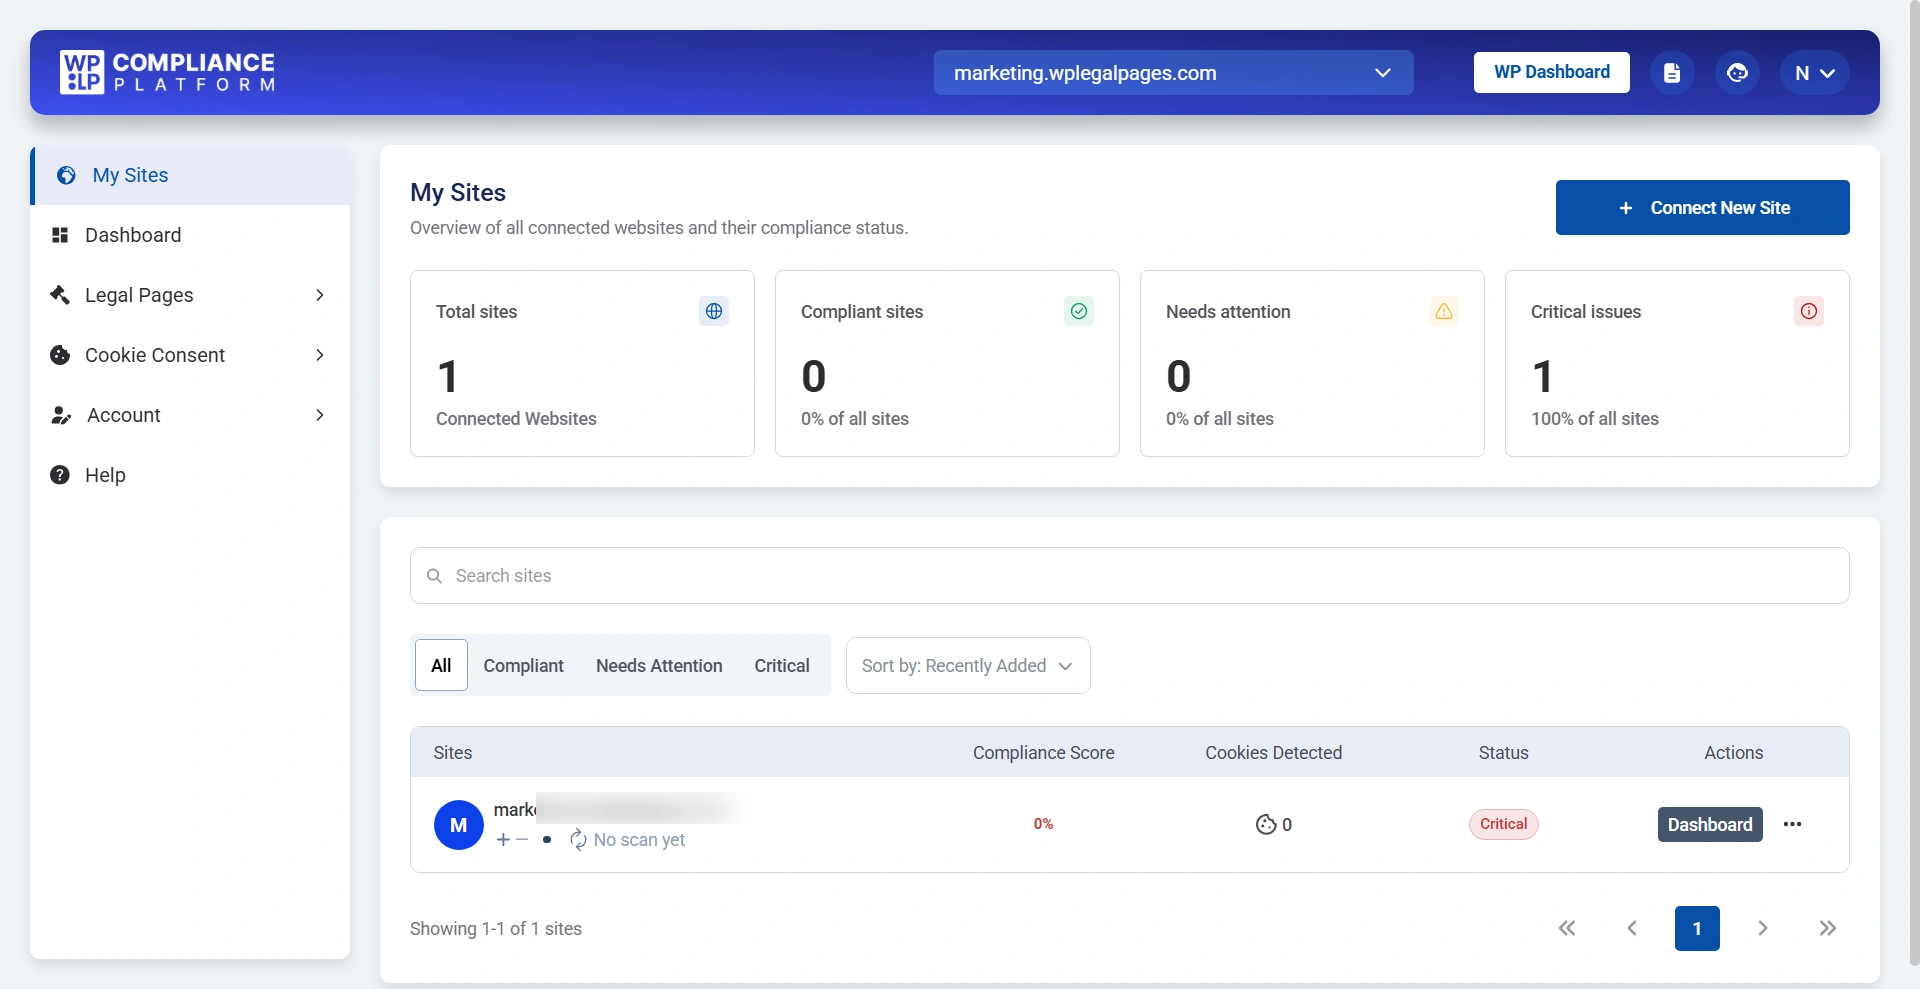
Then select Connect Your Site to begin setup.
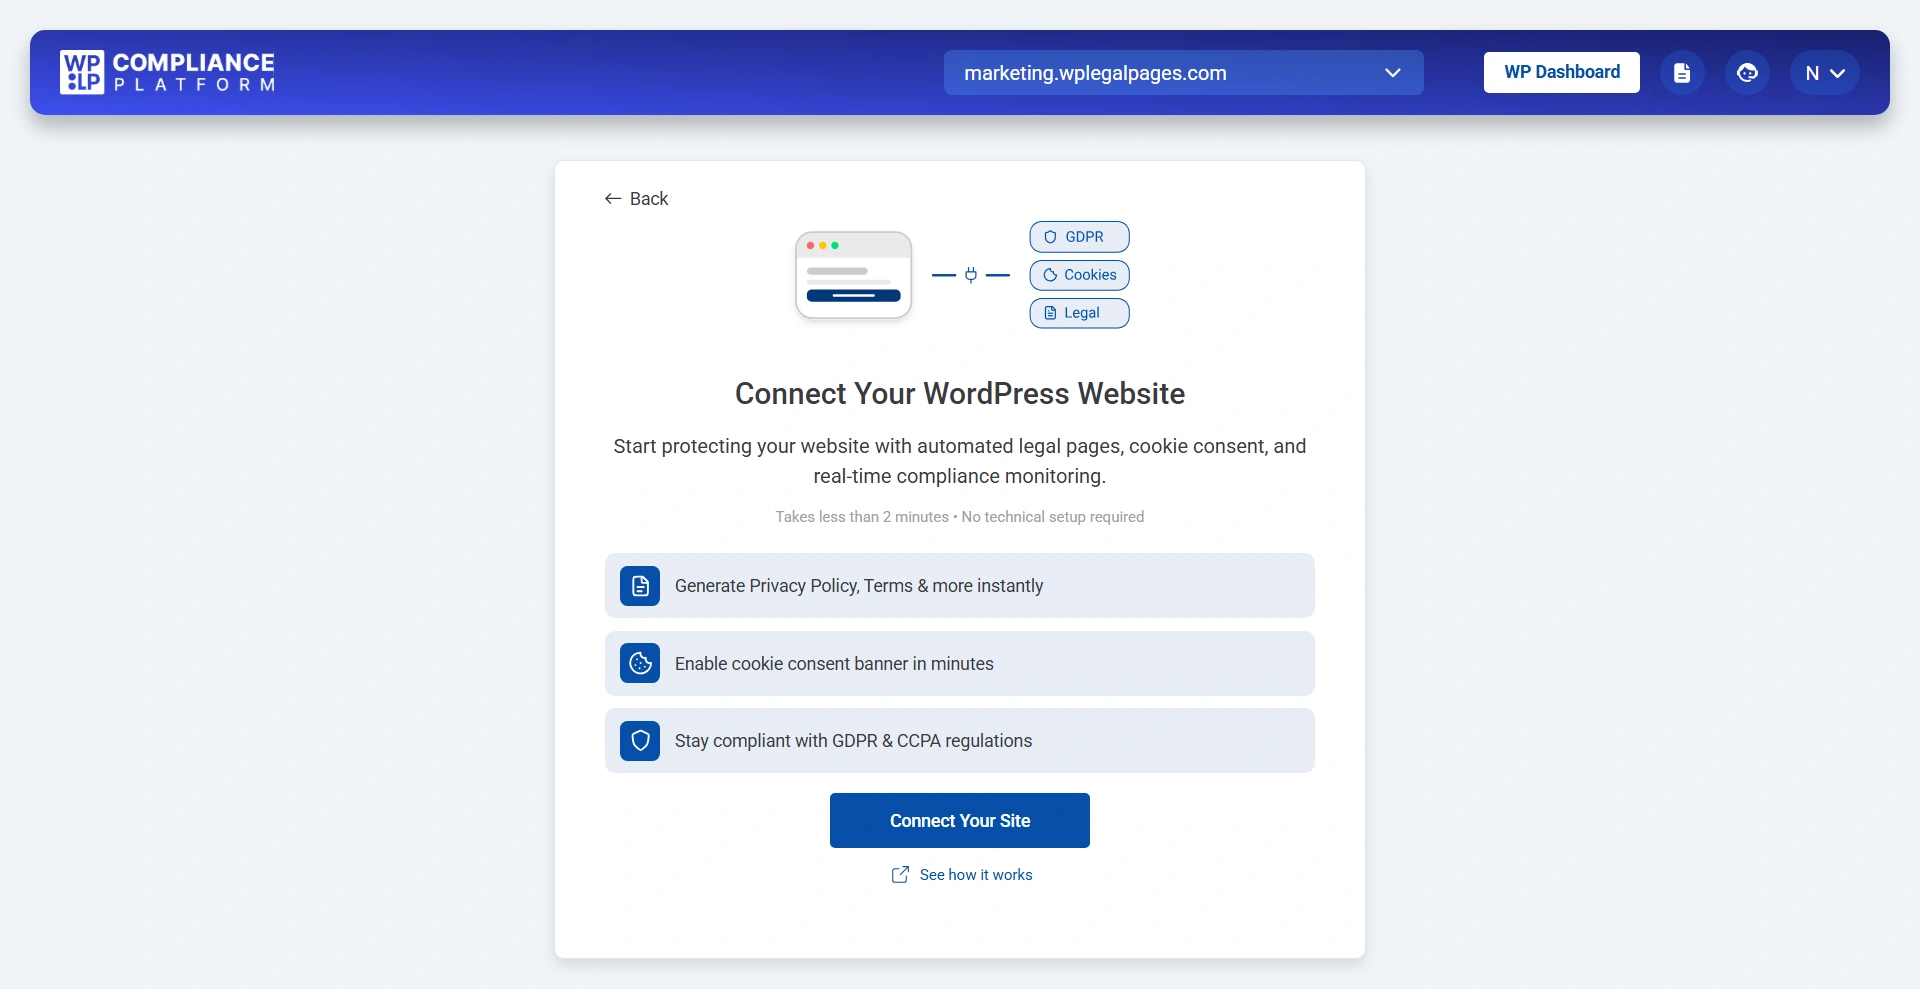
Option 1: Quick Connect (Recommended)
Quick Connect automatically installs and activates the required WPLP plugins on your website. No manual plugin installation is required.
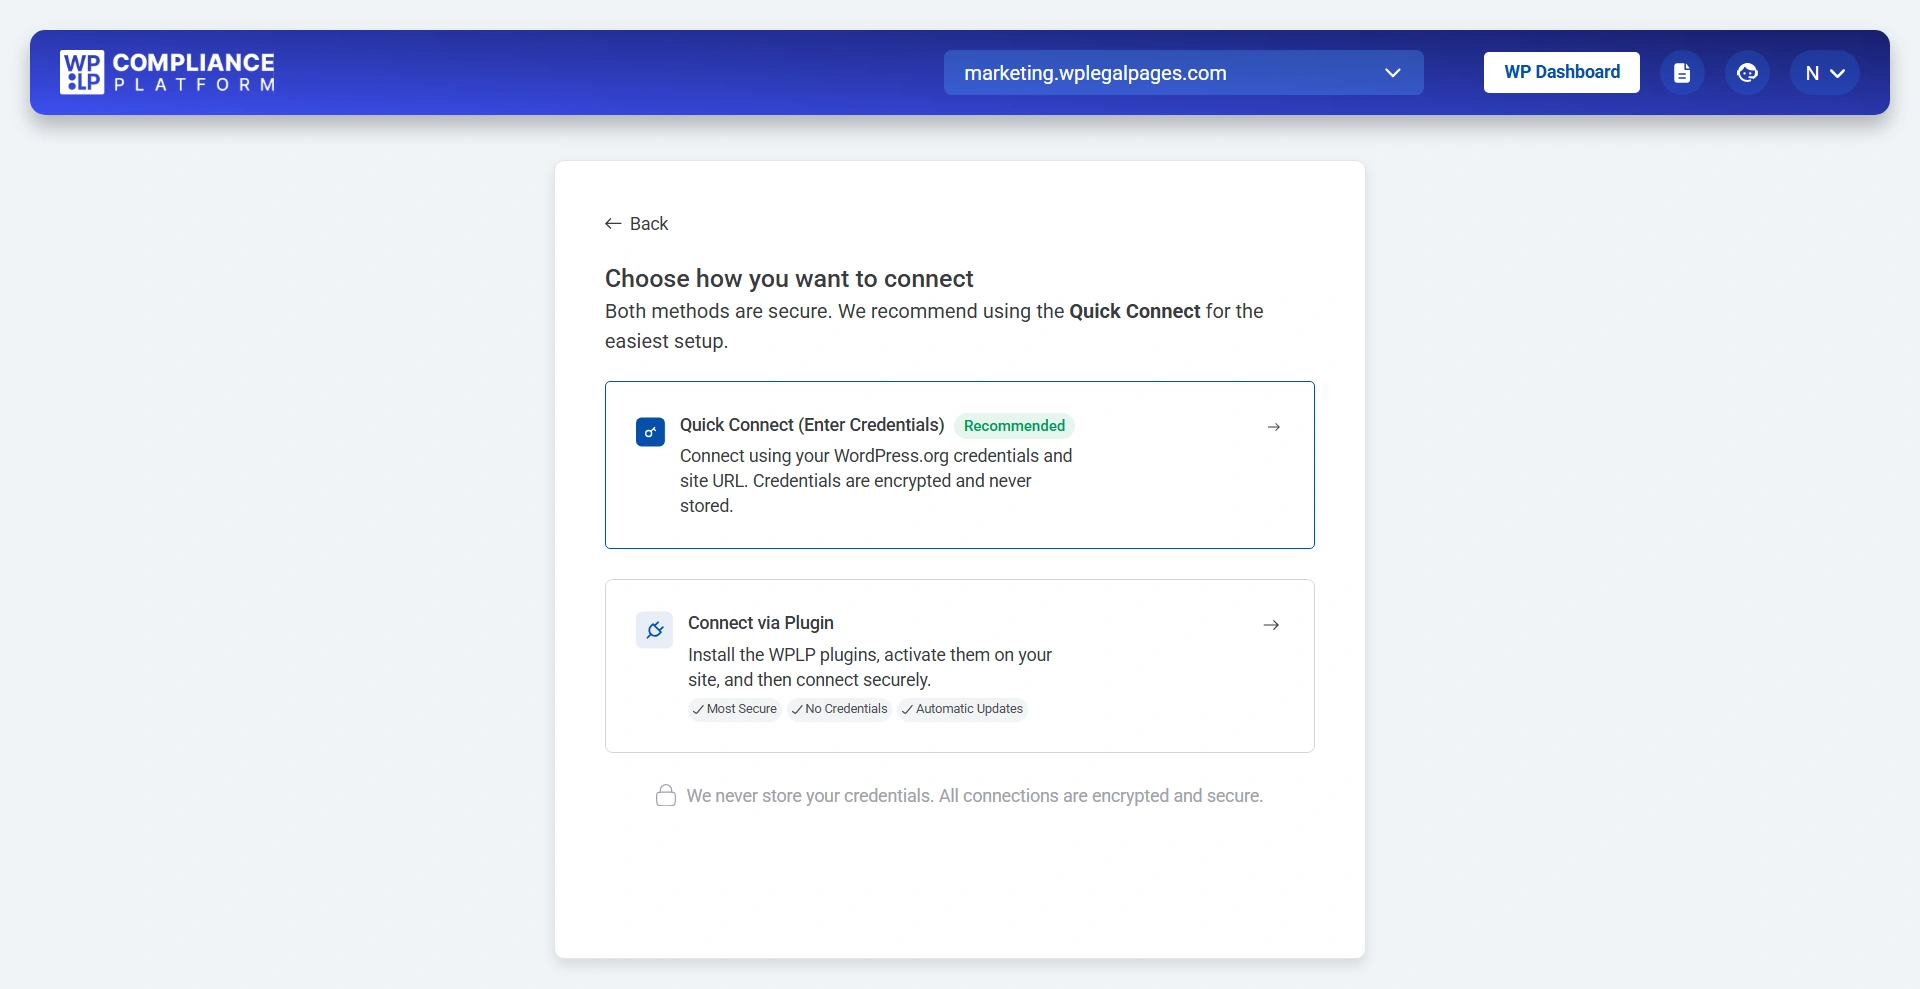
Select Quick Connect (Enter Credentials) from the connection options.
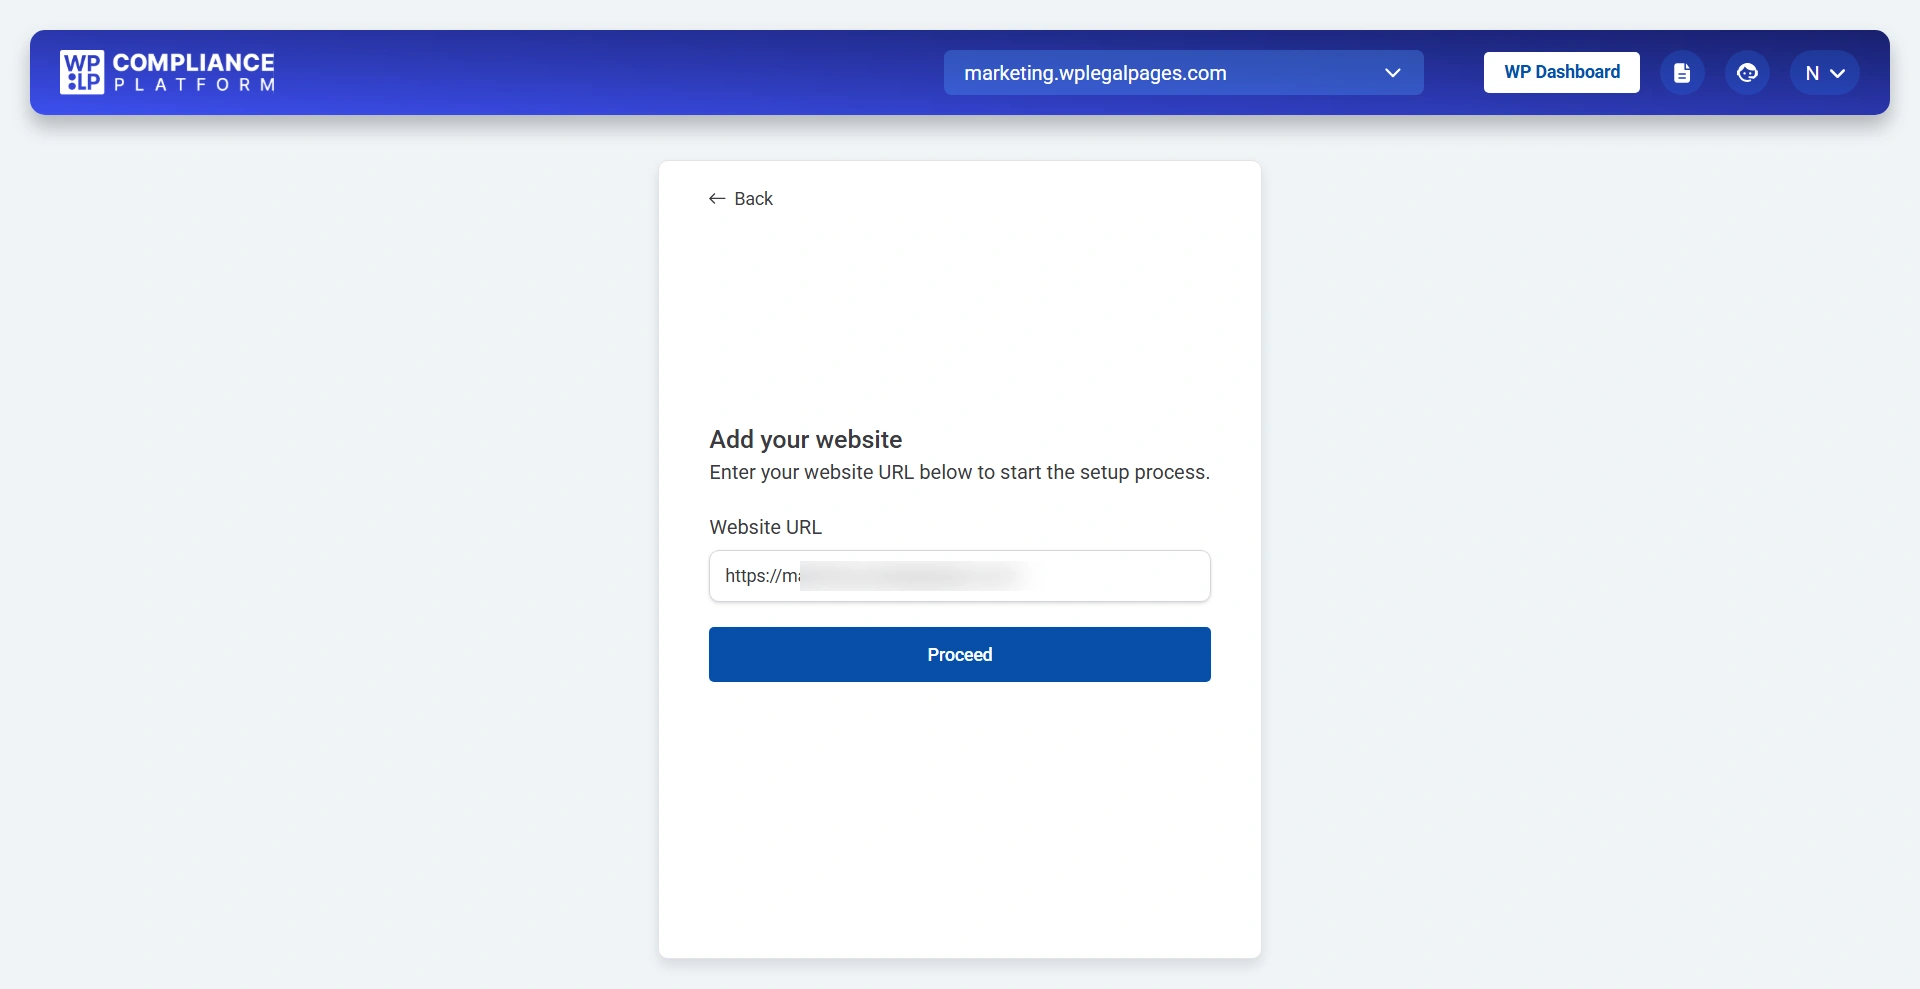
Enter your site link that you want to connect.
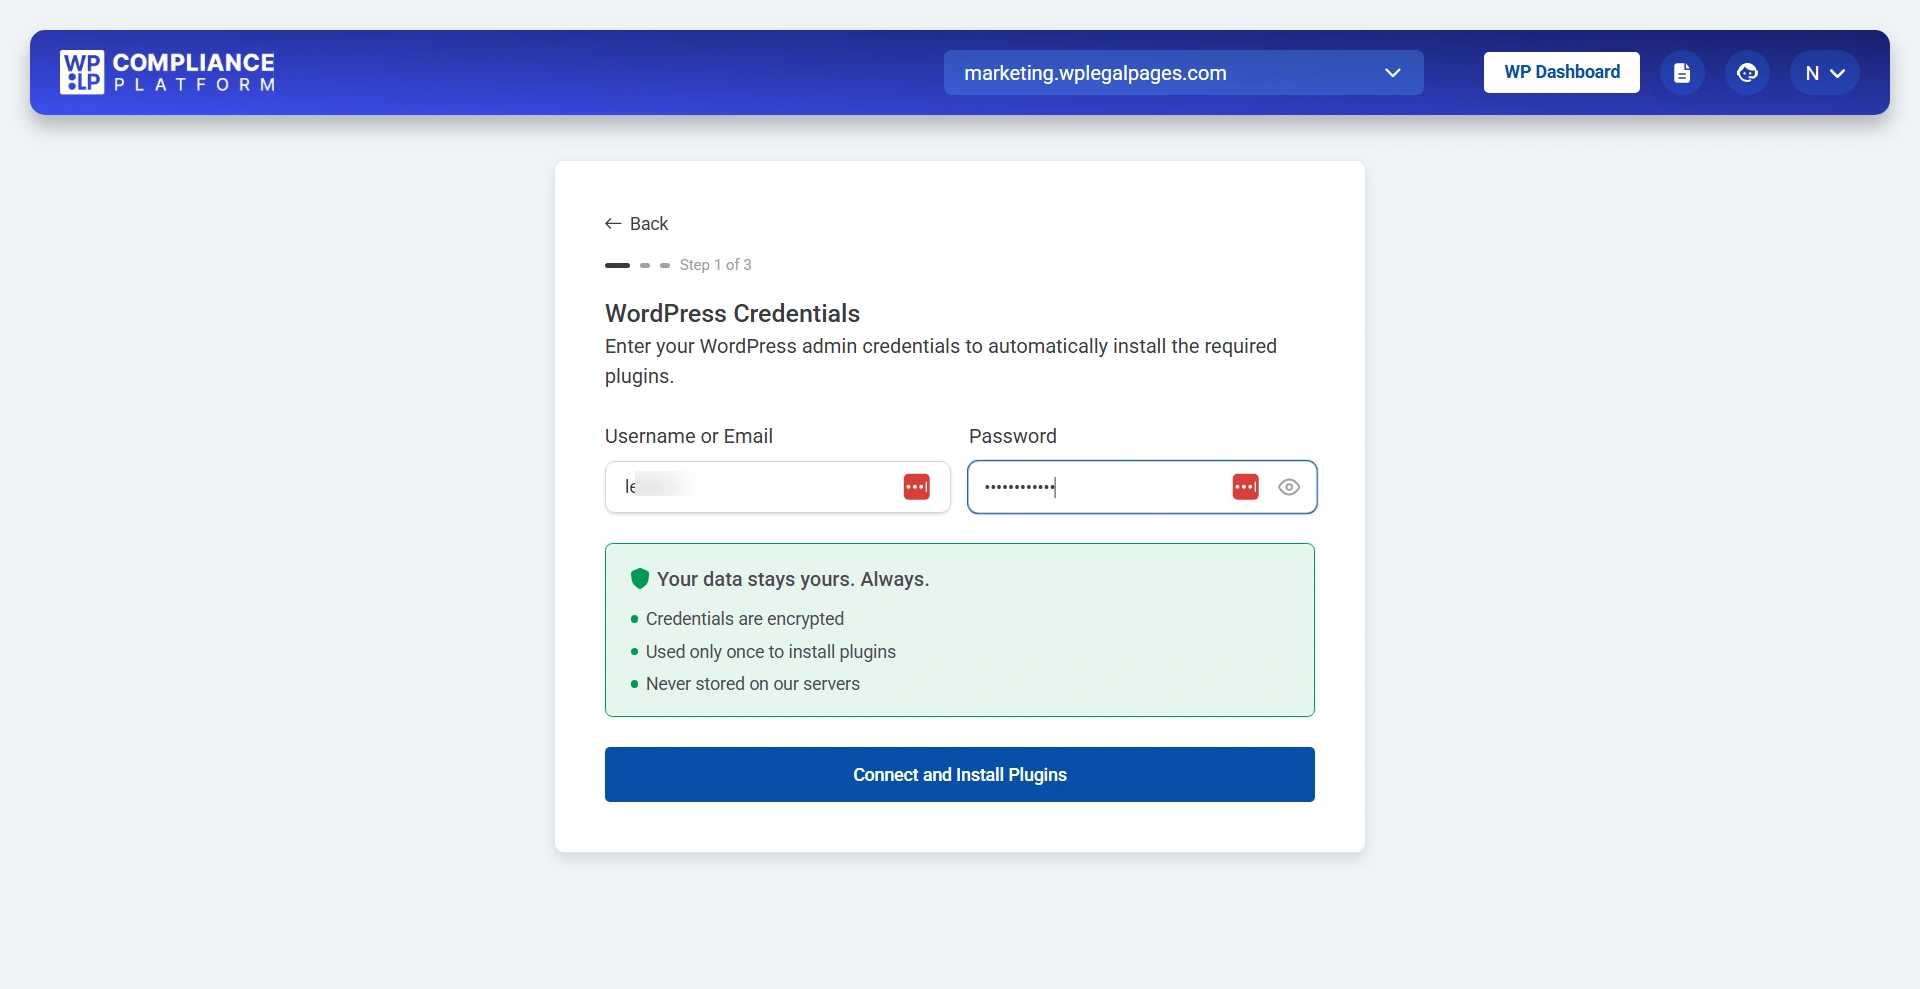
Enter:
- WordPress Username or Email
- Password
These credentials are encrypted and only used once to install and connect the plugins.
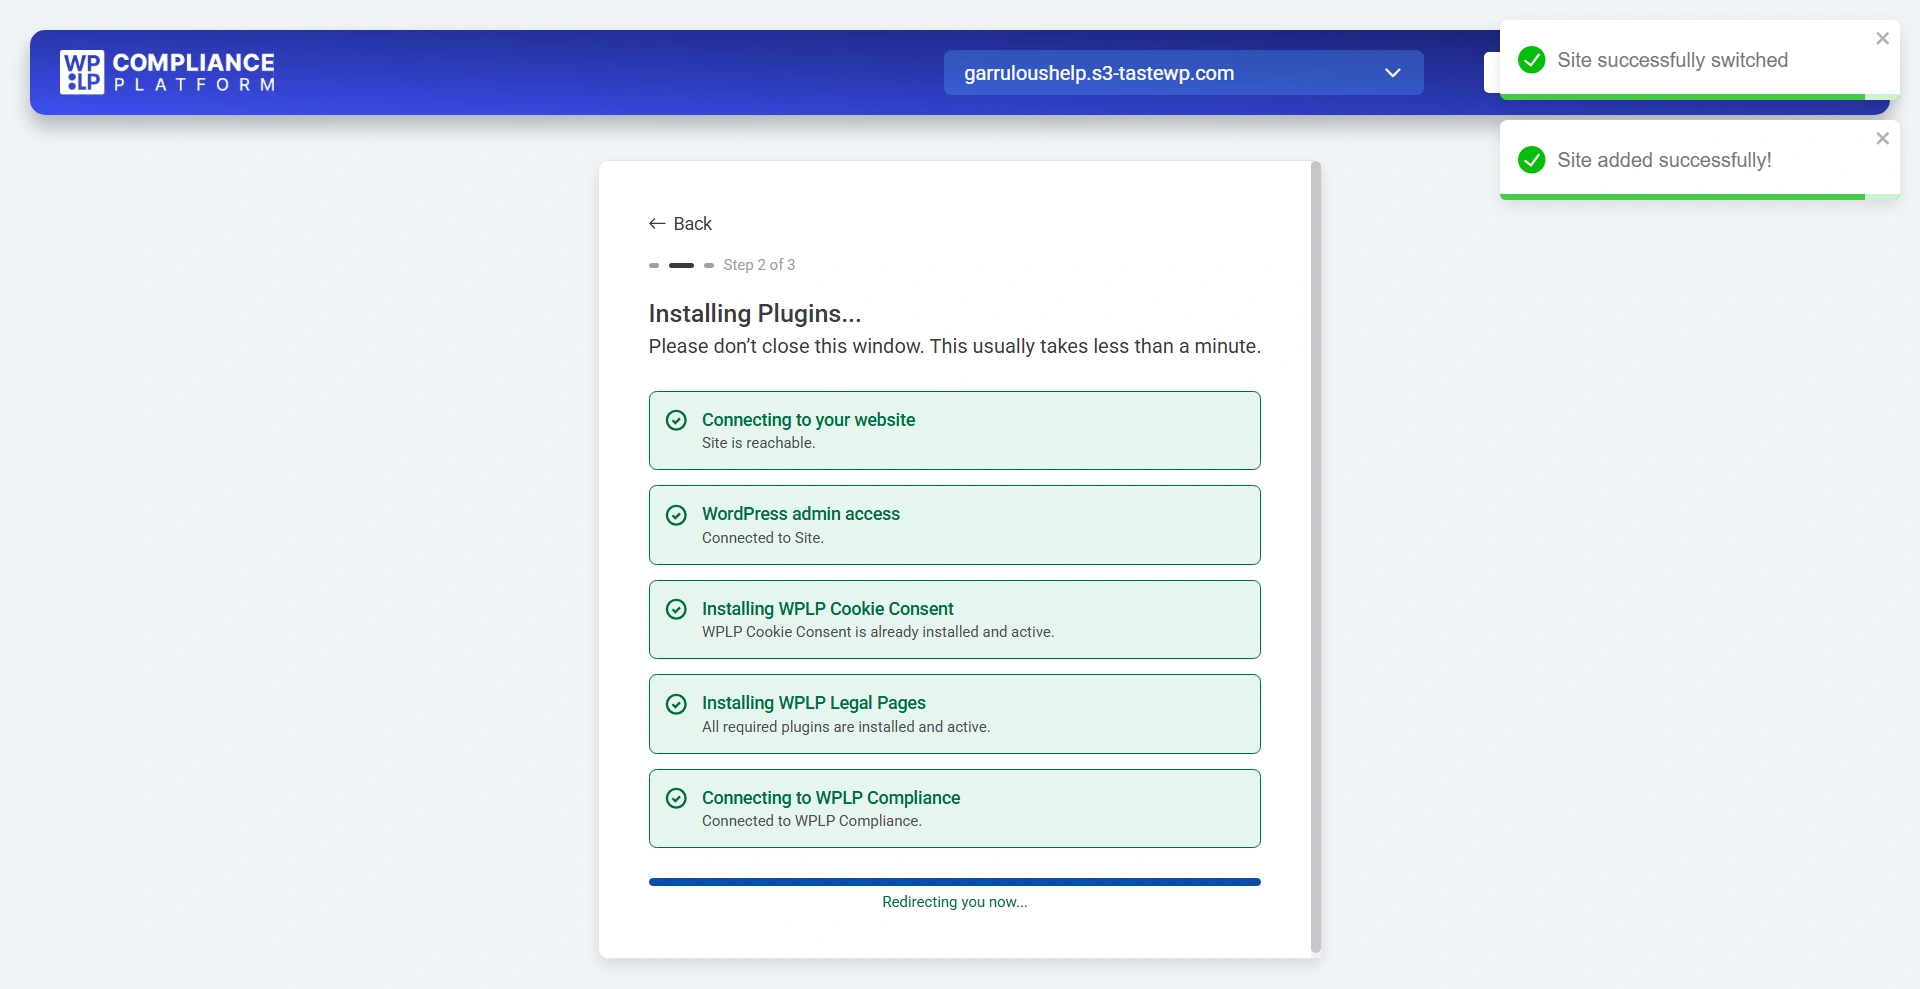
Once connected, WPLP will:
- Install the required plugins
- Activate them automatically
- Connect your website to your WPLP account
Please wait while the setup completes.
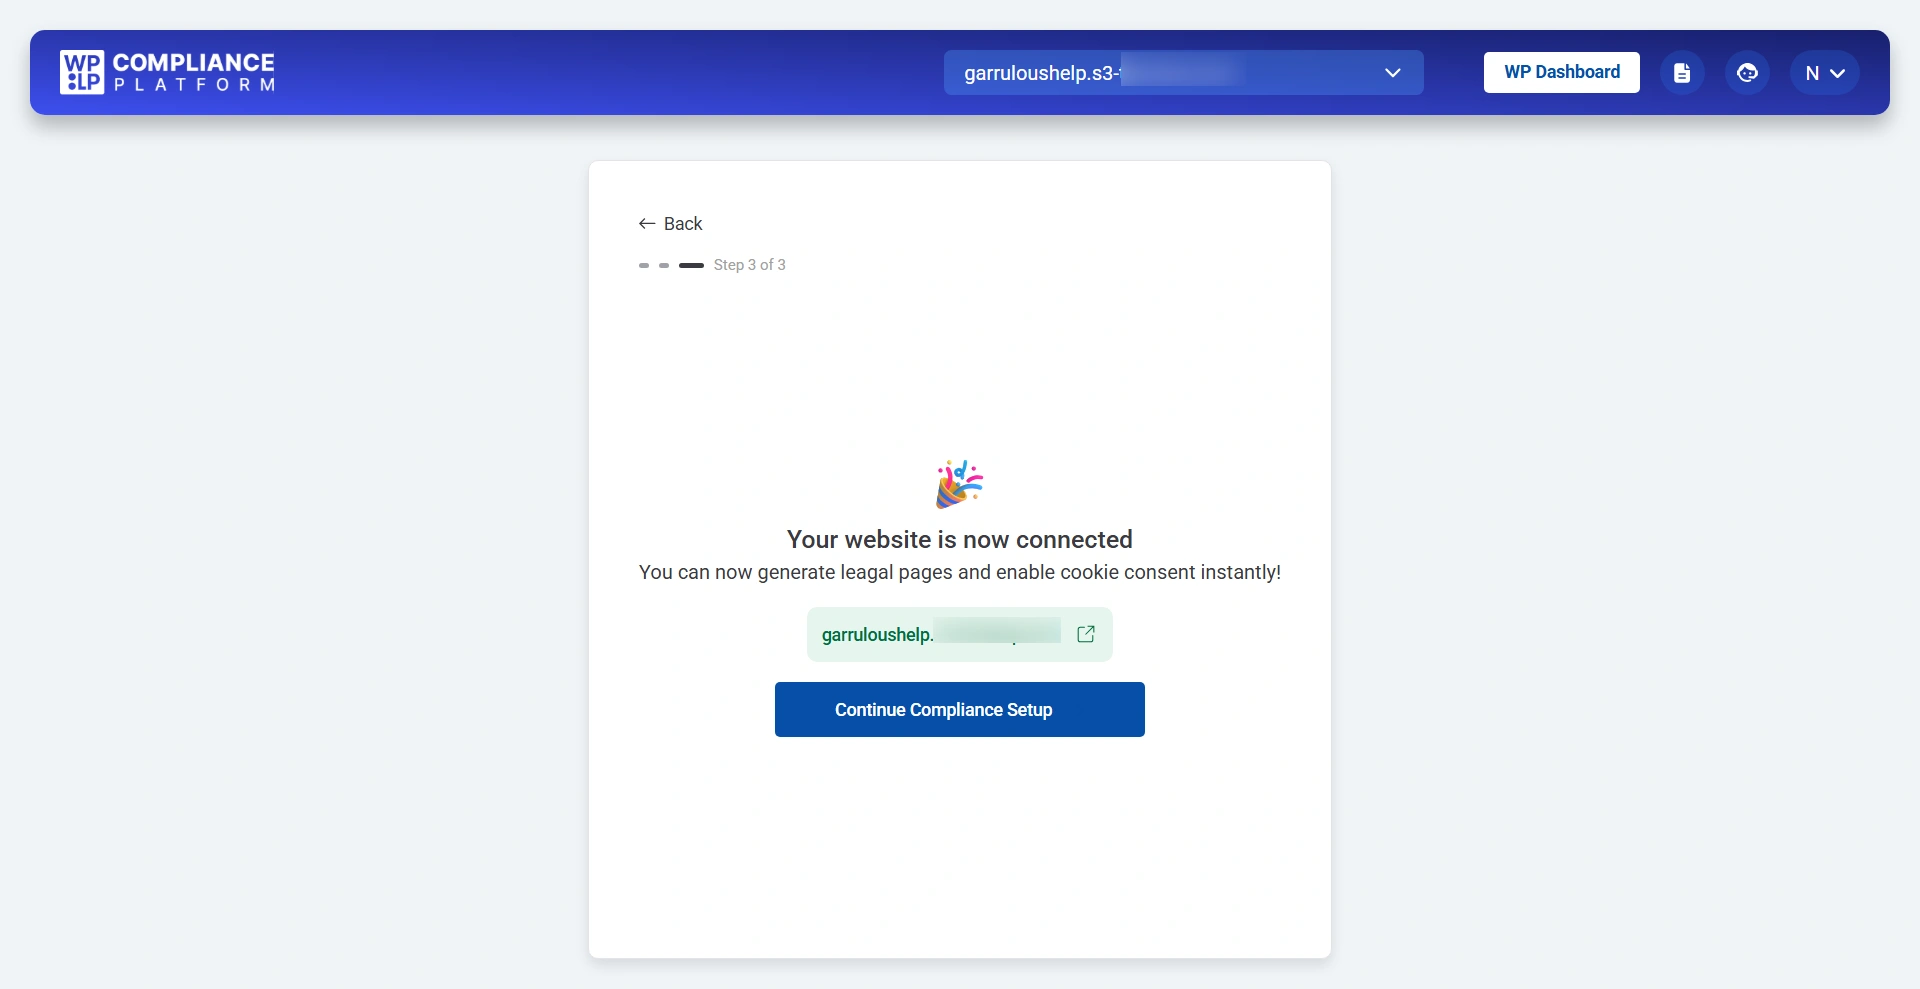
After setup is complete, click on Continue Compliance Setup.
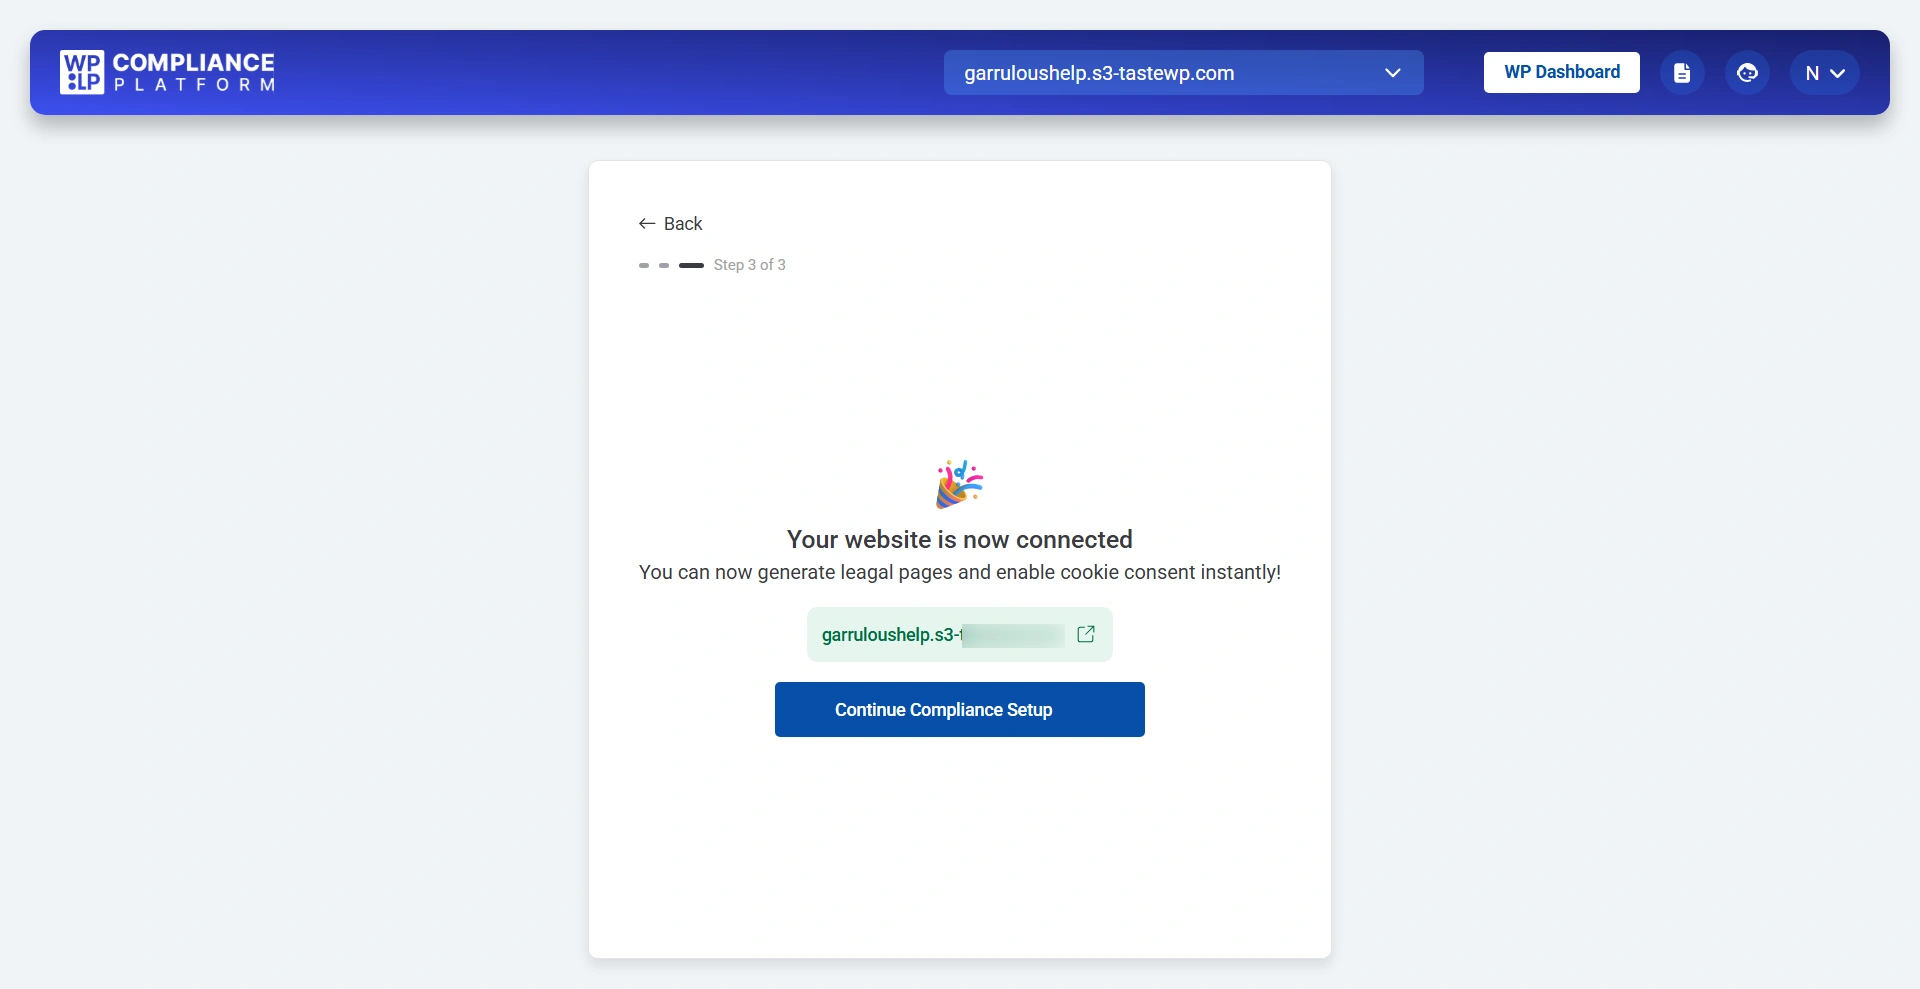
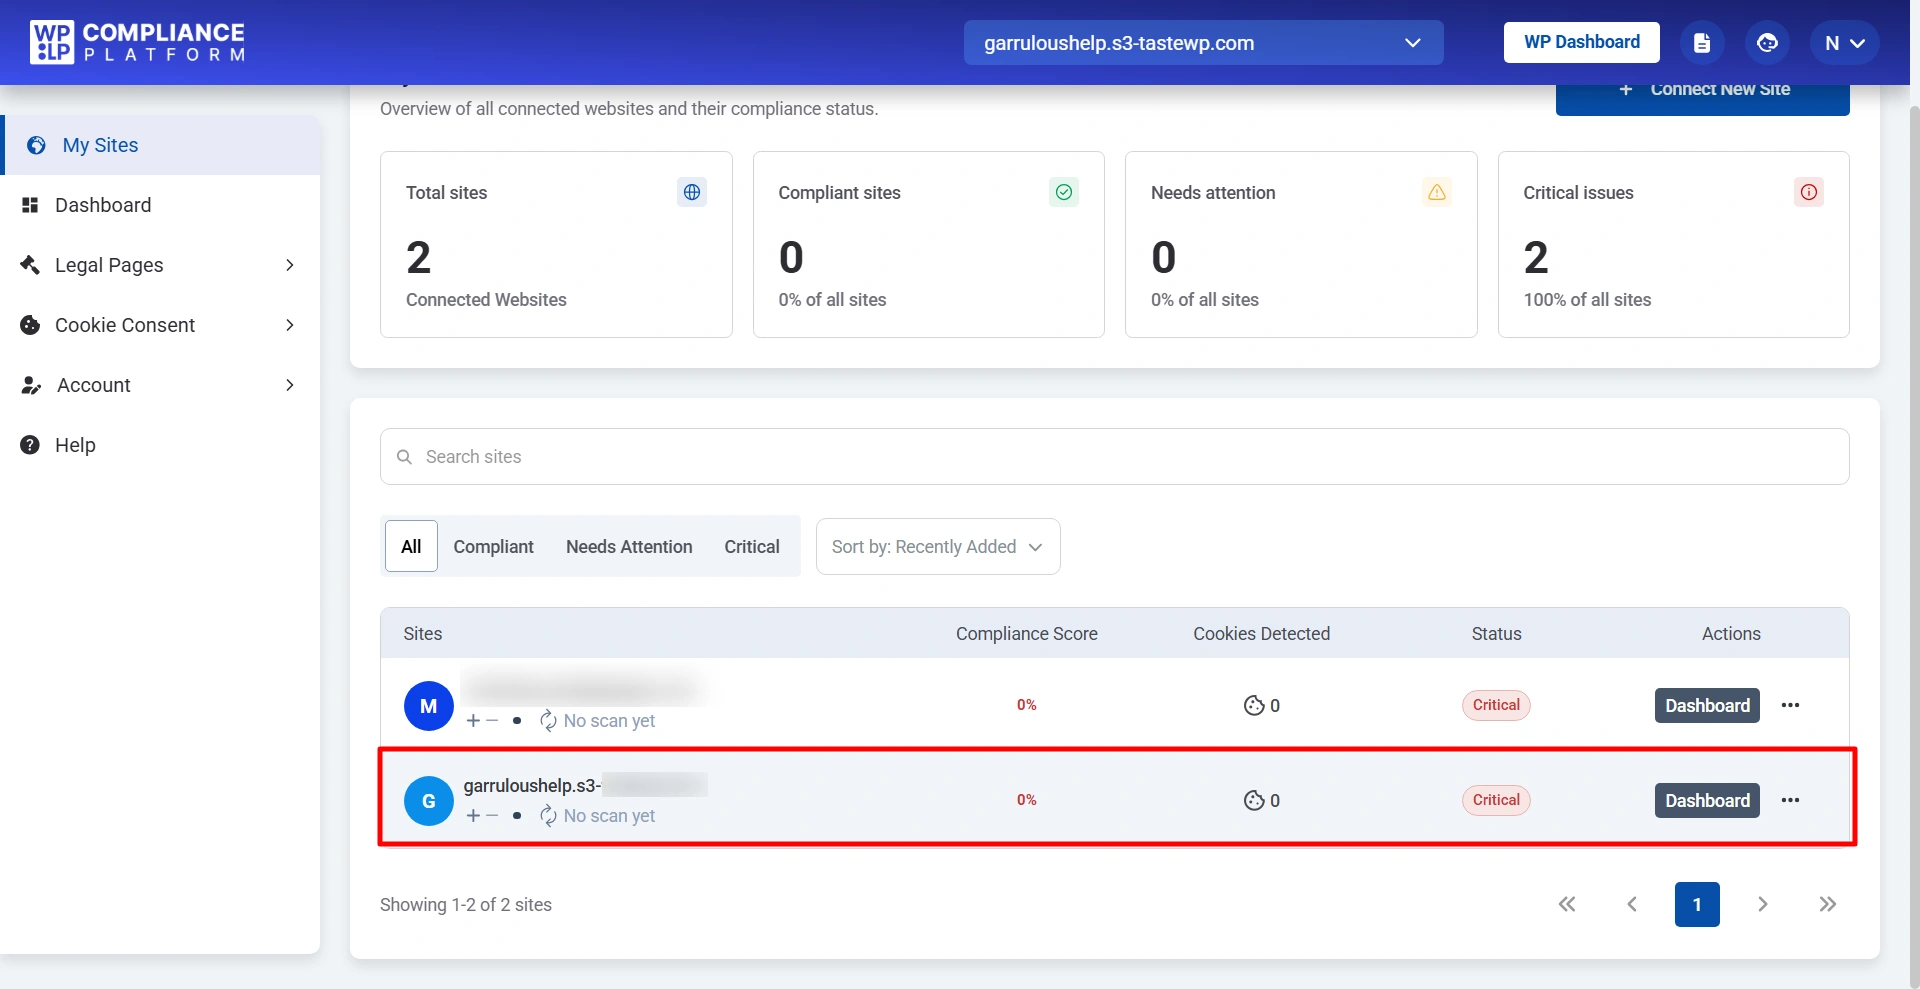
Your site will appear inside the Manage Sites dashboard.
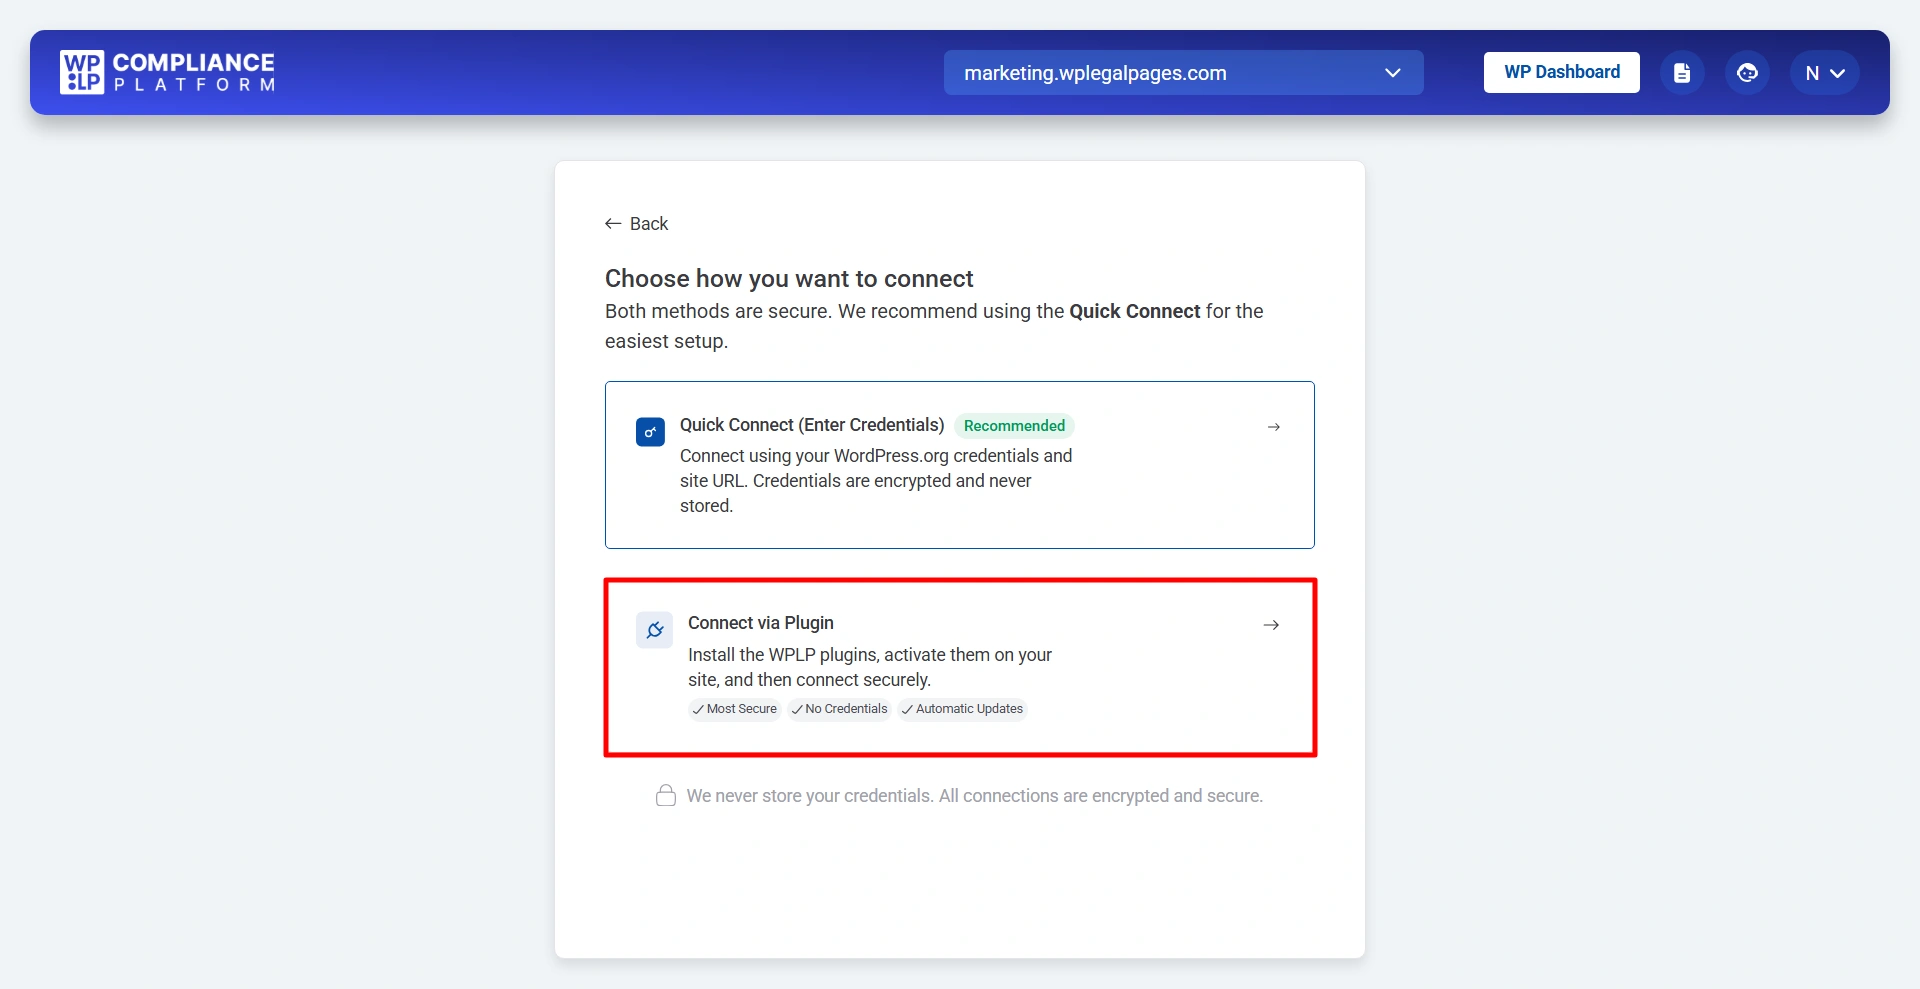
Option 2: Connect via Plugin
If you prefer manual setup, you can connect your site using the WPLP plugin. Select the Connect via Plugin option.
Click I’ve Installed the Plugin if you already have it, or click the Download Plugin ZIP button to download the plugin and upload it manually through your WordPress dashboard.
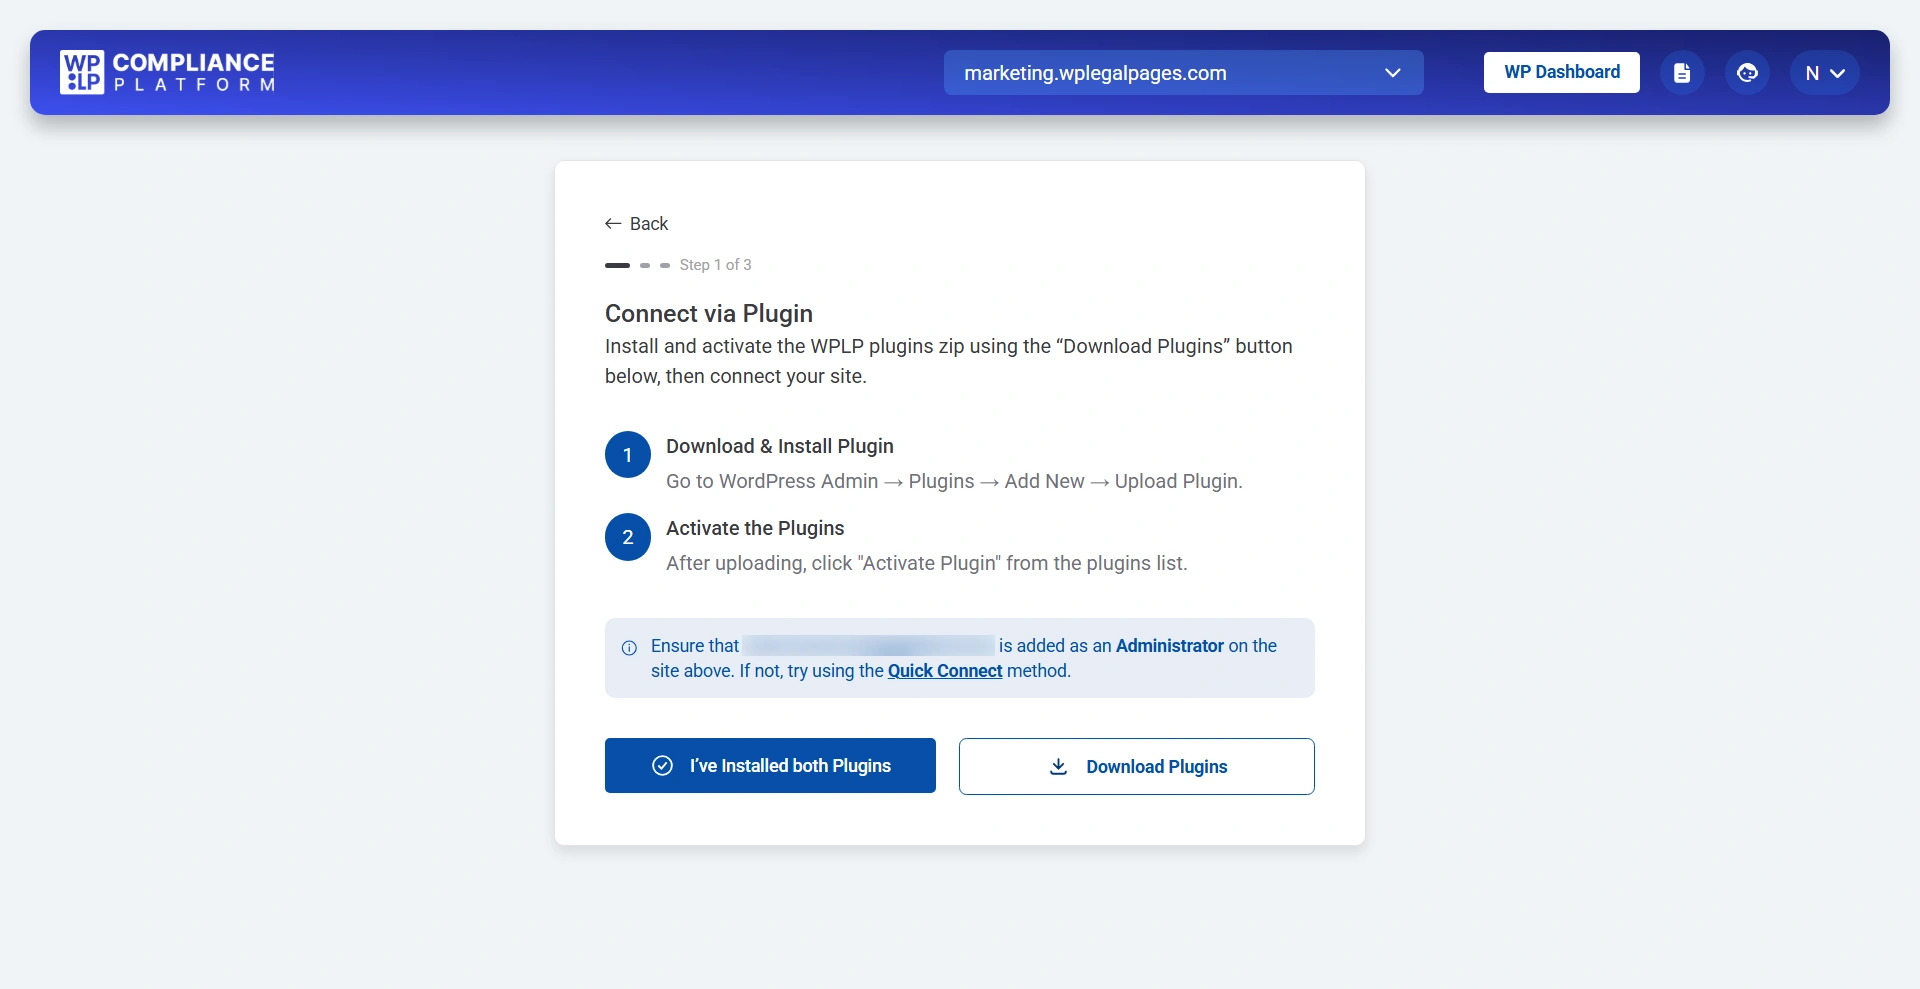
The platform will verify and connect your site automatically.
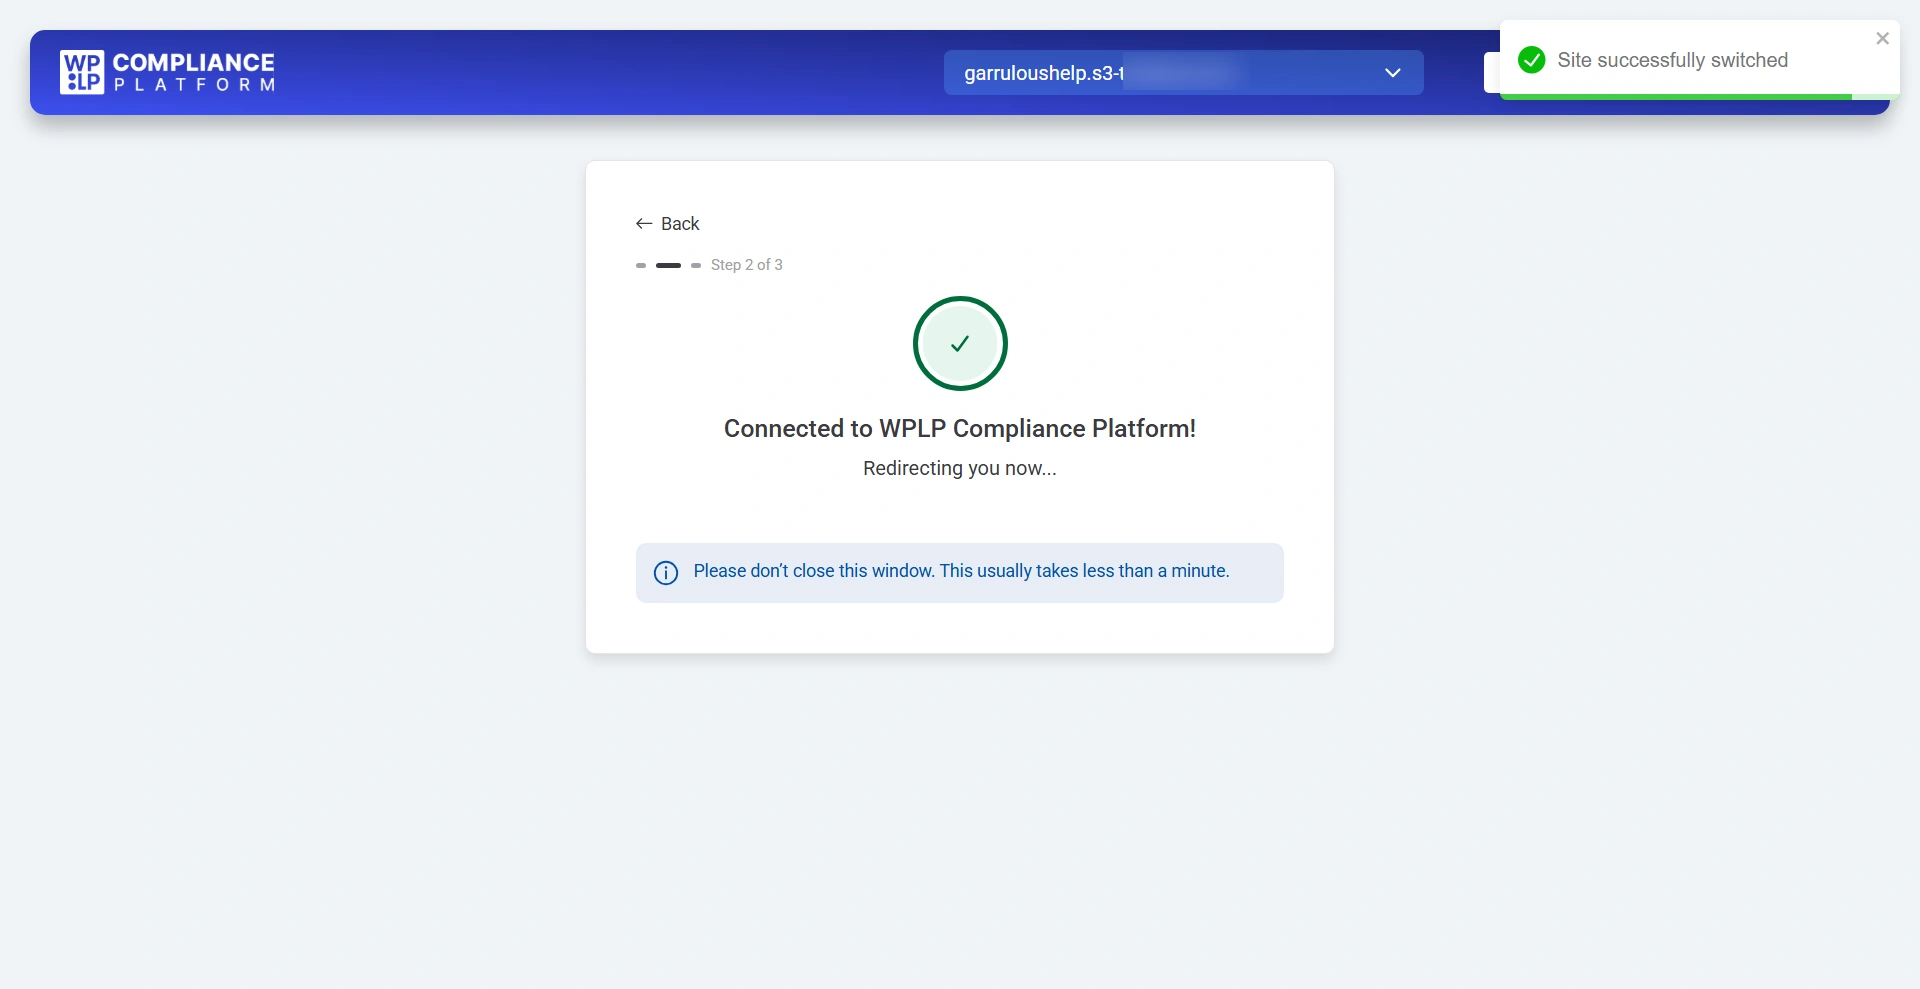
Once connected, your website will appear in the Manage Sites dashboard. You can now manage legal pages and cookie consent directly from your WPLP account.
3. Activate the PRO Plan
You can activate your WPLP Pro plan in two ways, depending on how you purchased it:
- Upgraded from inside the WordPress plugin
- Purchased directly from the WPLP website
Both methods are straightforward. Follow the steps below based on your situation.
Option 1: Upgrade to Pro from Inside the Plugin
If you started with the free version of WPLP and want to upgrade:
Step 1: Open WPLP in Your WordPress Dashboard
Log in to your WordPress admin area and open WP Legal Pages / WPLP Compliance Platform from the sidebar.
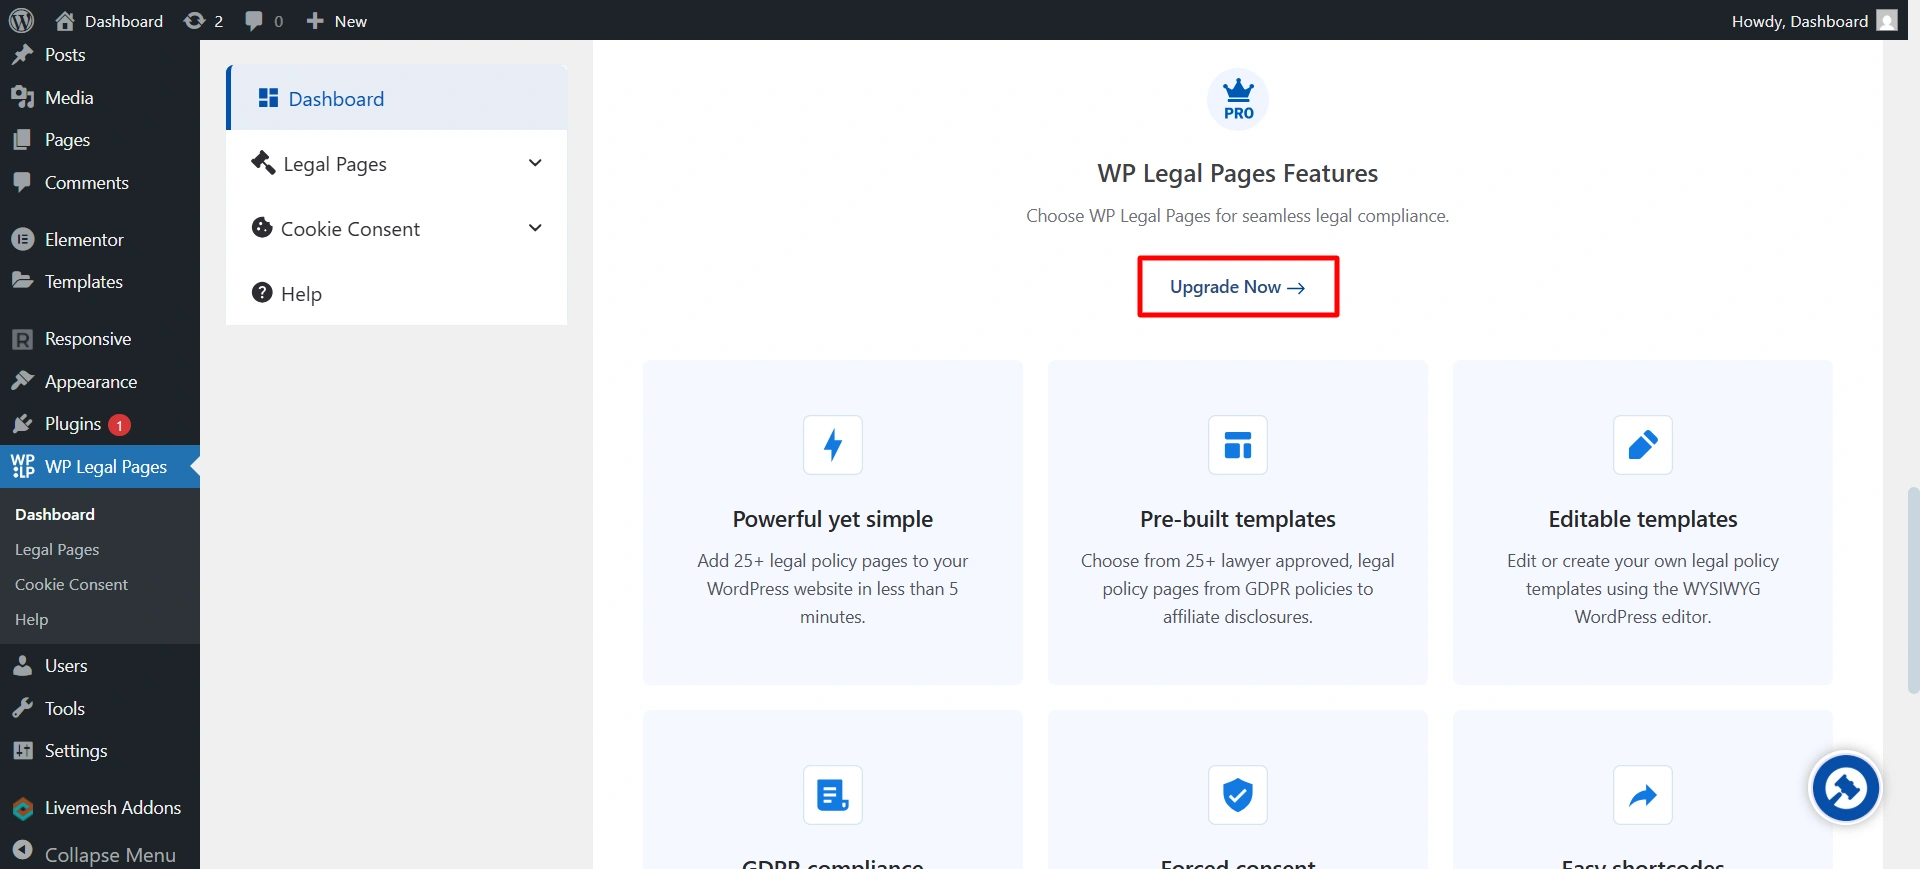
Step 2: Click “Upgrade”
You’ll see an Upgrade or Upgrade to Pro option inside the plugin dashboard.
Click it to continue.
Step 3: Choose a Plan
You’ll be redirected to the WPLP pricing page.
Select the plan that fits your needs and proceed.
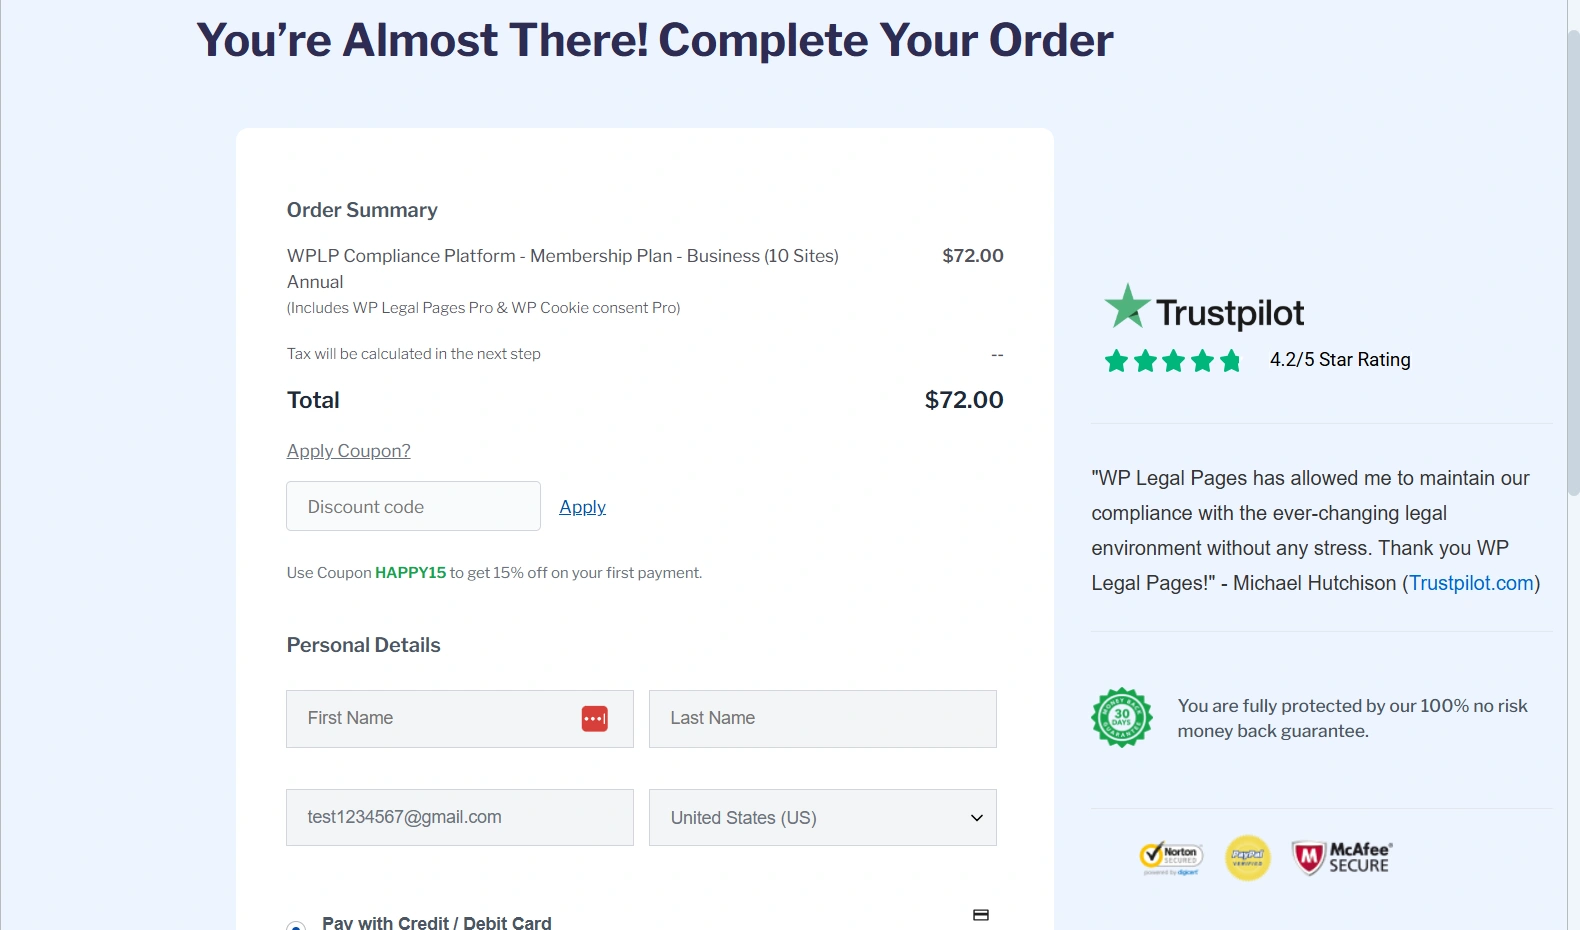
Step 4: Complete Checkout
Fill in the required details on the checkout page and complete your purchase.
Once the payment is successful, your Pro features will be activated automatically for your account.
If you face any issues during checkout, reach out to us at [email protected].
Option 2: Activate Pro After Purchasing Directly from the Website
If you already purchased a WPLP plan directly from the website (without upgrading from the plugin):
Step 1: Install Any WPLP Plugin
Go to Plugins → Add New in your WordPress dashboard and install any WPLP plugin, such as:
- WP Legal Pages
- WP Cookie Consent
Activate the plugin after installation.
Step 2: Log In to Your WPLP Account
Inside the plugin dashboard, click on the Log In button.
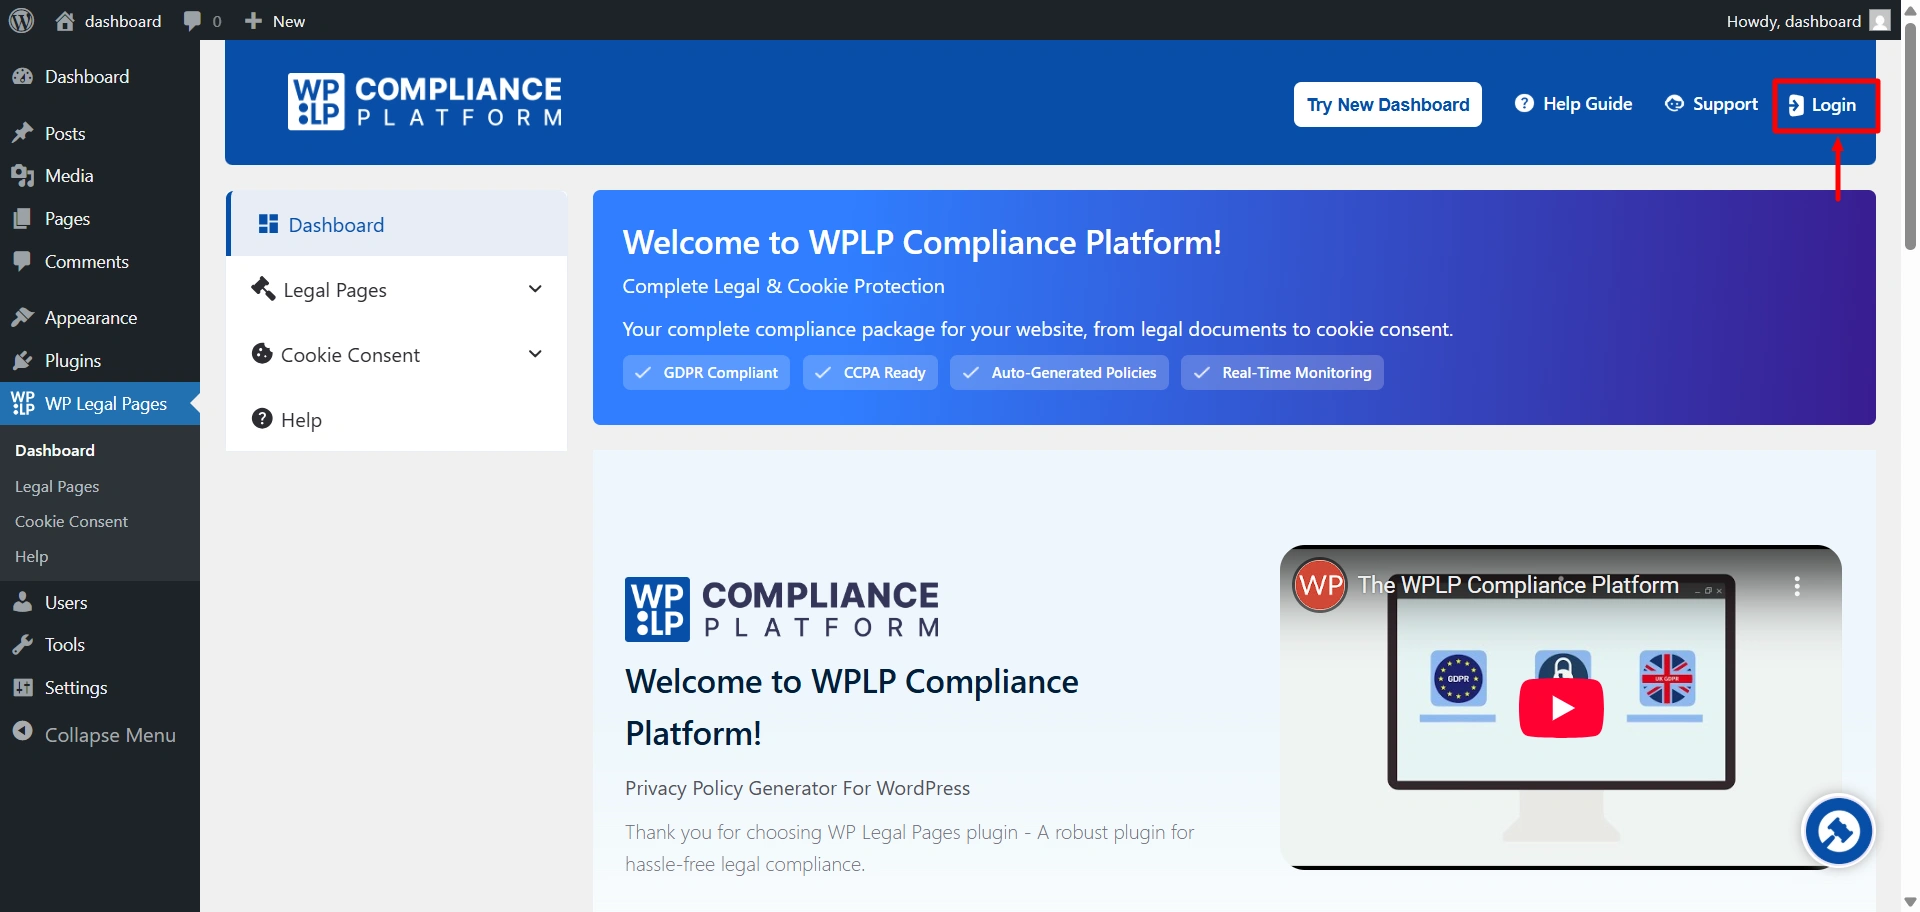
Use the same email address and password you used while purchasing the plan on the WPLP website.
Step 3: Pro Plan Activated Automatically
Once logged in, the plugin will automatically detect your active Pro plan and unlock all Pro features—no license key required.
That’s it. Your Pro plan is now active on your site.
4. Updating to the Latest Version
WPLP receives regular updates with bug fixes, new templates, and compliance rule changes.
To update it, go to the installed plugins option. And click on Enable auto-updates
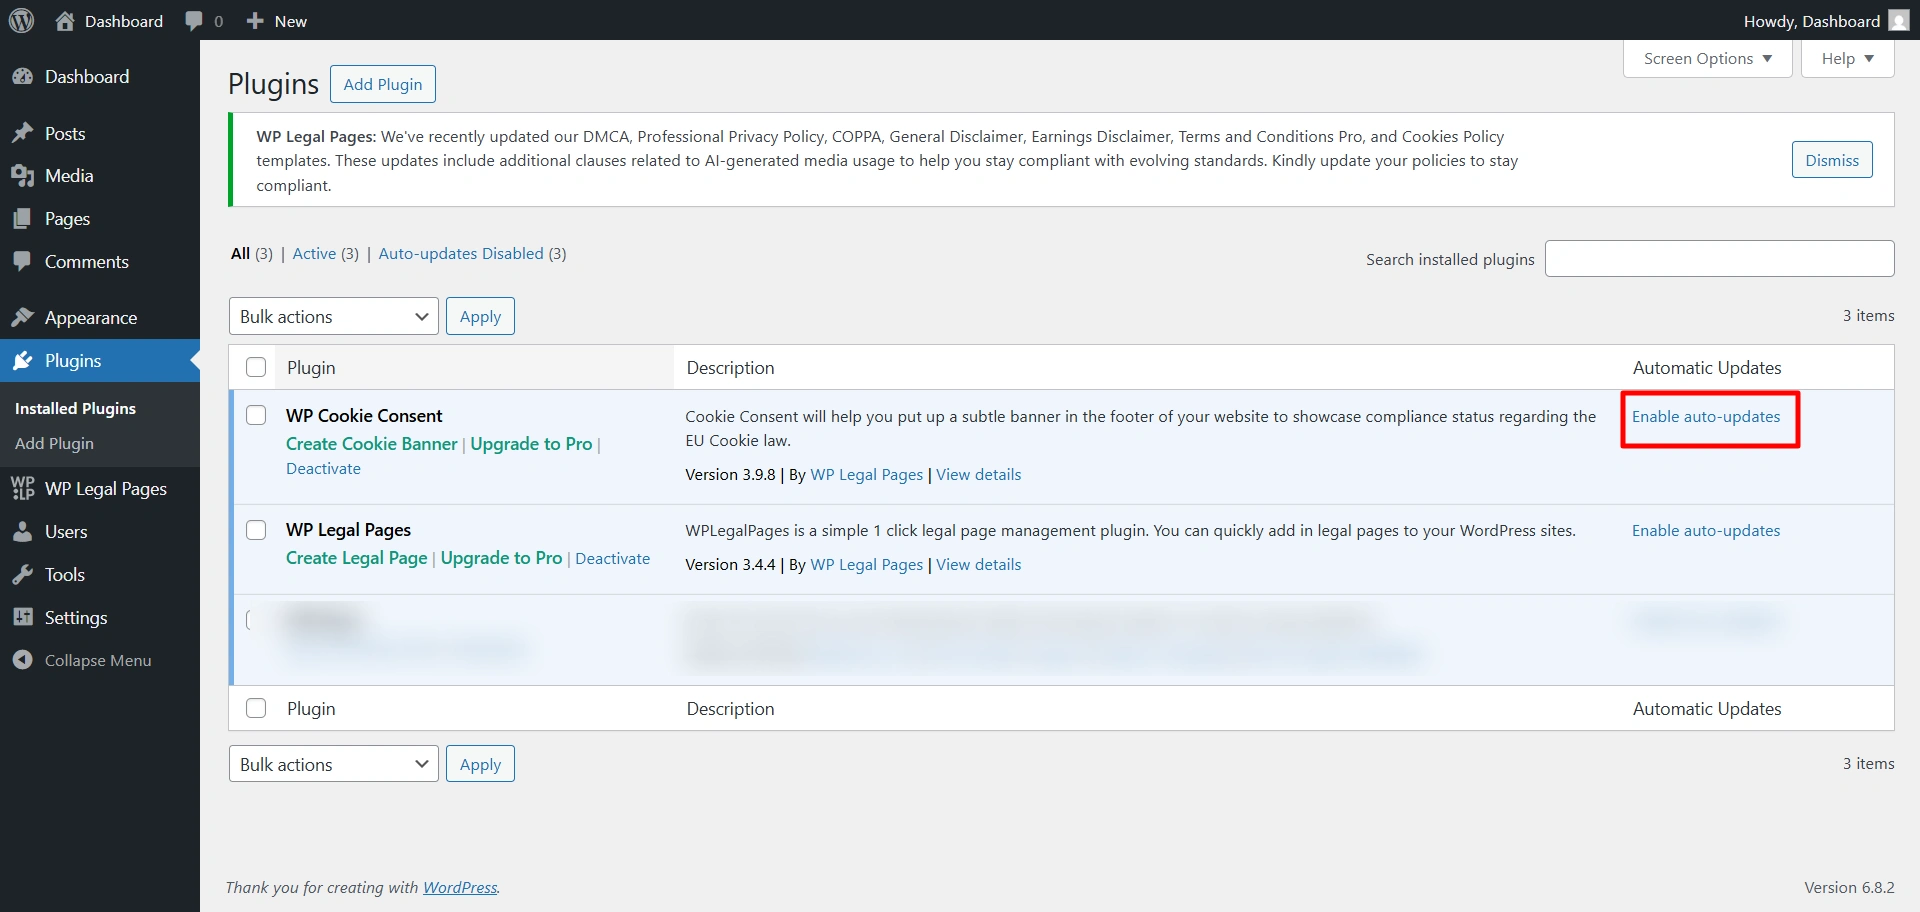
We strongly recommend enabling automatic updates for WPLP to ensure you never miss compliance changes.
5. Next Steps
Once you’ve completed the setup:
- Head to the Setup & Configuration docs for detailed banner and policy customisation.
- Review Features Walkthrough to explore advanced options like Consent Logs, Integrations, and Auto Updates.
- If you face issues, jump to Troubleshooting.


