Summary
We explain why consent is important and what elements your popup needs.
Plugins like WP Legal Pages let you create a compliant banner easily. Follow our best practices for a smooth user experience.
Adding a cookie popup shouldn’t take hours or require coding. In this guide, you’ll learn how to add a fully compliant cookie popup to WordPress in just a few minutes, even if you’re a complete beginner.
What is a Cookie Popup?
A cookie consent popup is a notification on a website that appears as a banner or popup to inform users about using cookies and asks for the user’s consent before deploying cookies.
The website’s cookie policy usually explains what cookies are, their purpose, and the types of cookies they use.
This is essential for informing users about privacy and providing them with control over their data.
Before exploring how to create a beautiful and compliant cookie popup, it’s important to understand what cookies are and how they function.
Why Do You Need a GDPR Cookie Consent Popup?
Listed below are the primary reasons for implementing a cookie consent popup on your website:
- Ensuring User Privacy: A cookie consent banner serves as the first line of defense in safeguarding user privacy. By displaying a notice and requesting consent before collecting data, websites respect users’ choices and preferences.
- Legal Requirements and Consequences: Non-compliance with privacy regulations can have severe consequences. Websites can face hefty fines and damage to their reputation. For instance, British Airways and Marriott International faced significant penalties due to breaches of GDPR regulations. Implementing a cookie consent popup is a proactive step in avoiding such penalties.
It’s important to note that data protection laws are enforced globally, and violating these laws can result in fines like:
Key fine levels by regulation:
| Regulation | Maximum fine |
|---|---|
| GDPR | €20M or 4% of global annual revenue |
| CCPA | $7,500 per user per violation |
| LGPD | 4% of annual turnover or 50M reais |
| PIPEDA | Up to $100,000 per violation |
| Thailand PDPA | Up to 5M Baht + possible imprisonment |
- GDPR: Under GDPR, companies can be fined up to 4% of their annual global revenue or €20 million, whichever is greater.
- CCPA: Under CCPA, companies can be fined up to $7,500 per user per violation. For instance, if 100 users are affected by the same offense, the fine is $7,500,000.
- LGPD: Under LGPD, companies can be fined up to 4% of their annual turnover or 50 million reais, whichever is higher.
- PIPEDA: The Personal Information Protection and Electronic Documents Act (PIPEDA) imposes a penalty of up to $100,000 per violation.
- Thailand PDPA: Thailand’s Personal Data Protection Act (PDPA) imposes fines of up to 5 million Baht and, in some cases, up to one year of imprisonment. Learn more about the PDPA, including key differences between it and the GDPR.
Cookie consent popup is an important tool in ensuring transparency and trust between website owners and users, and it helps users make informed decisions about their data privacy.
Introducing WPLP Compliance Platform
To simplify the process of adding a cookie consent popup to your WordPress website, we recommend the WPLP Compliance Platform plugin. It’s a user-friendly, powerful solution that offers several key features:
- Customizable Banner Design: Easily create a cookie consent banner that matches your website’s aesthetic and branding.
- GDPR and CCPA Compliance: WPLP Compliance Platform ensures that your website complies with privacy regulations, including GDPR and CCPA, by providing the necessary options and features.
- Cookie Categorization and Management: Using this plugin, you can categorize cookies, allowing users to choose which types of cookies they accept. This promotes transparency and user control.
- Geo-Targeting Options: Cookie consent lets you tailor your cookie consent banner to specific regions, providing a personalized experience for your visitors.
- Cookie Scanning and Consent Log: Scan your website for cookies and maintain a consent log, simplifying compliance maintenance.
- Suitable for All Users: Whether you’re a beginner or an experienced WordPress user, WPLP Compliance Platform is a versatile solution that caters to all levels of expertise.
Check out this compliance platform comparison page for a detailed guide on various cookie consent plugins.
Why use WPLP over other plugins?
Here’s a quick look at how it compares to the most popular alternatives:
WPLP Compliance Platform
- Free tier available
- Visual wizard setup
- Cookie scanner included
- Geo-targeting on paid
- Consent log built-in
Complianz
- Excellent scan engine
- Multi-law support
- Steeper learning curve
- Free + premium tiers
CookieYes
- Clean UI
- Auto-blocking scripts
- Good for non-technical users
- Free plan has limits
GDPR Cookie Compliance
- Lightweight plugin
- Simple consent bar
- Fewer advanced features
- Good for minimal sites
Step-by-Step Guide To Add Cookie Popup for WordPress
Now, let’s walk through the process of adding a cookie popup to your WordPress website using WPLPCompliance follow these steps:
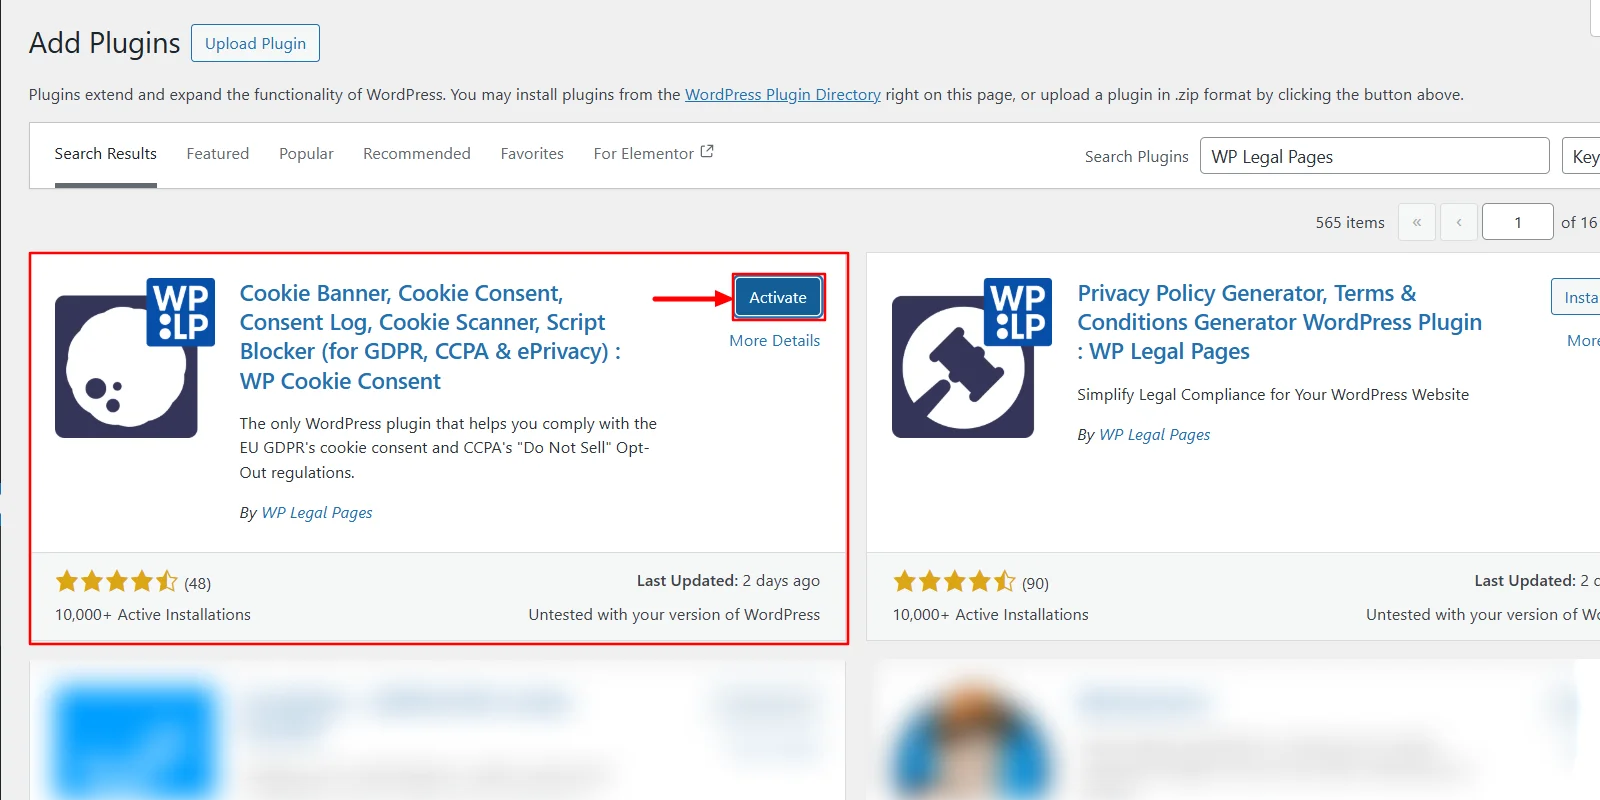
Step 1: Installing the Cookie Consent Plugin.
Navigate to your WordPress Dashboard and click on Plugins > Add New.

Search for WPLP in the search bar. Click on the Install Now Button. Activate the plugin.
Step 2: Configuring Cookie Consent Plugin
Once you have activated the plugin, you can access it directly from the Dashboard.
From the plugins dashboard, click on continue and finish setting up the plugin basic questions.
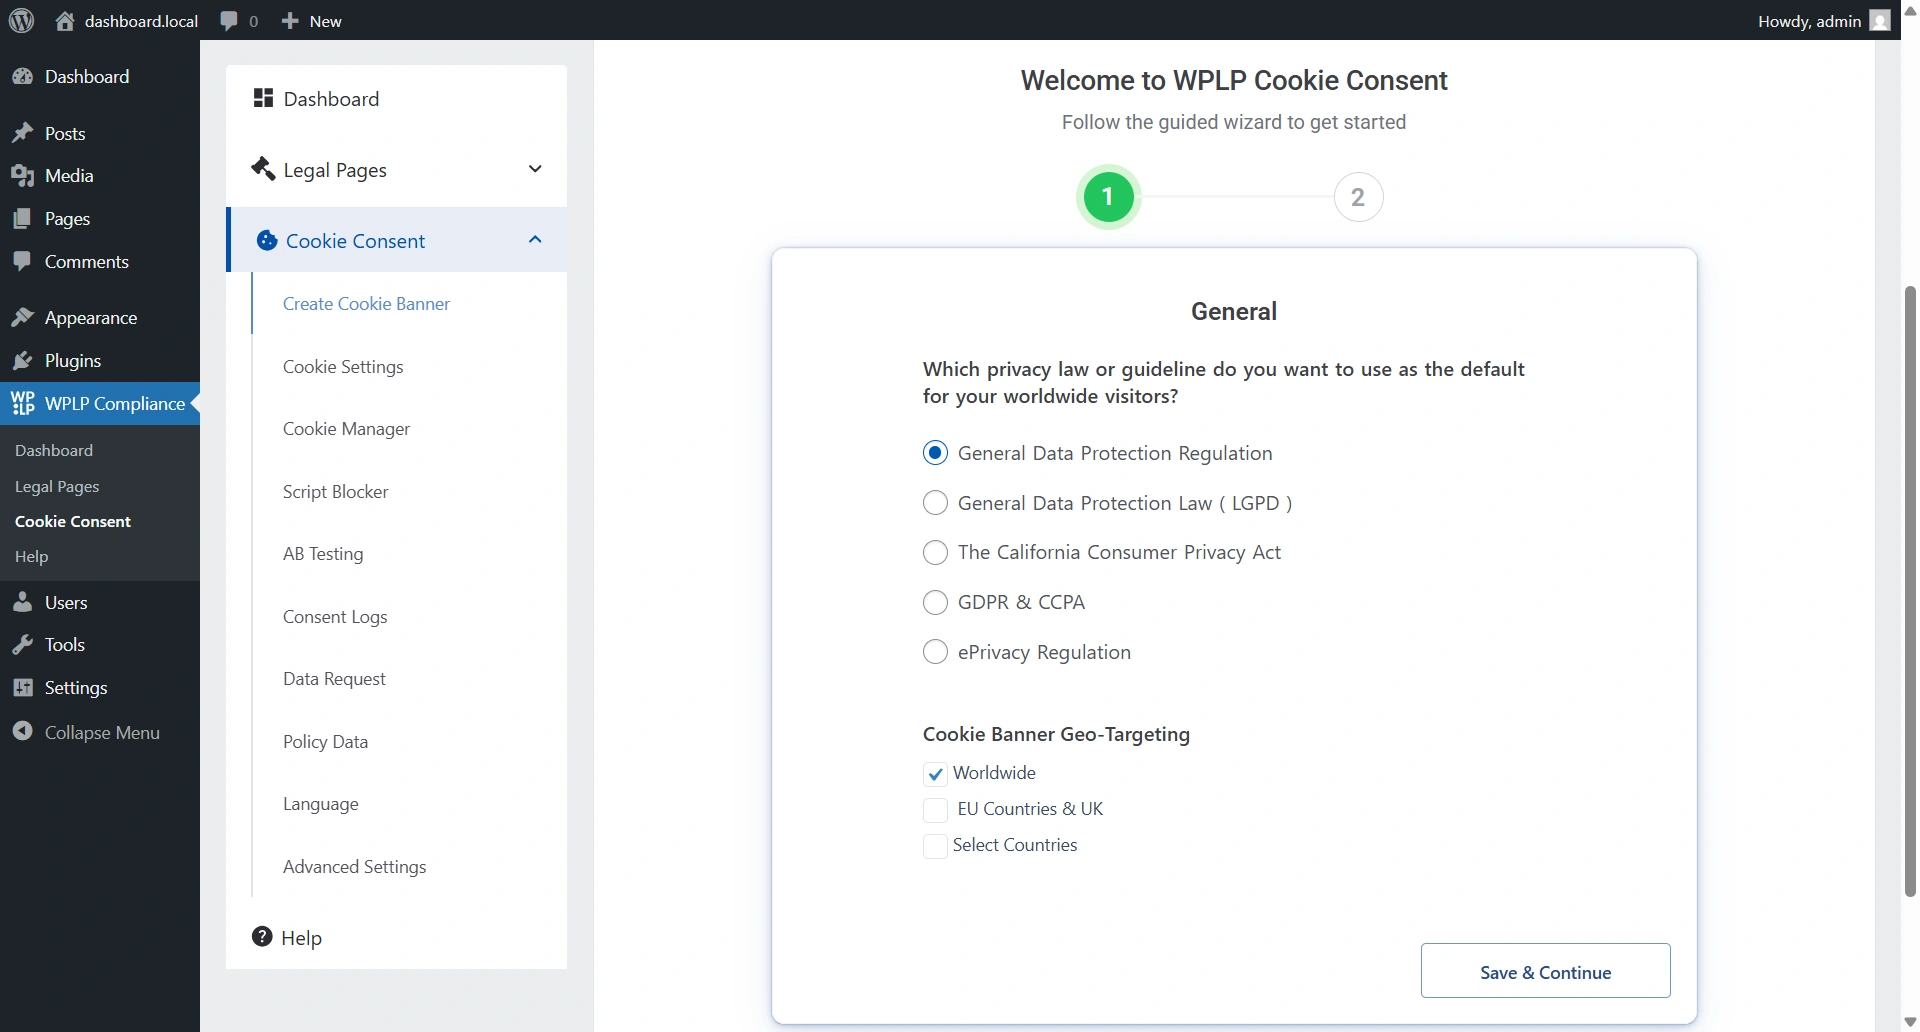
To access advanced features like Cookie Scanner, Advanced Dashboard, and Geo-Targeting, upgrade to the PRO plan.
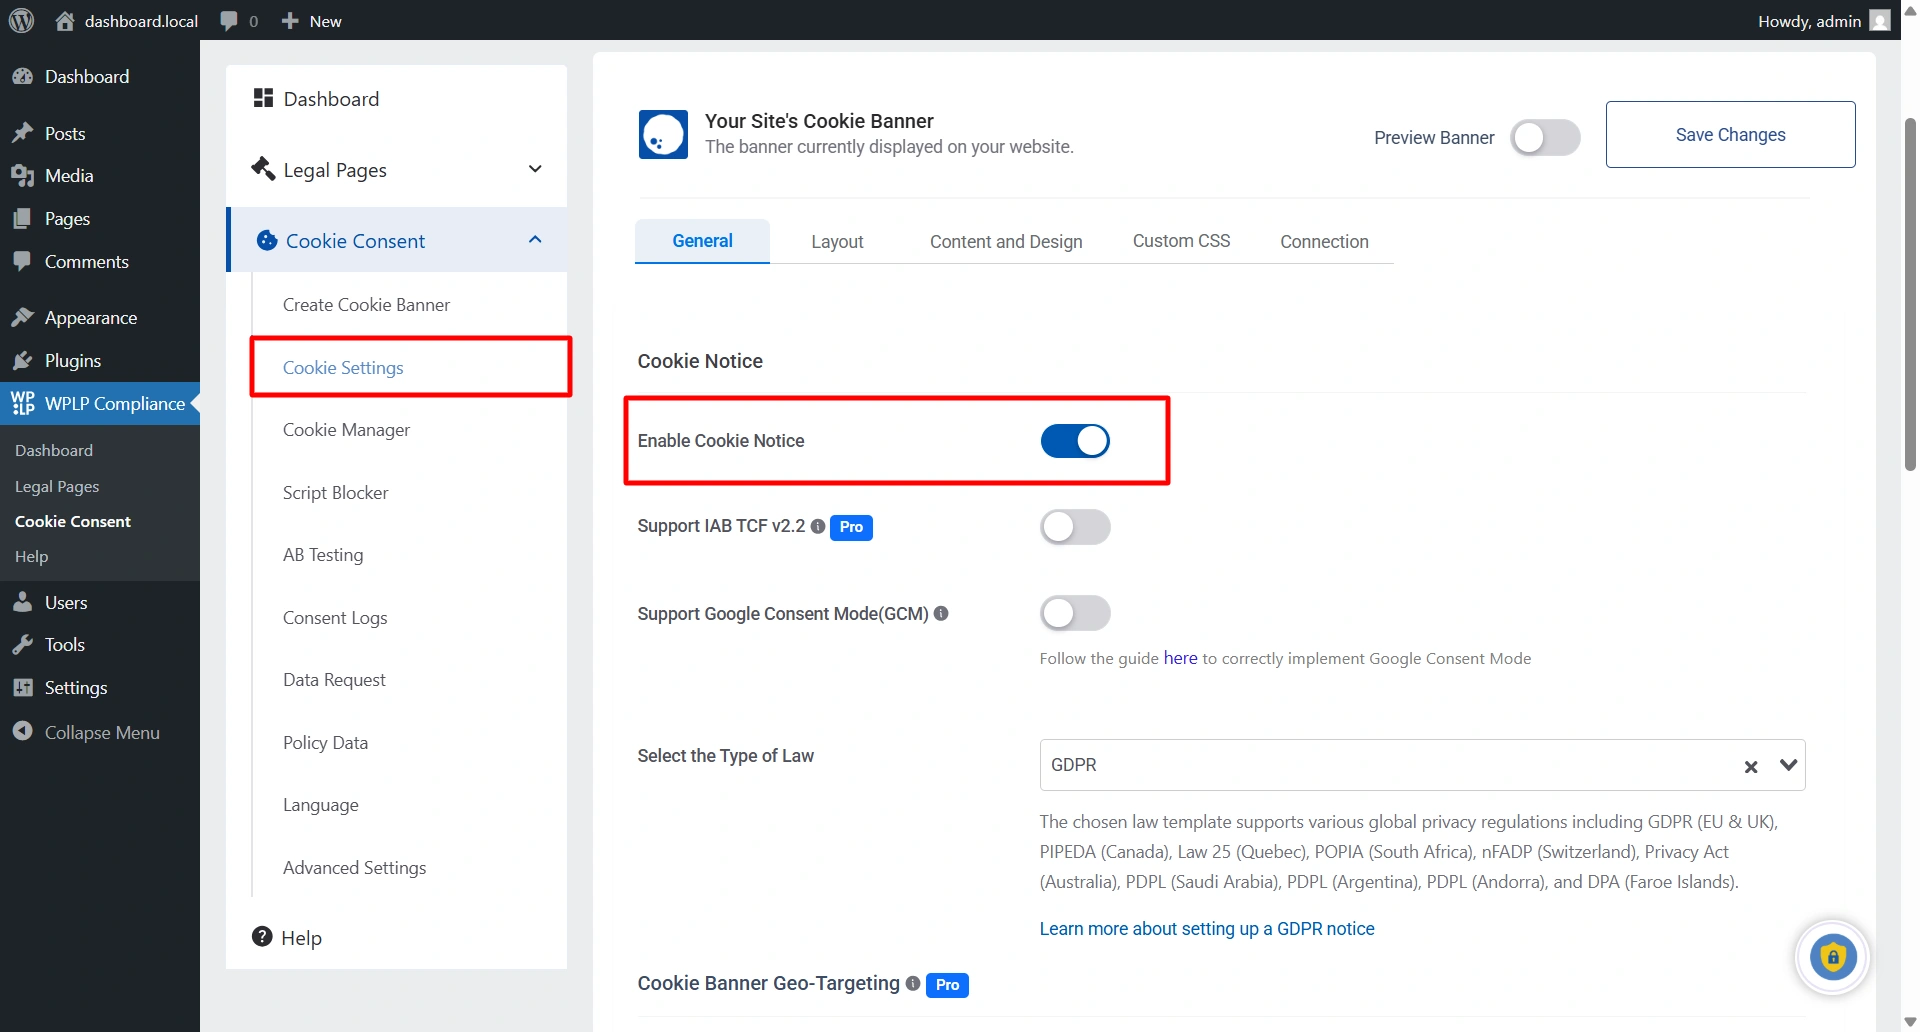
Step 3: Setting Up Wizard
In this step, we will get started with the Cookie Consent Wizard.
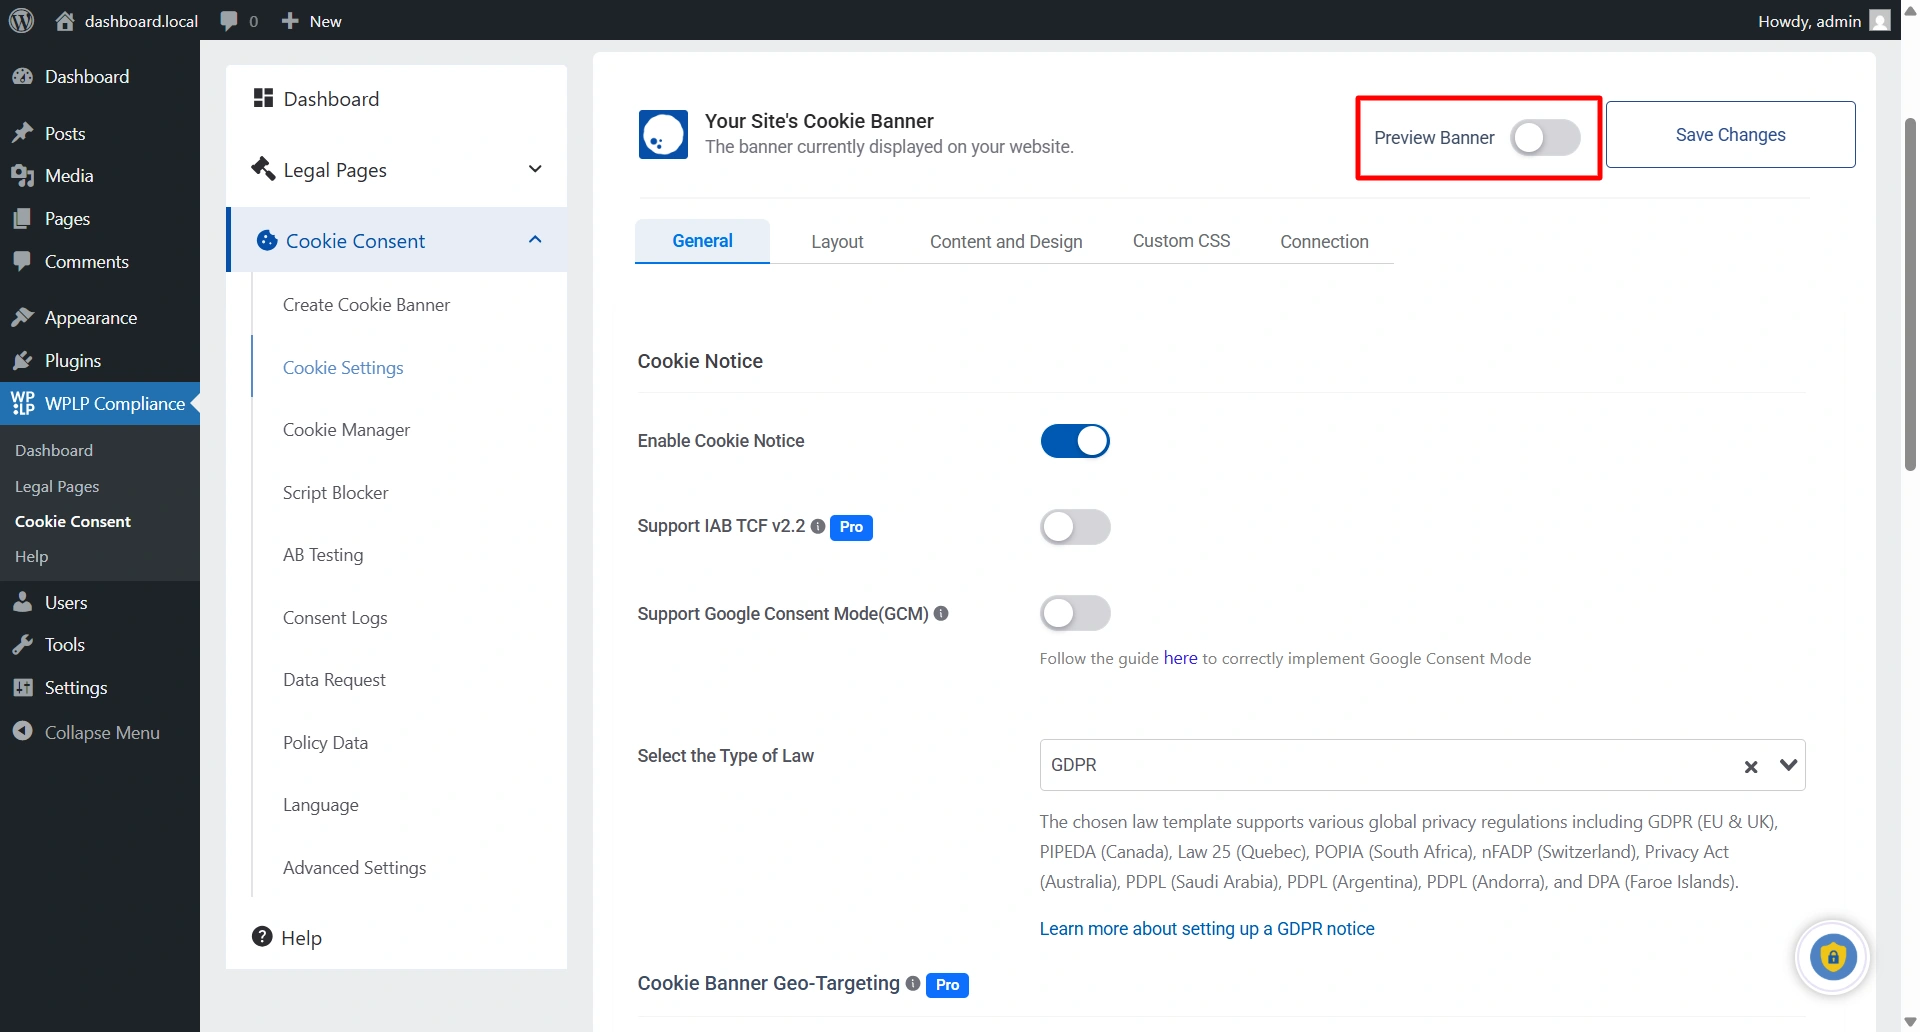
To access the Wizard, go to the WordPress dashboard, navigate to the Cookie Setting > General Tab, and enable the cookie notice.
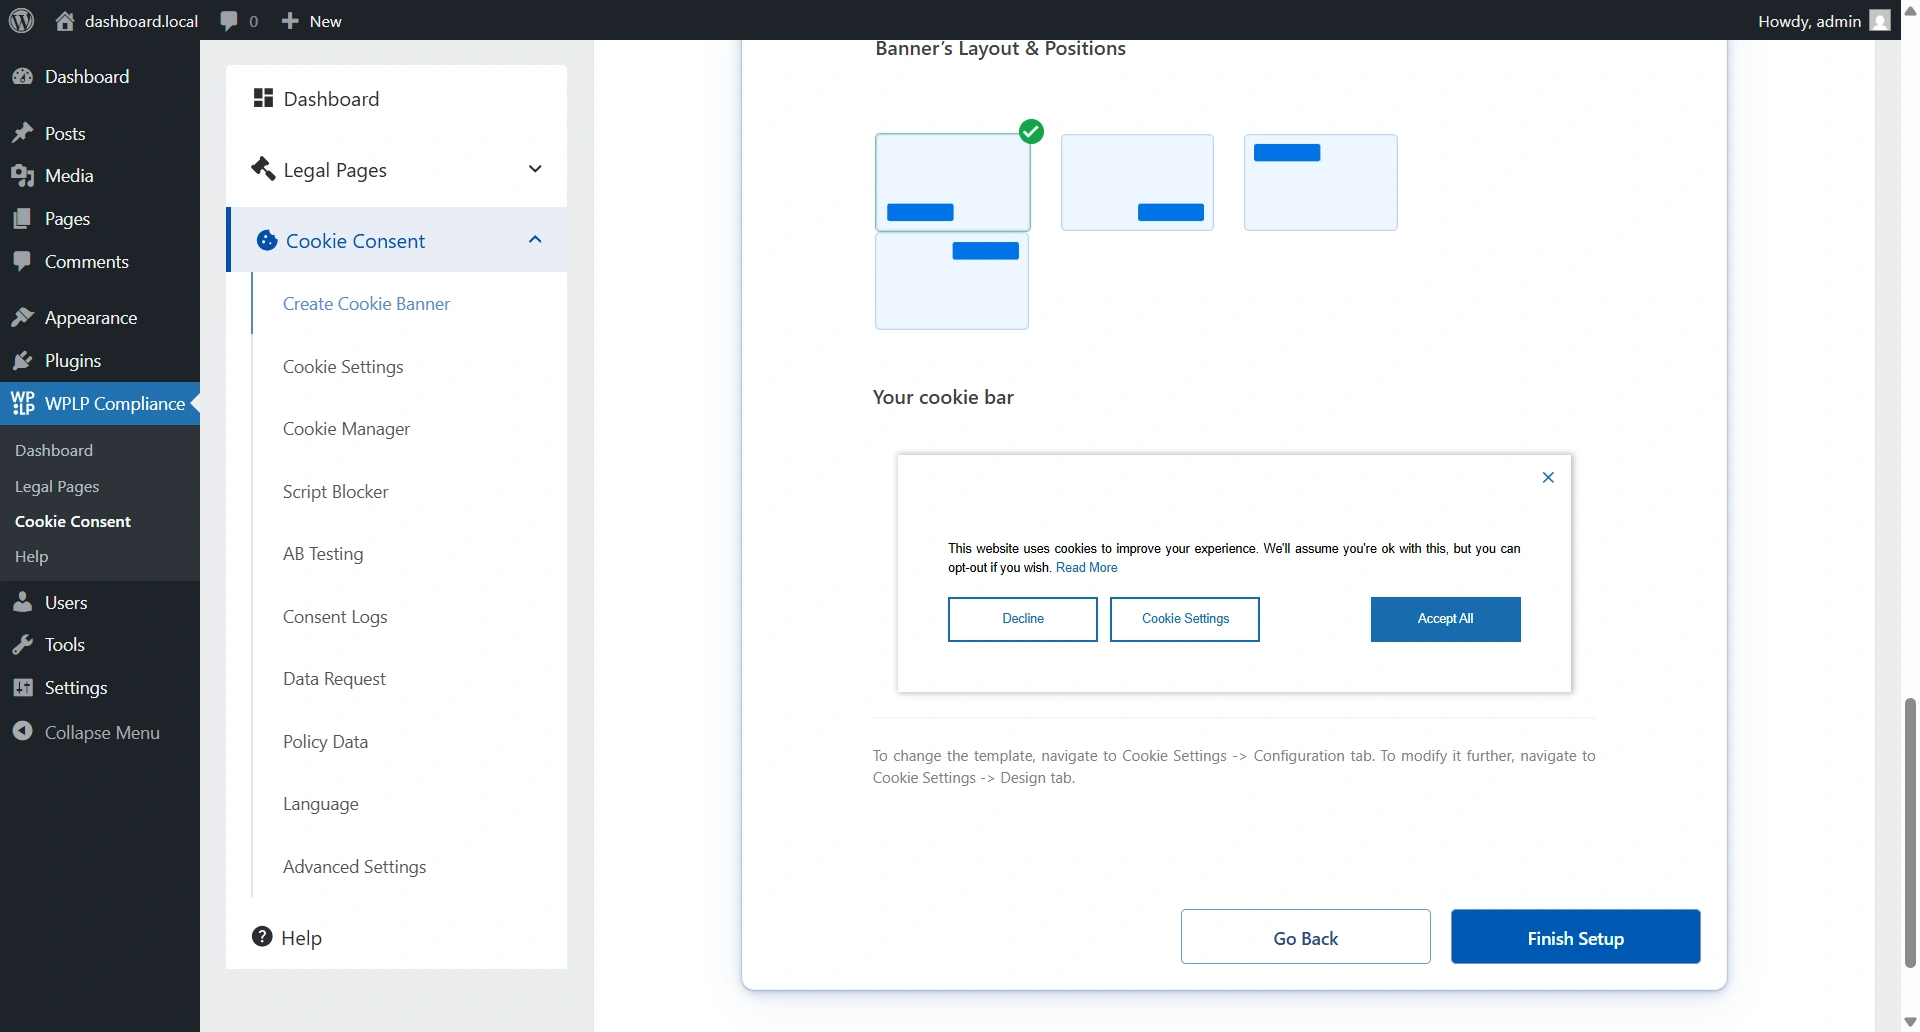
Now, click on the Preview Banner button to see the banner on the website.
Navigate to the Configuration Tab, look for the Show cookie notice, and select Pop Up from the dropdown menu.
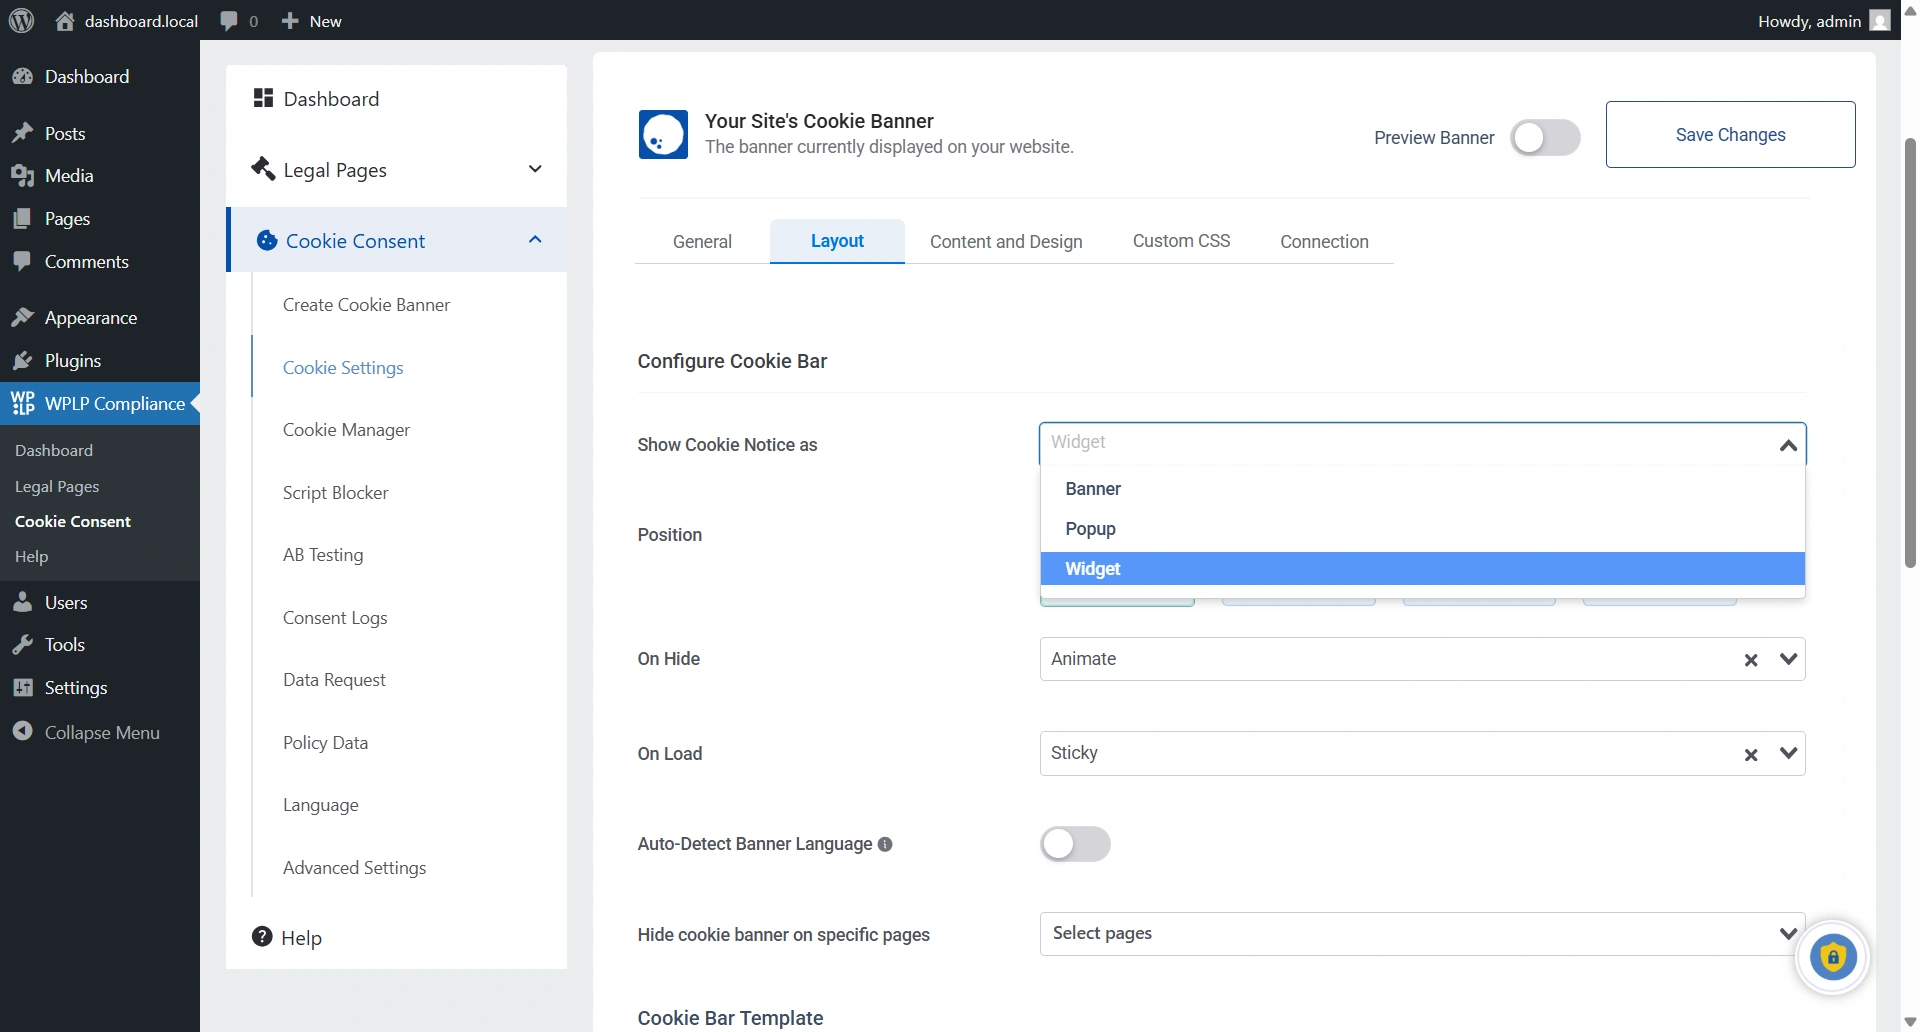
Now, click on the ” Save Changes “ button on the plugin.
That’s it. You have successfully added a cookie popup to your website.
Best Practices for GDPR Cookie Consent Popups
To effectively implement your cookie consent banner, consider these best practices:
- Positioning and Visibility: Position the banner where it is easily visible but does not interfere with the user experience. It is crucial to make the banner accessible to all users, including those with disabilities.
- Language and Wording: Explain the purpose of cookies and the consent process using clear, concise, and user-friendly language.
- Cookie Categories and Descriptions: Clearly define different cookie categories and provide detailed descriptions to help users make informed choices. For example, the banner could specify that the website uses analytics cookies to track user behavior and advertising cookies to deliver personalized ads.
- Maintaining Compliance: Regular updates and maintenance of cookie consent pop-ups are necessary for compliance. WPLP simplifies this with user-friendly options to manage and monitor consent.
Remember that user-friendliness and transparency are key to gaining user trust.
Common issues and fixes
Read these common issue you may face while using the platform:
- Popup not showing: Check that the cookie notice is enabled in the Compliance tab and that you’ve saved changes. Also verify the plugin is activated.
- Cache blocking the popup: Clear your site’s cache (via caching plugin or hosting dashboard) after enabling the popup. Test in an incognito window.
- Mobile display issues: Use the preview on a mobile device. If the banner overlaps content, check your theme’s z-index settings or switch to a banner-style display.
- Conflict with theme or another plugin: Temporarily deactivate other plugins one by one to identify conflicts. Check the plugin’s support forum for known theme incompatibilities.
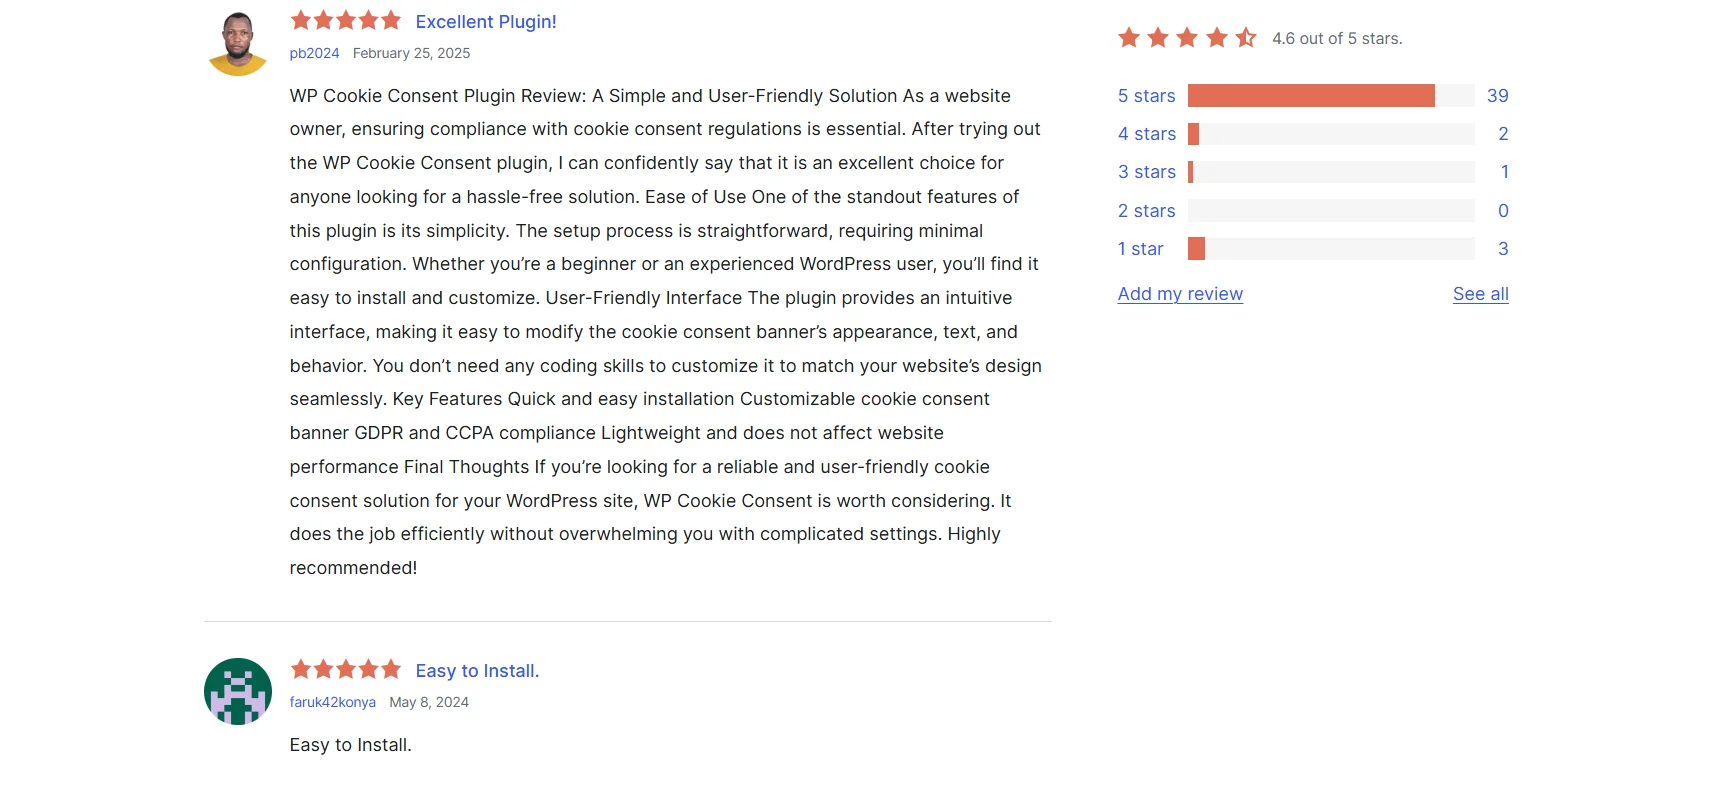
Testimonials From Users of WPLP
Let’s examine what our customers have to say about the plugin’s ease of use.
FAQ
It depends on your audience and how your website uses cookies. If you have visitors from regions like the EU or UK, or if your site uses non-essential cookies such as analytics, advertising, or tracking tools, then a cookie consent pop-up is generally required.
However, if your website only uses strictly necessary cookies for core functions like login sessions or shopping carts, a pop-up may not be mandatory. As a best practice, most websites implement a consent banner to stay compliant and transparent.
No, cookies and pop-ups are not the same. Cookies are small data files stored in a user’s browser that help websites remember information such as login status or preferences.
Cookie pop-ups, on the other hand, are visual elements that inform users about cookie usage and request their consent. In simple terms, cookies are the technology, while pop-ups are the mechanism used to obtain permission.
Yes, a website can run without cookies, but it will have limitations. Without cookies, users may not be able to stay logged in, shopping carts may not retain items, personalization features will not work, and analytics tracking will be less accurate.
While simple or static websites can function without cookies, most modern websites rely on them to provide a smooth user experience.
Cookie pop-ups do not directly impact SEO rankings, but poor implementation can negatively affect user experience, which in turn can influence performance metrics.
For example, pop-ups that block content, are difficult to close on mobile devices, or slow down page loading, can frustrate users. To avoid issues, it is recommended to use a lightweight, non-intrusive banner that allows easy interaction.
Users can browse websites without accepting non-essential cookies by clicking the “Reject” option on the consent banner if it is available.
They can also block cookies through browser settings, use private or incognito mode, or install privacy-focused browser extensions. However, doing so may limit certain functionalities such as logging in, maintaining sessions, or saving preferences.
Conclusion
You can set up a fully compliant cookie popup in under 10 minutes using the steps above.
The key is not just adding a banner, but ensuring it gives users clear, equal choices and works smoothly across devices. A well-implemented consent popup protects your users, keeps your site legally sound, and builds the trust that keeps visitors coming back.
If you enjoyed this article and want to learn more about cookie consent, then check out these as well:
- How WP Cookie Consent Helps Your WordPress Site Adhere to CCPA Regulations
- Understanding Cookie Consent: A Guide For Website Owners
- GDPR cookie consent: What’s really required and how to manage them?
Want to create a cookie consent banner for your website? Grab the WPLP Compliance Platform plugin now!