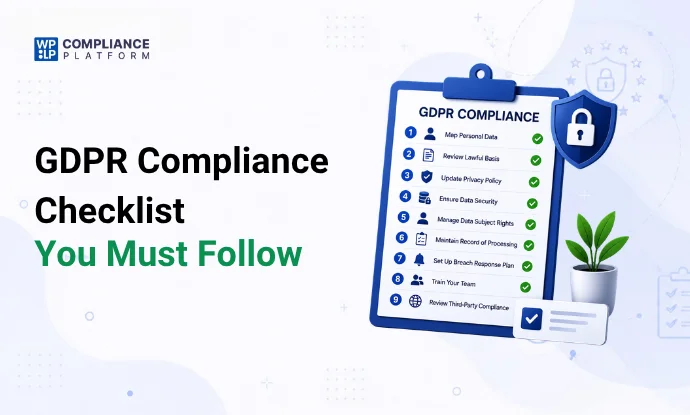
Most WordPress cookie banners show a message and block nothing. Google Analytics and the Meta Pixel still fire the moment the page loads.
That banner fails GDPR. It also gives you no record to show if a regulator or a visitor asks.
This guide shows you how to add a banner that blocks tracking until the visitor agrees and logs each choice. It uses the free WPLP Cookie Consent plugin. No code needed.
What a cookie banner does
A cookie banner is the notice a visitor sees on their first visit. It tells them which cookies your site uses and lets them accept, reject, or pick by category.
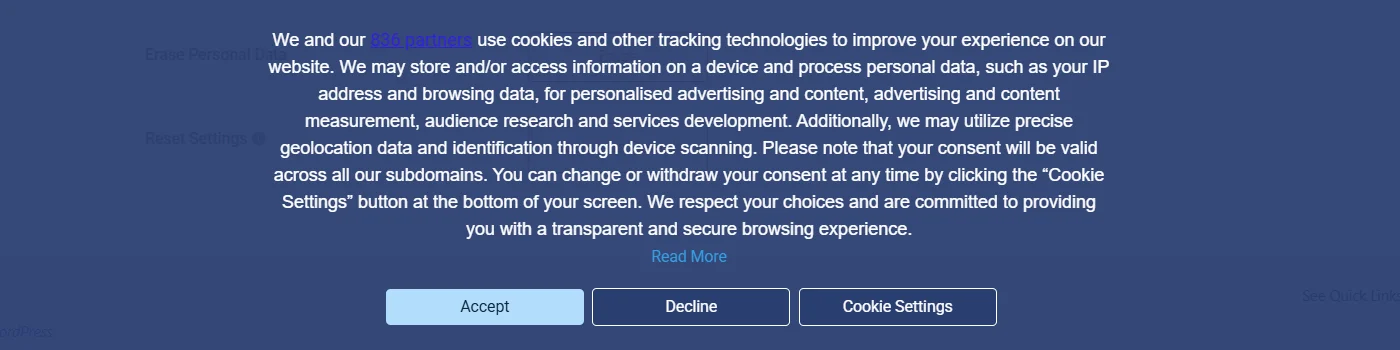
A compliant banner does 3 jobs:
- Asks first. Non-essential cookies (analytics, ads, social embeds) stay off until the visitor clicks Accept.
- Gives a real choice. Reject is as easy to click as Accept.
- Keeps proof. Each decision is logged with a date and the choices made.
Not sure which cookies count as non-essential? Start with the types of internet cookies. Session cookies for login or cart are usually exempt. Analytical cookies and Google Ads cookies are not.
What you need before you start
- Admin access to your WordPress site.
- A privacy policy or cookie policy page to link from the banner. No policy yet? The GDPR cookie policy generator makes one.
- A list of the tools you use: Google Analytics, Tag Manager, Meta Pixel, YouTube embeds, chat widgets. The scan in step 3 finds most of them, but you know your site best.
Why a plugin? WordPress has a built-in privacy policy page tool. It has no consent banner and no script blocking. A text widget that says “We use cookies” does neither job.
How to add a cookie banner in WordPress
Step 1: Install WPLP Cookie Consent
- In your WordPress dashboard, go to Plugins > Add New.
- Search for WPLP Cookie Consent.
- Click Install Now, then Activate.
You can also download it from the WordPress.org plugin page.
Step 2: Run the setup wizard
The setup wizard opens after activation. It walks you through 3 things:
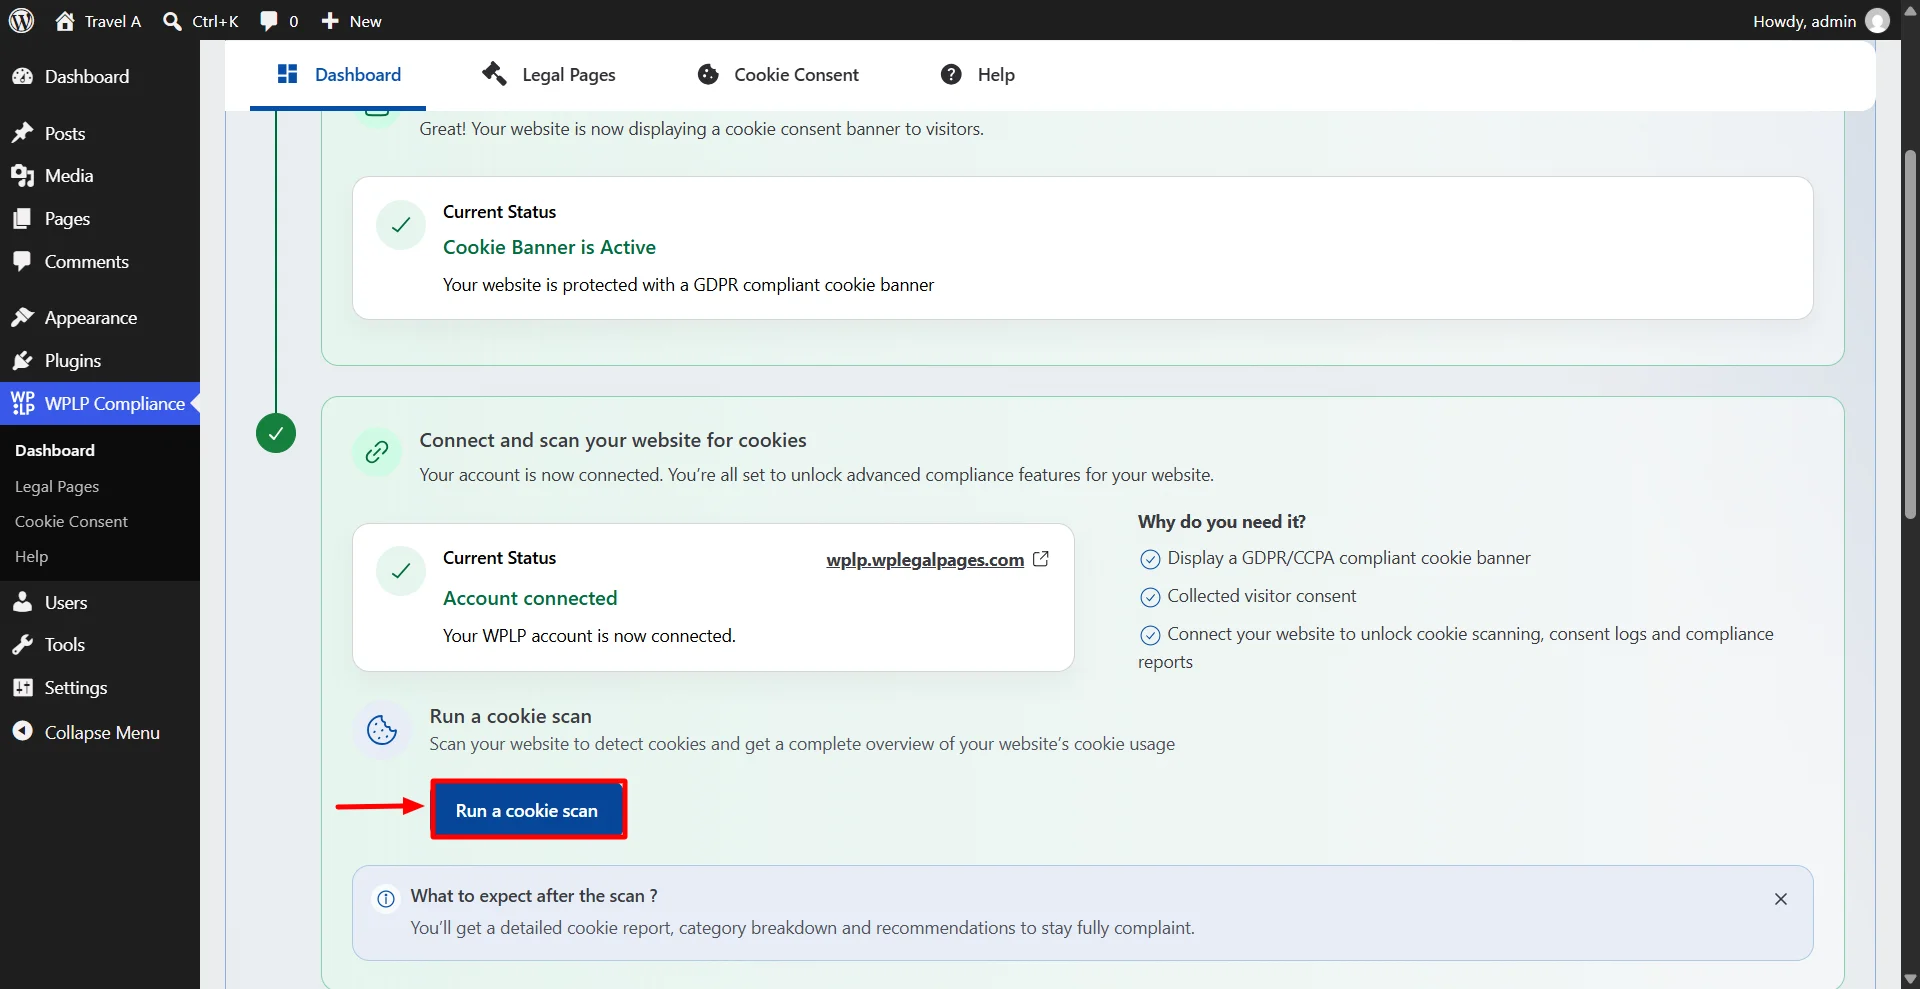
- Running your first cookie scan.
- Choosing which scripts to block.
- Publishing the banner.
Finish the wizard and your banner is live. The rest of this guide covers what to check and change after that.
To edit the banner later, go to WP Legal Pages > Cookie Consent in the admin menu. Open Cookie Settings or click Edit banner.
Step 3: Scan your site and check the cookie list
The scan crawls your pages and lists each cookie and script it finds, sorted by category: necessary, analytics, marketing, and so on.
Check the list. Two things to look for:
- Wrong category. A cookie filed as “necessary” will not be blocked. Move analytics and ad cookies to the right group.
- Missing cookies. Pages behind a login, or tools that load only on some pages, can slip past a scan. Add them by hand with the cookie’s name, domain, duration, and purpose.
Free plan: 5 scans a month. Run a new scan each time you add a plugin, a form, or a tracking tool. Paid plans raise the limits and turn on a weekly scan by default. See the cookie scanner page for details.
Step 4: Turn on script blocking
This is the step that makes the banner do its job.
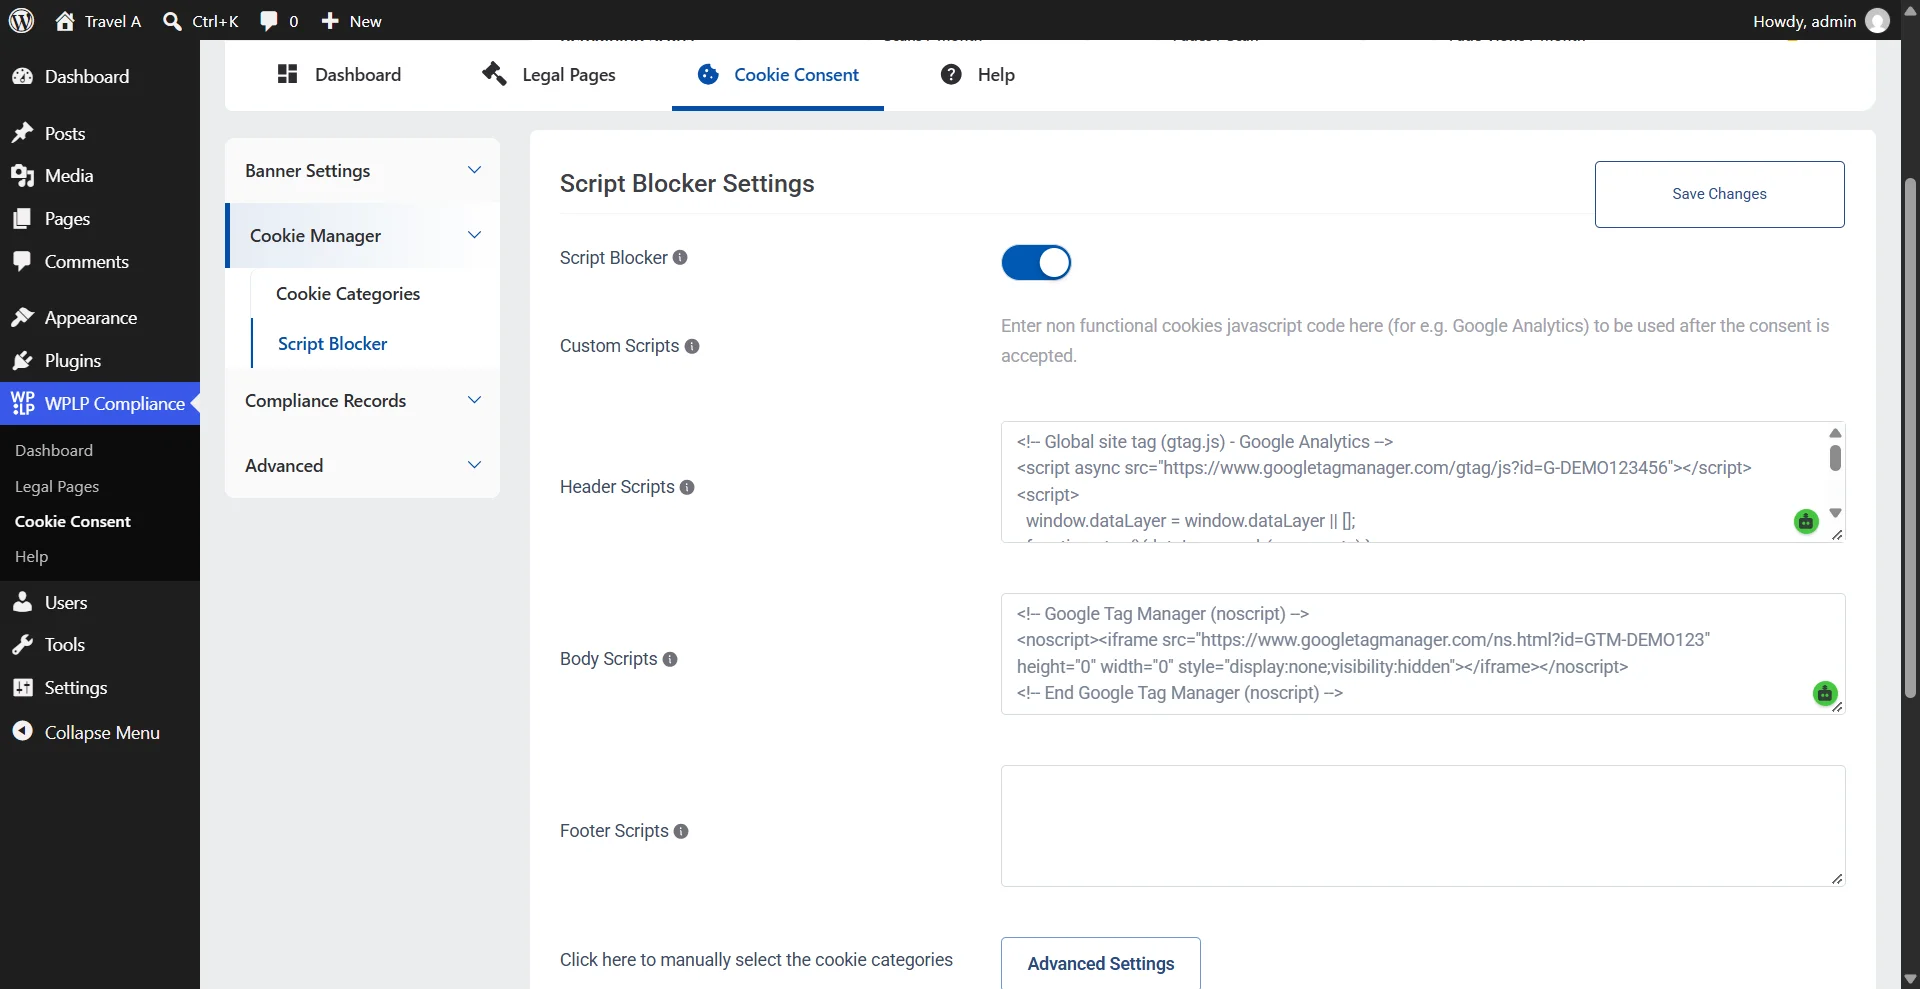
The script blocker holds back Google Analytics, Google Ads, the Meta Pixel, and other trackers until the visitor consents. It also blocks YouTube, Vimeo, Google Maps, and social embeds until consent.
Open the script blocker and check that it is on. Then check each script sits in the right category.
Some scripts must always run, for example a payment script on checkout. Add those to the whitelist. (Why a whitelist approach works for cookies.)
Step 5: Set the law and consent options
In Cookie Settings, open the Compliance tab.
- Law. Pick the law that matches your visitors. GDPR, CCPA, LGPD, and COPPA are free. GDPR banners use opt-in. CCPA banners use opt-out with a “Do Not Sell or Share” link.
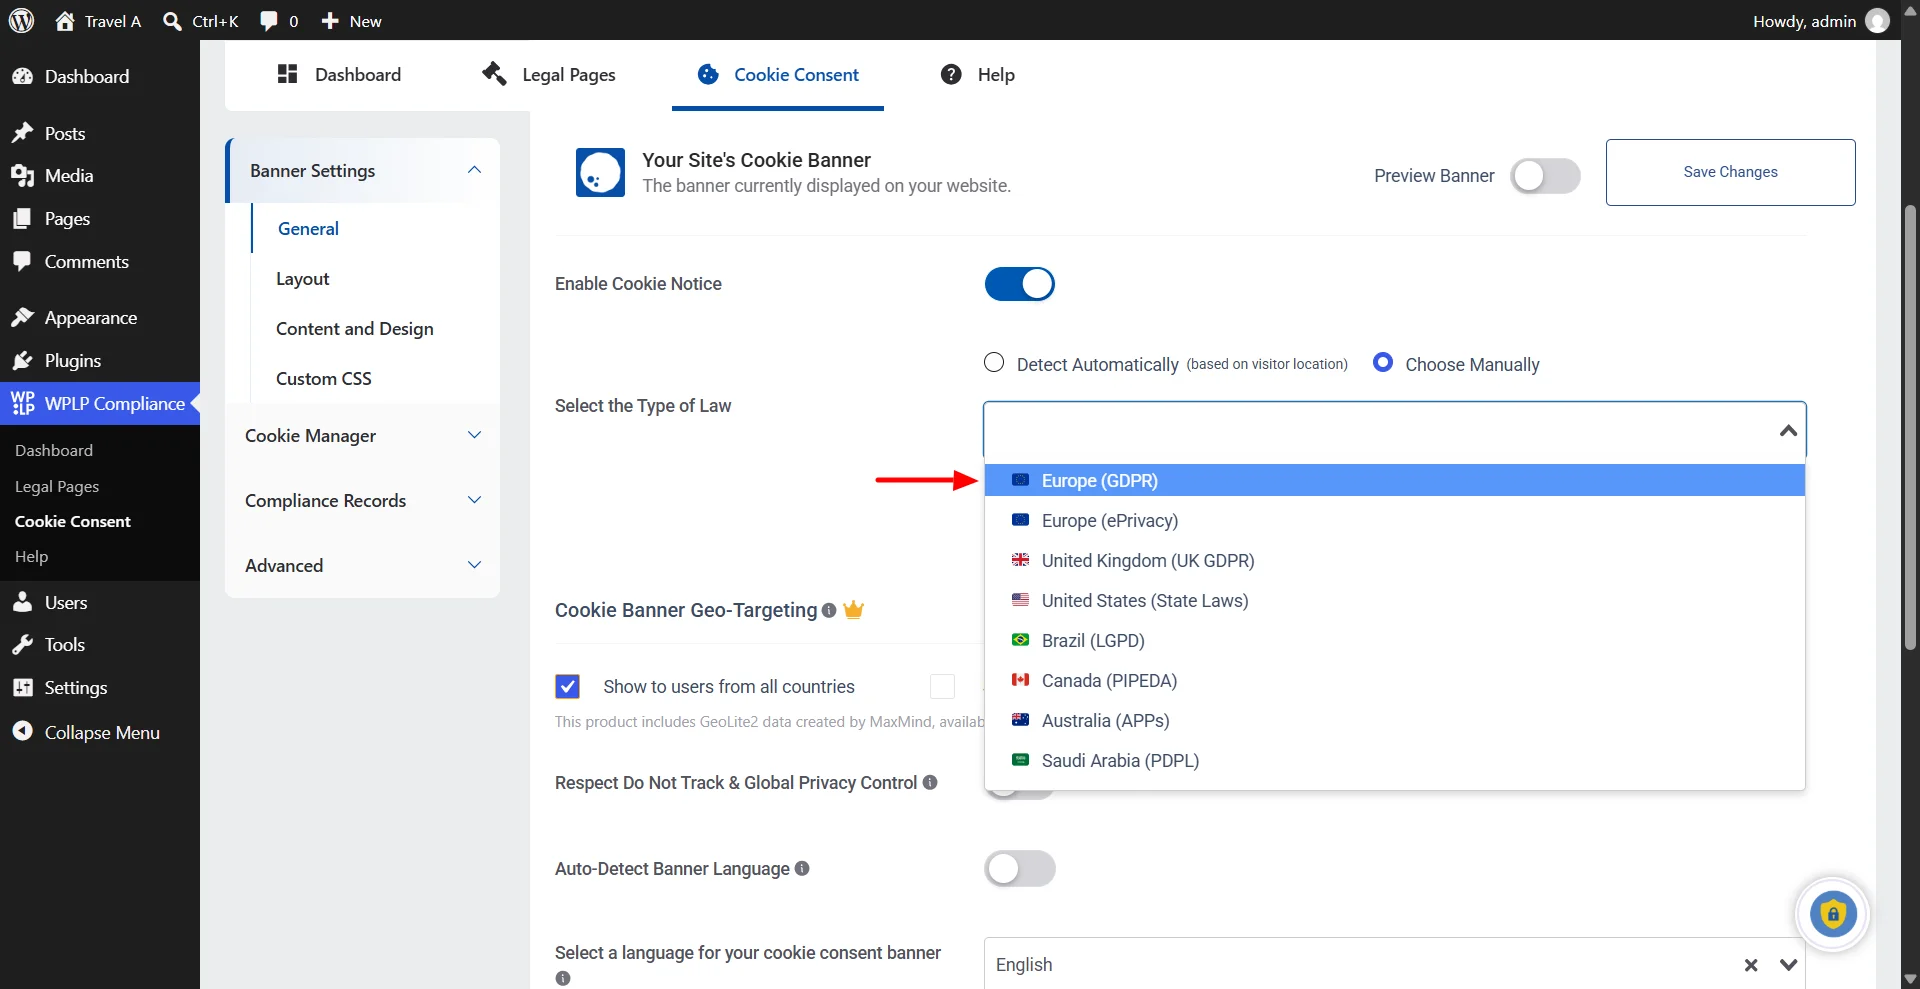
- Message and links. Write a short message. Link your privacy policy or cookie policy.
- Revoke consent. Leave this on. It adds a small button so visitors can change their mind later.
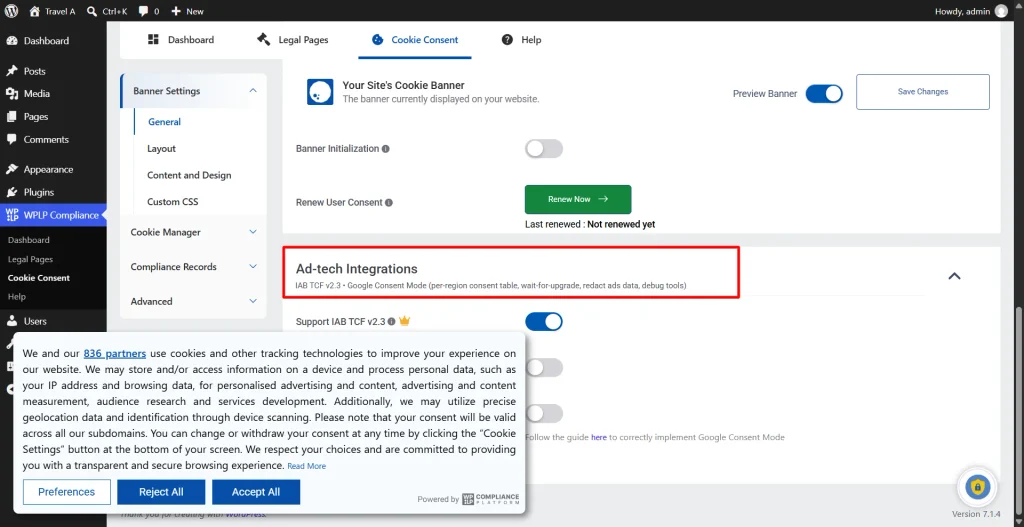
- Google Consent Mode v2. Turn it on if you run Google Ads or Google Analytics. It is free on every plan. Setup details: Google Consent Mode.
- IAB TCF. Needed if you sell ad space through TCF-based ad networks. Background: what is IAB TCF.
Get visitors from many regions? Auto-detect law reads each visitor’s location and shows the matching banner: GDPR to a visitor from the EU, CCPA to a visitor from California. Geo-targeting, shows or hides the banner by region. More on that in geo-targeting a cookie banner.
Step 6: Choose a layout and style the banner
Pick a layout: bar, box, or popup. Then pick a template and set the position.
In the Design tab, set colors, text, borders, font, and button styles. Match your site. Keep the text readable against the background.
Give Accept and Reject the same size and weight. A bright Accept button next to a grey “settings” link is a pattern EU regulators have fined sites for. For ideas, see these cookie consent banner examples.
Step 7: Set language and page rules
- Language. The banner can match the visitor’s browser language. 50+ languages are supported.
- Hide on specific pages. Hide the banner on your privacy policy and cookie policy pages, so visitors can read them first.
Step 8: Test it
Don’t trust the preview. Test the live site.
- Open your site in a private (incognito) window.
- Before you click anything, open Inspect > Application > Cookies.
- Check that no analytics or ad cookies (for example
_gaor_fbp) are set yet. - Click Reject. Reload. They should still be missing.
- Clear cookies, reload, and click Accept. Now they should appear.
If _ga shows up before you click anything, the script blocker is off or the script is in the wrong category. Go back to step 4.
Extra features you get for free
Consent logs. Every choice is stored in your own WordPress database, not on a third-party server. Visitors can withdraw consent at any time, and you can set the plugin to ask again on a schedule. More on what a log should hold: consent audit and logging best practices.
Data requests (DSAR). Add a request form to any page with a shortcode. Visitors use it to ask for, or ask you to delete, the data you hold on them. You get an email alert, and each request lands in a queue.
A/B testing. Run 2 versions of your banner and compare how many visitors consent to each. Guide: cookie banner A/B testing.
Privacy signals. The plugin respects Global Privacy Control and Do Not Track signals from the visitor’s browser.
Cookie banner rules under GDPR
GDPR and the ePrivacy Directive set the rules for EU visitors. Here is what your banner must do.
- Ask before you set non-essential cookies. Strictly necessary cookies (login, cart, security) are exempt. Everything else waits for consent (ePrivacy Directive, Art. 5(3)).
- Get a clear yes. The visitor must click something. Scrolling does not count. Neither does “By using this site you accept cookies” (EDPB Guidelines 05/2020). More on this: implied vs explicit cookie consent.
- No pre-ticked boxes. The EU Court of Justice ruled pre-ticked boxes are not valid consent (Planet49, 2019).
- Let visitors choose by category. Analytics yes, marketing no, for example.
- Make Reject easy. Most EU regulators expect a Reject option on the first screen, next to Accept.
- Don’t block the site until they accept. A “cookie wall” does not give valid consent under the EDPB guidelines.
- Keep a record. You must be able to show that a visitor consented (GDPR Art. 7(1)).
- Let visitors withdraw. Withdrawing must be as easy as giving consent (GDPR Art. 7(3)).
- Delete data on request. Visitors can ask you to erase their personal data (GDPR Art. 17).
US rules differ. The CCPA uses opt-out: you can set cookies first, but you need a “Do Not Sell or Share My Personal Information” link and must honor Global Privacy Control. See how to make a WordPress site CCPA compliant.
Full detail by law: GDPR compliance, CCPA compliance, and the ePrivacy Directive vs GDPR.
Where to display a cookie banner
4 placements work. Pick by how much you want the banner to interrupt.
| Placement | What it looks like | Good for |
|---|---|---|
| Bottom bar | Full-width strip at the bottom of the screen | Most sites. Visible, keeps content readable |
| Top bar | Full-width strip at the top, above the header | Sites where the footer area is busy (chat widgets, sticky carts) |
| Corner box | Small box in a bottom corner | Content-heavy sites and blogs |
| Center popup | Box in the middle of the screen, page dimmed behind it | Sites that need a decision before tracking starts, for example ad-funded sites |
A few rules for any placement:
- Show it on the first page view, on every page, until the visitor decides.
- Don’t let it hide the Reject button on mobile. Test on a phone.
- If you use a center popup, keep Reject on the first screen. A popup with only “Accept” and “Settings” is close to a cookie wall.
- Running a store? WooCommerce has its own cookie needs. See how to add a cookie banner to an ecommerce website.
When to move to a paid plan
The Free plan covers 1 site. Move up when you add a second site, run out of scans, pass 20,000 banner pageviews a month, or need a paid feature: IAB TCF, auto-detect law, geo-targeting, more laws (ePrivacy, UK GDPR, PIPEDA, PDPL, APP), automated DSAR processing, or a custom logo.
How it works:
- Buy a plan on the pricing page. Professional covers up to 3 sites, Business up to 10, Agency 25, 50, or 100.
- Pro features turn on in the plugin you already have.
- Nothing to reinstall. Your banner, cookie list, and consent logs stay as they are.
Managing more than one site? Sign in at app.wplegalpages.com and add each site. The web app is on every plan, Free included.
FAQ
A cookie banner is a notice that tells visitors which cookies your site uses and asks for their consent. A compliant banner also blocks non-essential cookies until the visitor says yes. More: what is a cookie banner.
-Install and activate WPLP Cookie Consent from Plugins > Add New.
-Run the setup wizard: scan your site, choose scripts to block, publish.
-Check the cookie list and turn on script blocking.
-Set the law, message, and policy link in Cookie Settings.
-Test in a private window that tracking cookies wait for consent.
No. WordPress includes a privacy policy page tool, but no consent banner and no script blocking. You need a plugin.
A bottom bar works for most sites. Use a corner box for blogs and a center popup only if you need a decision before tracking starts. Whatever you pick, keep Accept and Reject side by side.
Under GDPR: ask before setting non-essential cookies, get a clear click (scrolling does not count), offer choice by category, make Reject as easy as Accept, keep a record of consent, let visitors withdraw at any time, and delete their data on request. Under the CCPA: offer an opt-out link and honor Global Privacy Control.
Only if it has script blocking and it is set up. Many banners show a notice while trackers keep running. Test your site with the steps in step 8.
For 1 site with GDPR, CCPA, LGPD, or COPPA visitors, yes. You get the banner, script blocking, Google Consent Mode v2, consent logs, and a DSAR form. Paid plans add more sites, more laws, auto-detect law, geo-targeting, and IAB TCF.
Next steps
- Install WPLP Cookie Consent and run the wizard.
- Test with DevTools before you call it done.
- Link the banner to a cookie policy. Guide: how to create a cookie policy for your website.
- Read the cookie consent best practices and the GDPR compliance checklist for the rest of your site.
Not sure what your site sets today? Run a free website compliance audit.
Related reading: