
Do you want to add a cookie consent banner to your WordPress website?
Adding a cookie banner to your site is the first step you can take to comply with global laws like GDPR and CCPA.
In the last two decades, the world has significantly transitioned from physical to digital enterprise systems.
Nevertheless, global legal systems have already drawn a fine line between what is legally right and wrong when operating a business online, specifically making stringent laws around data privacy regulations.
If you are just getting started with your online business and are worried about data privacy compliance, then do not worry: using a cookie banner will solve most of your problems.
This article will help you understand how to integrate a cookie banner in WordPress without any legal or coding knowledge.
Let’s get started!
- What is a Cookie Banner and Why is it Essential?
- Pre-requisites to Add a Cookie Banner to Your WordPress Website
- How to Add a Cookie Banner Using WP Cookie Consent
- How to Customize a Cookie Banner Using WP Cookie Consent
- Advanced Features Offered by WP Cookie Consent
- Where to Display a Cookie Banner?
- FAQ
- Conclusion
What is a Cookie Banner and Why is it Essential?
Before you directly try to dive into the steps, it is important to learn what a cookie banner is and its importance for websites.
Definition-wise, a cookie banner is essentially a mandatory pop-up that websites collecting cookies are required to display, informing users about the use of cookies and similar tracking technologies.
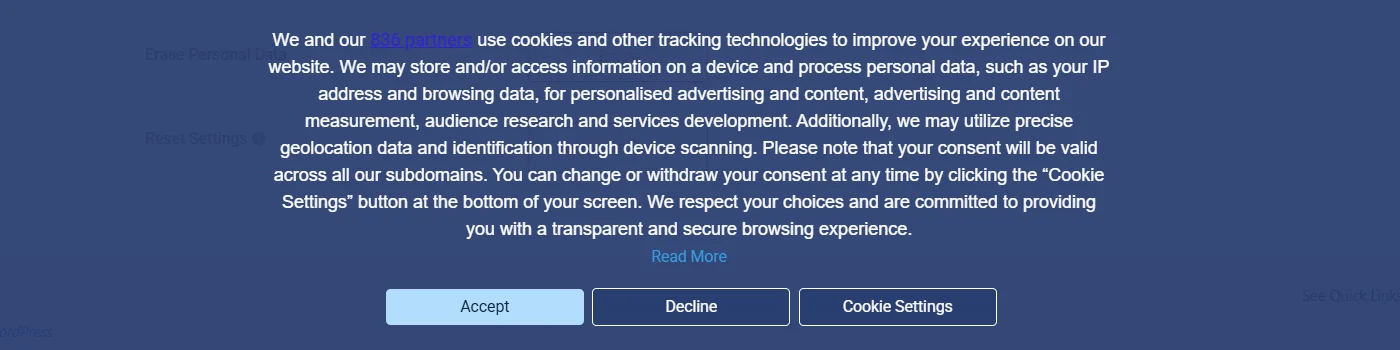
While exploring the internet, you might have often encountered a first interaction banner or pop-up asking you to accept or decline its terms; that’s exactly what a cookie banner is.
When users encounter such a notification, they are expected to accept, decline, or partially accept the terms of the cookies. Based on their responses, if they accept, the website allows the use of cookies on their devices to track their behaviour.
If you are new to the term cookies, learn about the different types of internet cookies.
Importance of Cookies on a Website
Now that you know what a cookie banner is, you might have already understood its purpose. It is not only valid for website visitors but also of utmost importance for website owners.
Wondering how?
Pre-requisites to Add a Cookie Banner to Your WordPress Website
Let’s now deep dive into how you can create a cookie banner on your WordPress website.
A cookie banner, though simple looking, is a legal obligation that must comply with legal regulations regarding the notification. At the same time, you might think of simply using a widget to create a cookie pop-up with generalized text and buttons to show your users, but that’s actually not enough.
Legal pop-ups like cookie banners need to fulfill various prerequisites before being created. One must have a sound knowledge of data privacy regulations governing the regions where the website operates.
In addition to seamlessly creating a cookie banner using a tool that provides you with compliant templates, configuration, and design options, along with other relevant customizations, could be most helpful.

If you are a WordPress user, using WP Cookie Consent could be an all-in-one solution that matches the requirements of all these prerequisites. It is a free and powerful WordPress plugin developed by WP Legal Pages that helps you create globally compliant cookie banners.
It boasts all the required features to add and customize a cookie banner on your website. Additionally, it offers other vital functionalities like script blocker, A/B testing, auto language detection, keeping a record of consent logs, and data requests.
How to Add a Cookie Banner Using WP Cookie Consent
To add a cookie banner to your WordPress website, you can simply follow the steps below:
(For this tutorial, we will also use the WP Cookie Consent plugin to show how you can create one for your website.)
Download WP Legal Cookie Consent
Like any other WordPress plugin, you can easily download WP Cookie Consent. To learn how, you can check out our video on:
Creating Cookie Banner
Once you install the plugin, you create a cookie banner for your website.
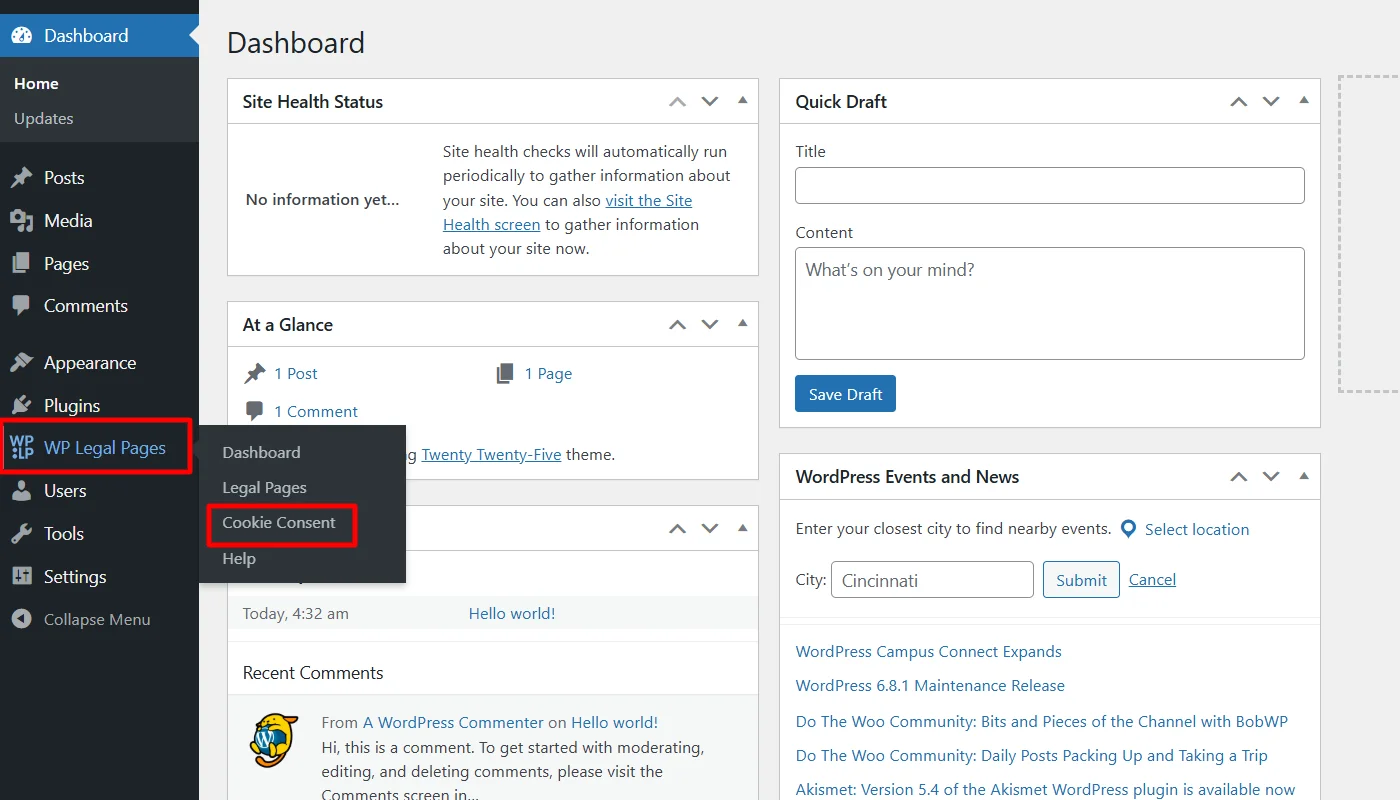
From your WordPress admin dashboard, hover over WP Legal Pages and click on Cookie Consent.
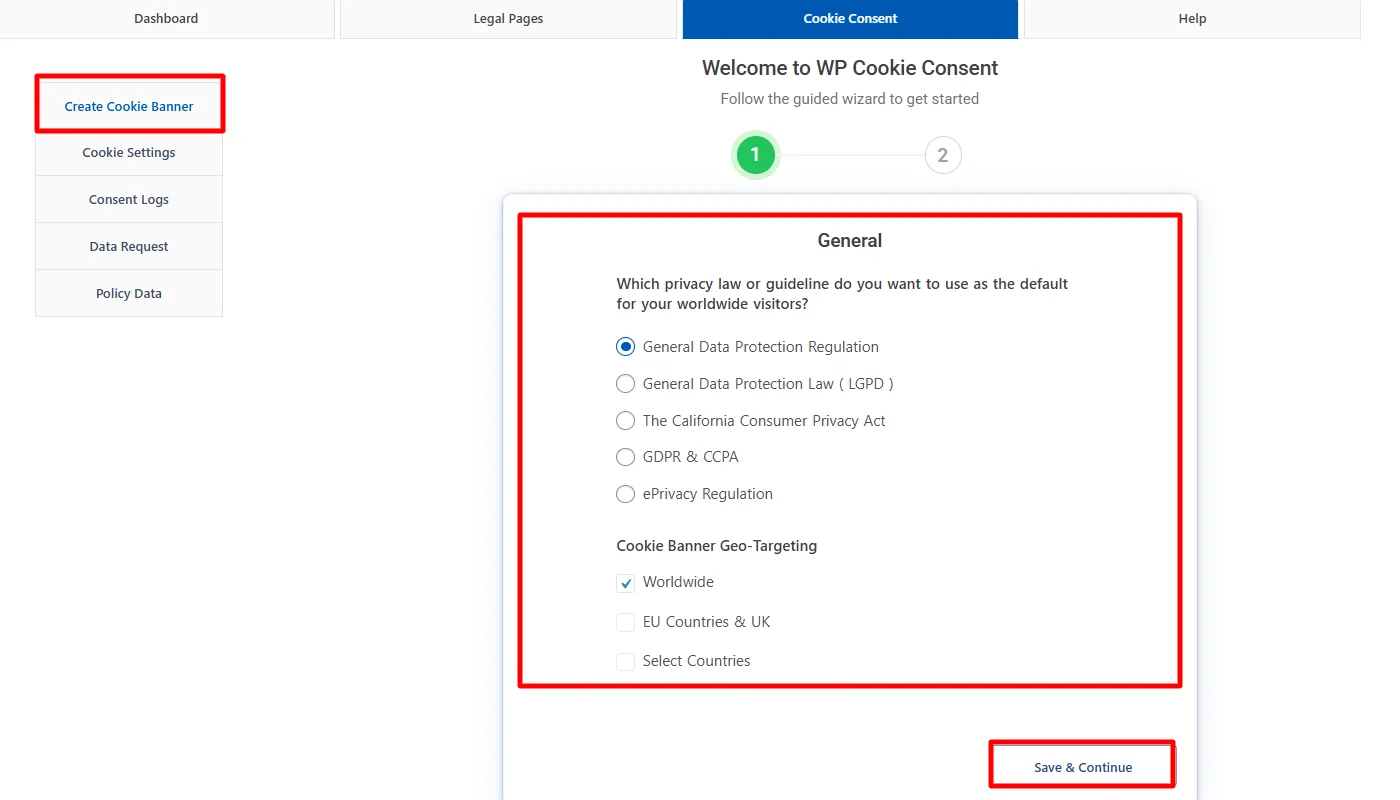
Next, set up the general cookie banner guideline per your requirements, which you can do by selecting from the available options.
(For instance, if you want a GDPR compliant cookie banner to be visible worldwide, you can select the options as shown in the image.)
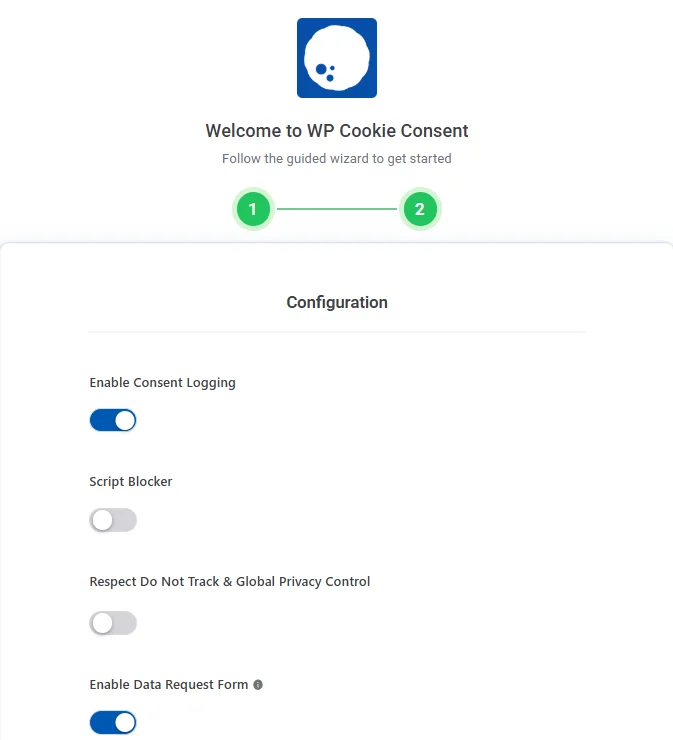
Once done, you can configure various options per your cookie banner needs, enabling or disabling various options.
Here, I enabled consent logging and data request while keeping others disabled. This option will help me display my cookie banner on the website. The data request will also allow me to display a form to collect users’ data.
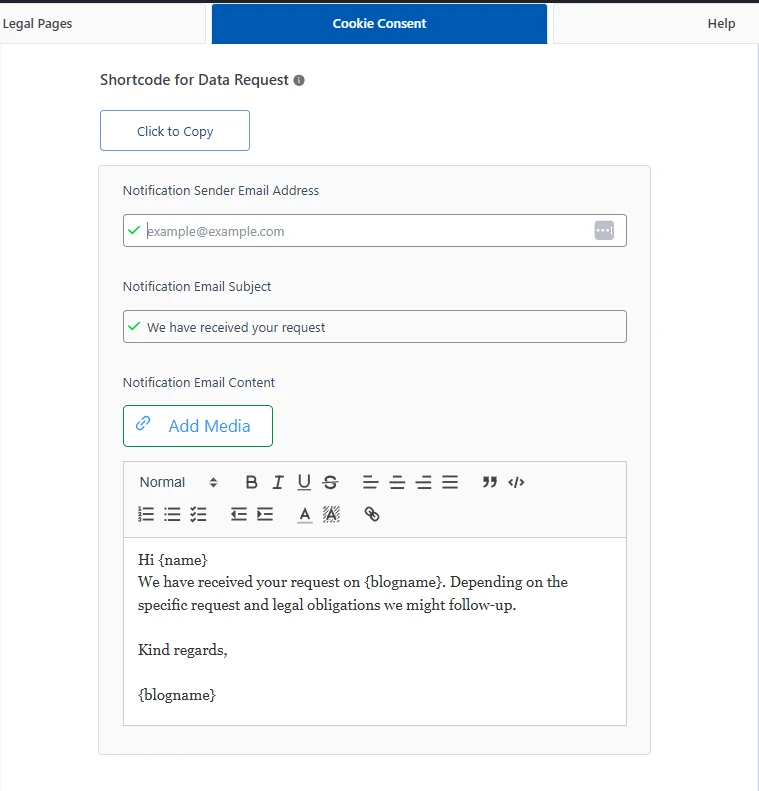
If a user accepts the data request, it further allows the website to set up an automated email informing users that the website can follow up.
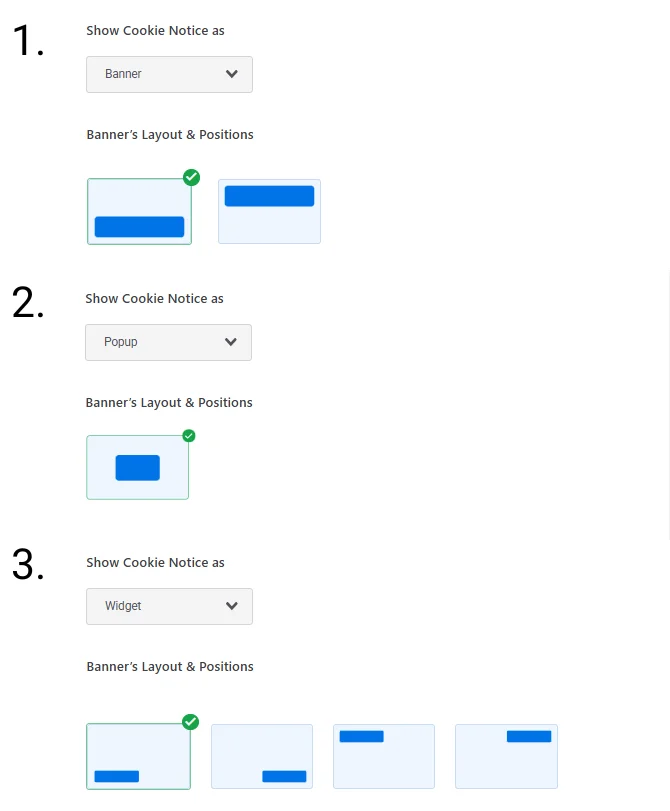
Further, the configurations also allow you to decide the appearance in which you want to display the cookie banner.
You can display the cookie banner in one of three forms: banner, pop-up, or widget, and based on your selection, you can also set up its layout and position.
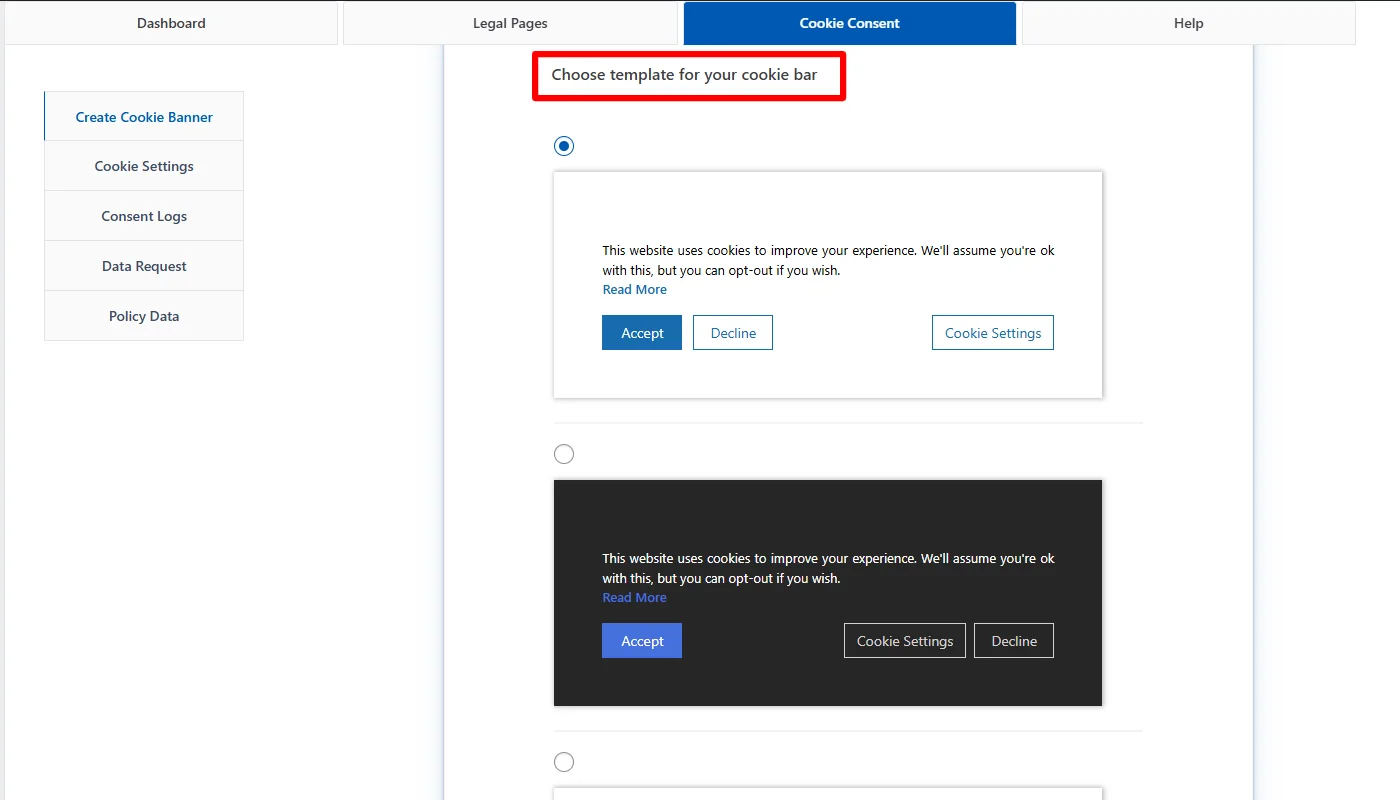
Lastly, the plugin offers nine templates for displaying the cookie banner content. You can change the templates based on your convenience and finish your cookie banner setup.
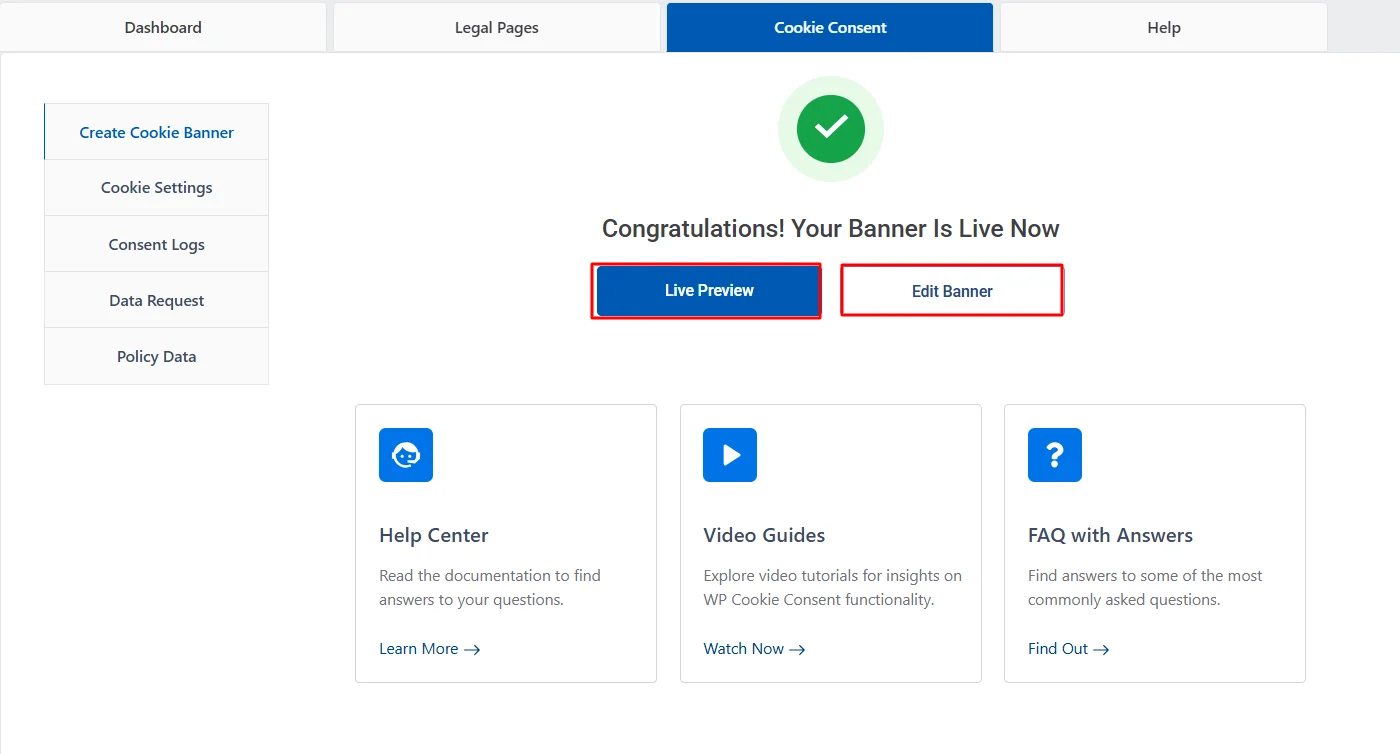
Upon successfully finishing the set, you can next check the live preview or edit the banner.
How to Customize a Cookie Banner Using WP Cookie Consent
Once you have successfully created a cookie consent banner, the WP Cookie Consent plugin allows you to customize and style it further. Let’s explore the options the plugin allows you to customize individually.
To customize the banner, click on the edit banner option while finishing the configuration to add a banner, or navigate to Cookie Settings from the cookie consent dashboard.
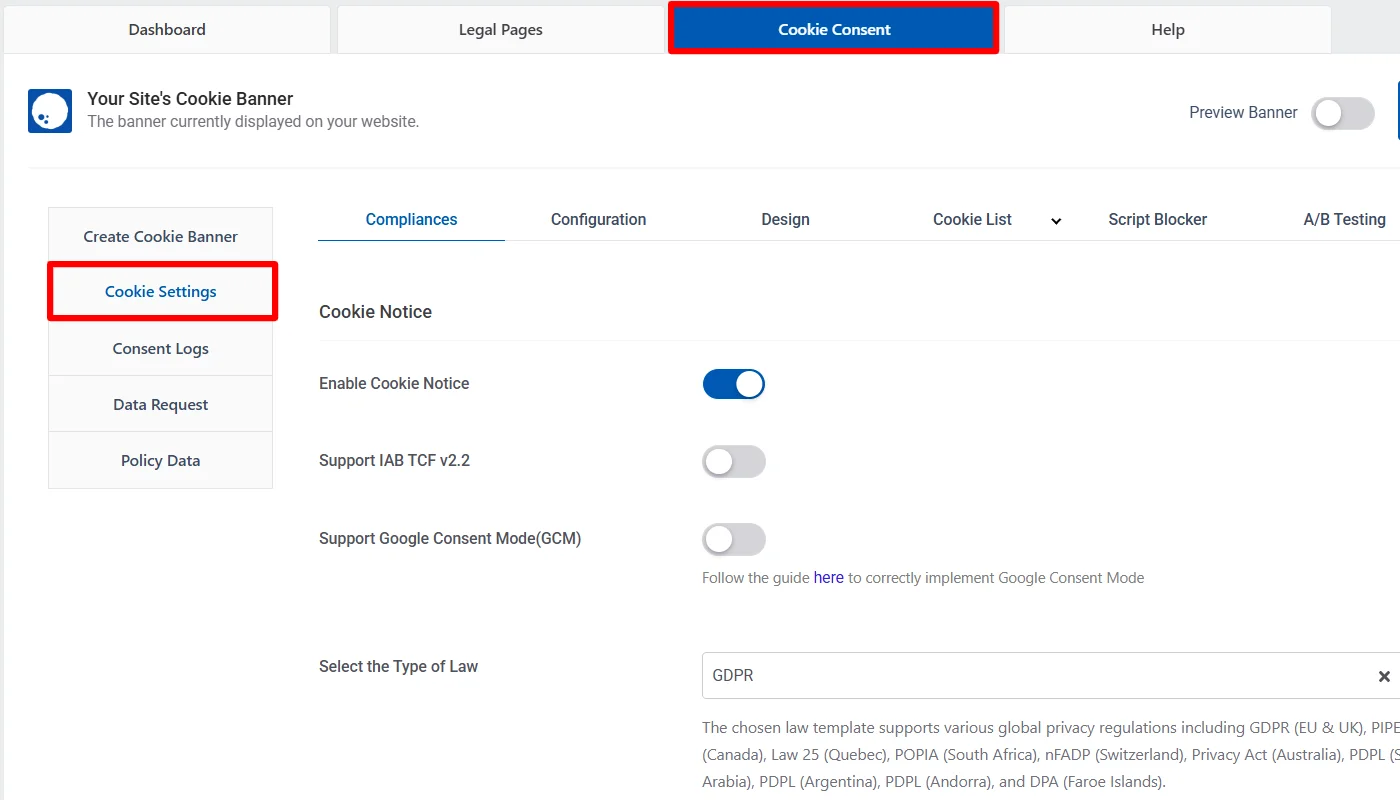
Compliance
You have various options for compliance configurations. This allows you to:
- Enable or disable cookie notice.
- Support IAB TCF,
- Support Google Consent Mode,
- Google Additional Consent Mode (only with the pro version) and
- Select the type of law to be targeted and
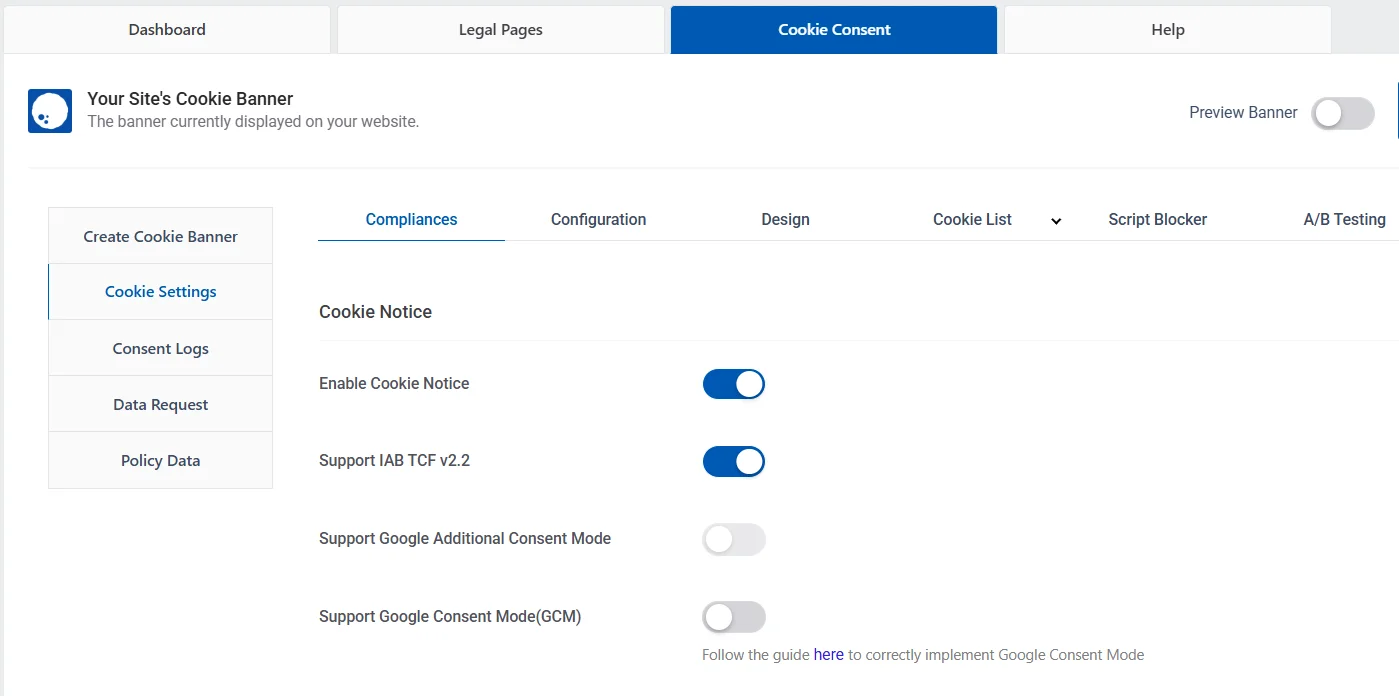
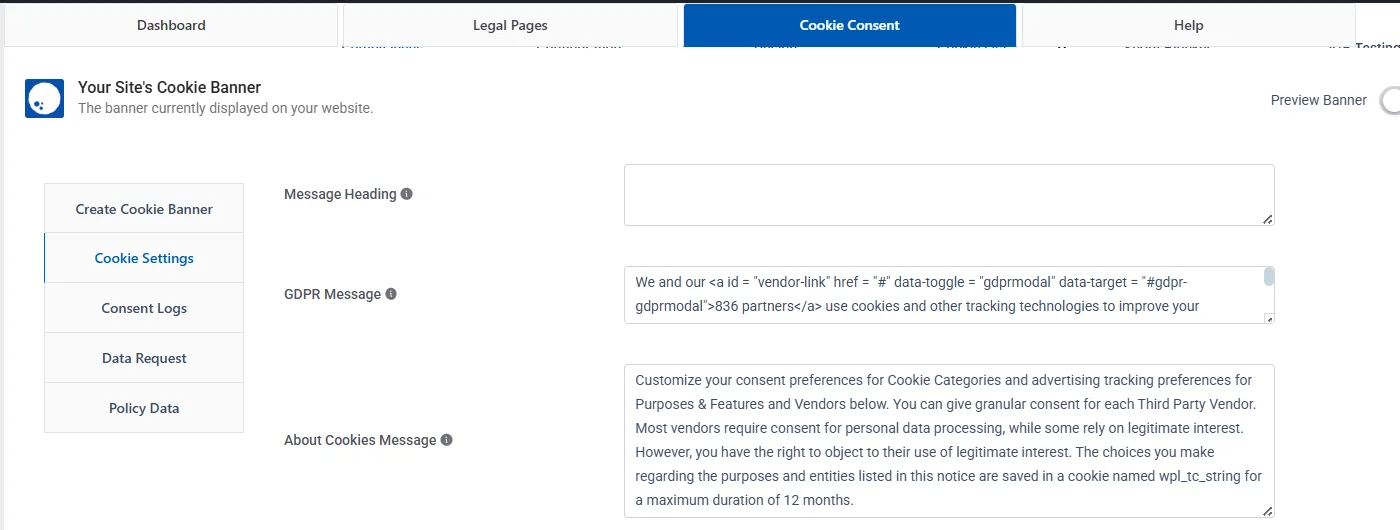
The compliance customizations additionally allow you to customize the display of the GDPR and Cookie message, and also let you add a message heading.
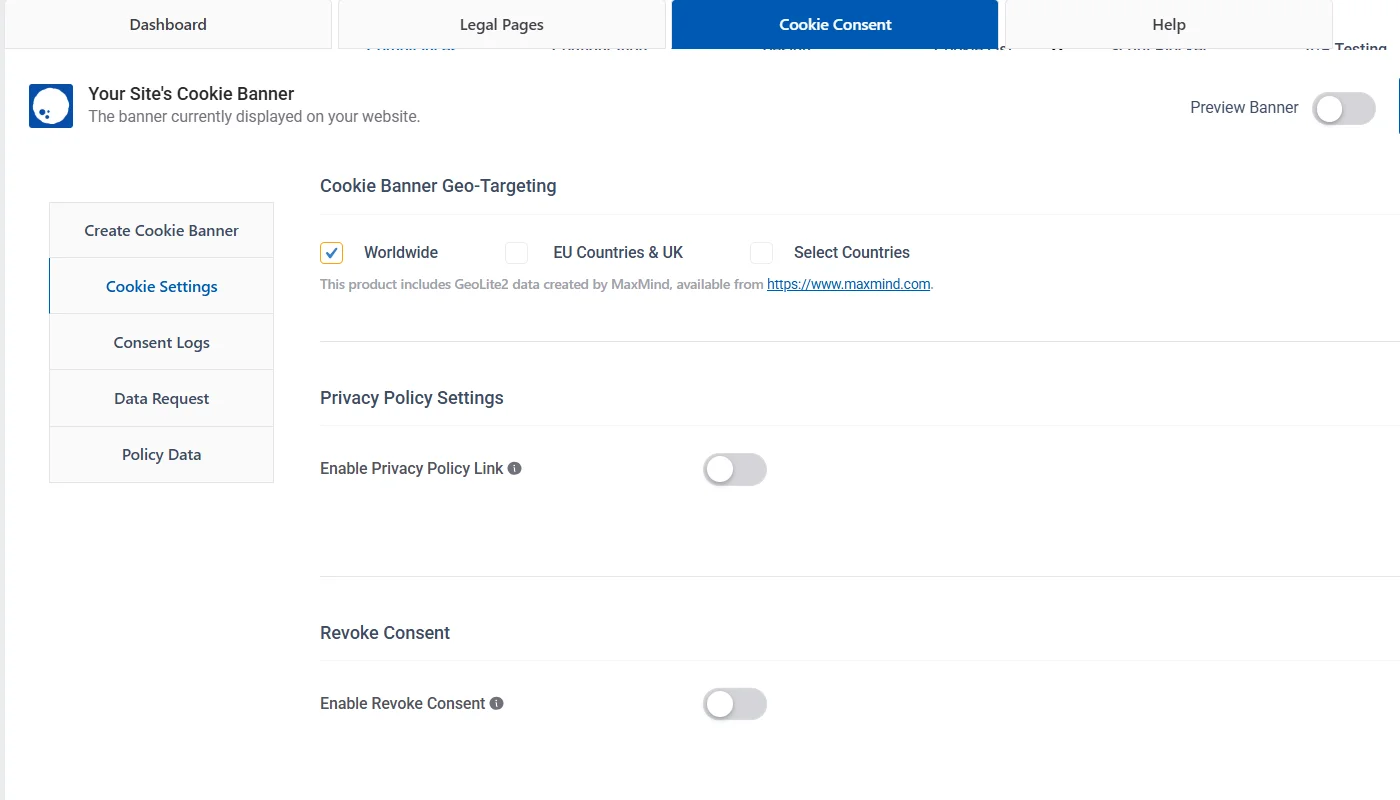
The compliance customization further allows you to geo-target the cookie banner (although you did set up this during adding the cookie banner, you can change it here again), enable the privacy policy link, or enable revoke consent.
(In case you enable any of the two options or both, you can further style the text, color link, and other settings.)
Similar to geo-targeting customizations you did while adding the cookie banner, you can re-edit consent settings with additional options to set up that enable website owners to get various user permissions with a single click.

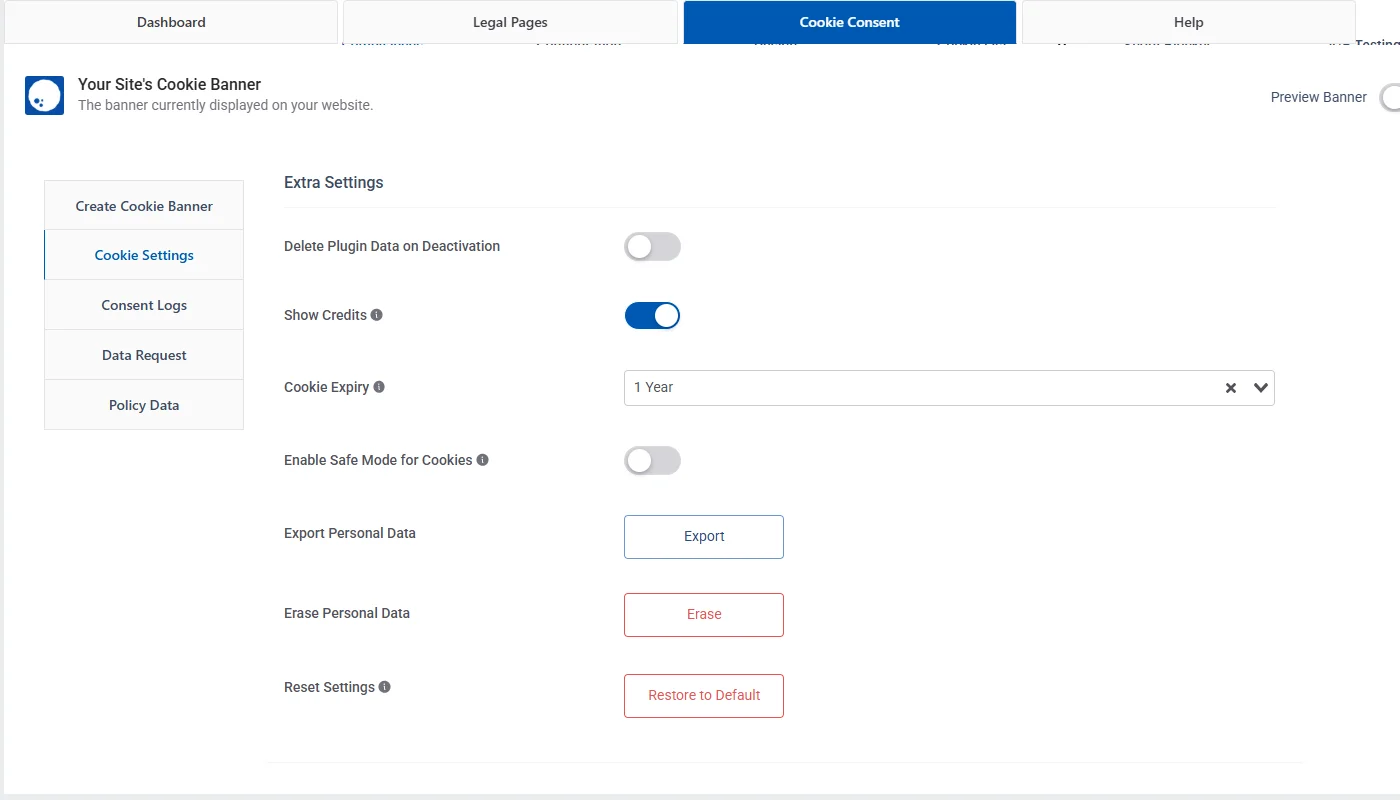
Moreover, the compliance settings also provide you with some extra settings which you ight explore and use based on your convenience.
Configuration
The configuration options available to customize your cookie banner are mostly the same settings offered while creating the cookie banner.
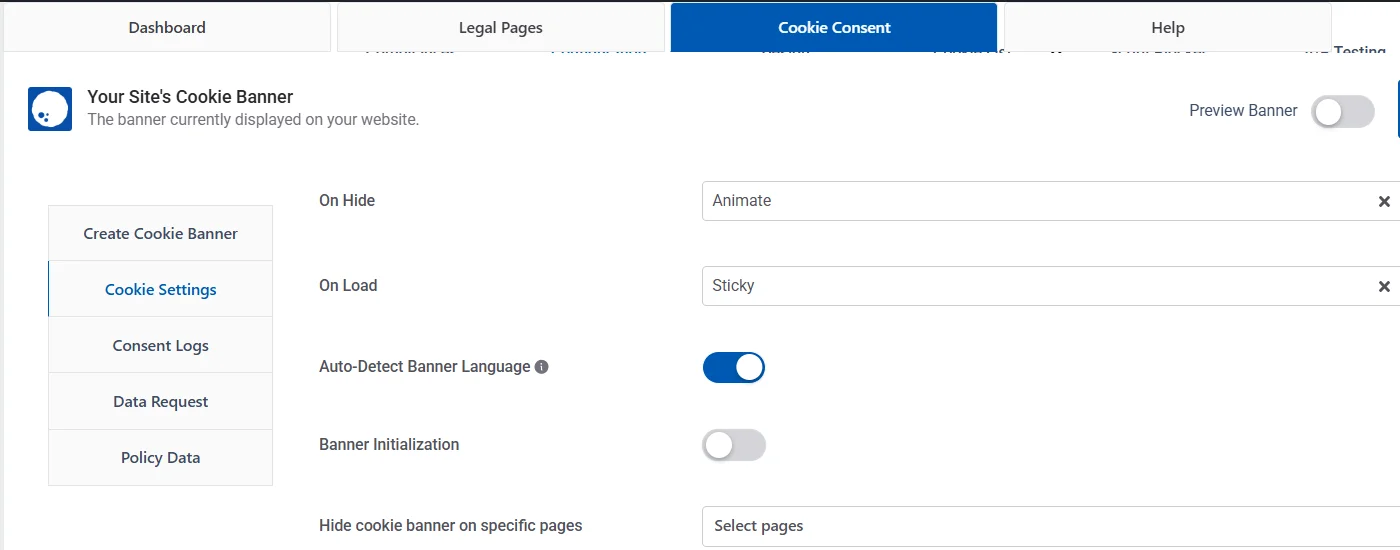
Alongside the same options, when editing the cookie banner, you can also set up some additional configuration that allows you to:
- Set the effect of the cookie banner when it is hidden (when a pop-up is closed)
- Set the effect when the pop-up loads
- Auto-detect the banner language on pop-up
- Banner Initialization
- Hiding the banner on specific pages
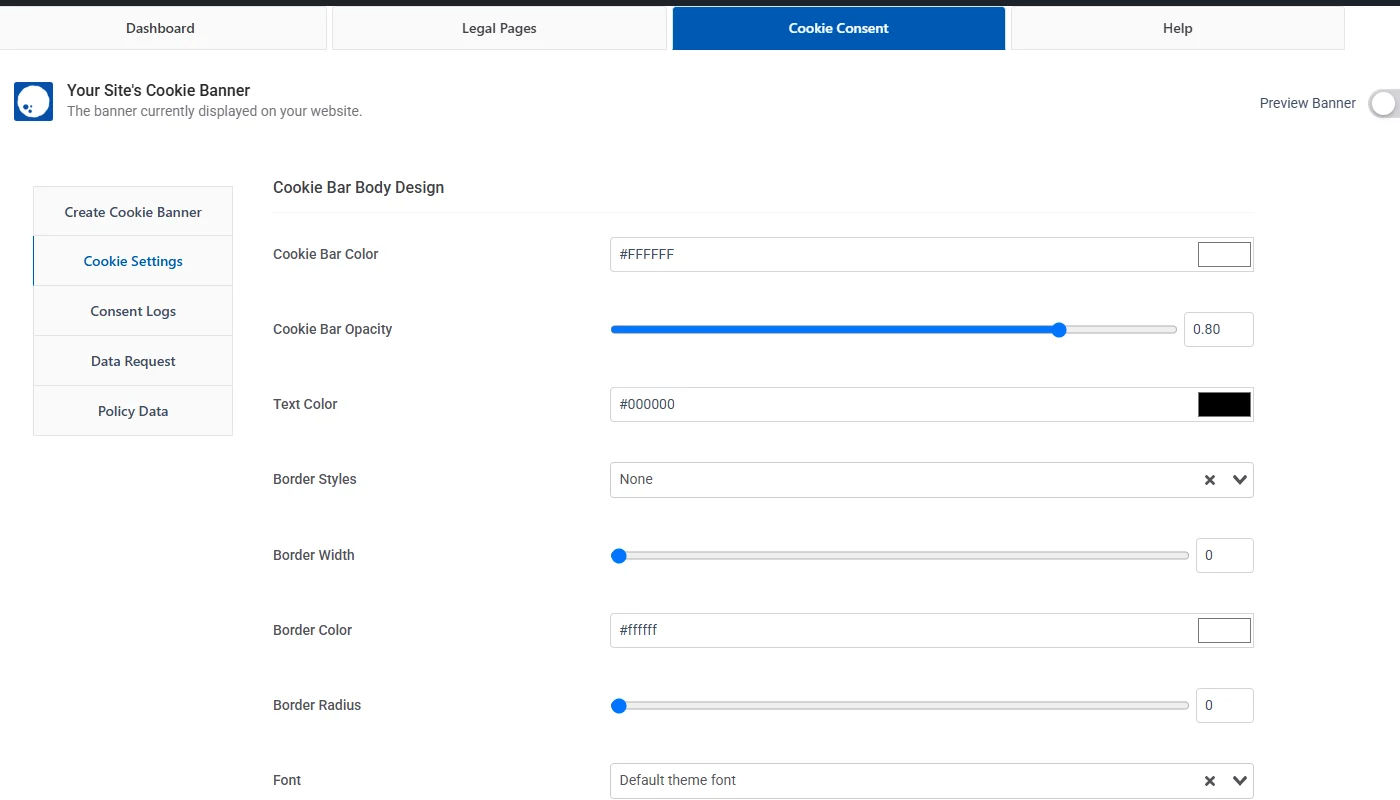
Design
In terms of design, the WP Cookie Consent plugin also offers various options that allow you to style the appearance of the cookie bar color, cookie bar opacity, and text color. Additionally, you can customize the border styles, width, color, radius, and overall cookie notice font.
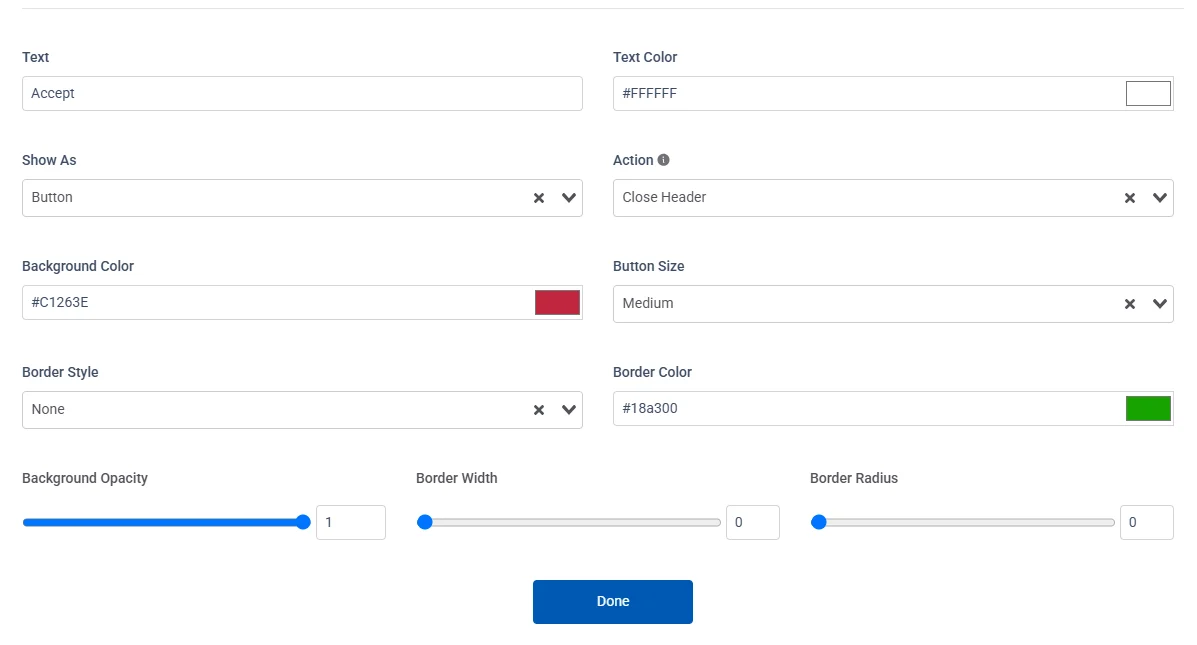
Furthermore, you can also enable and style the appearance of all the buttons displayed around the cookie banner. To customize, click on the settings icon for the button you want to style.
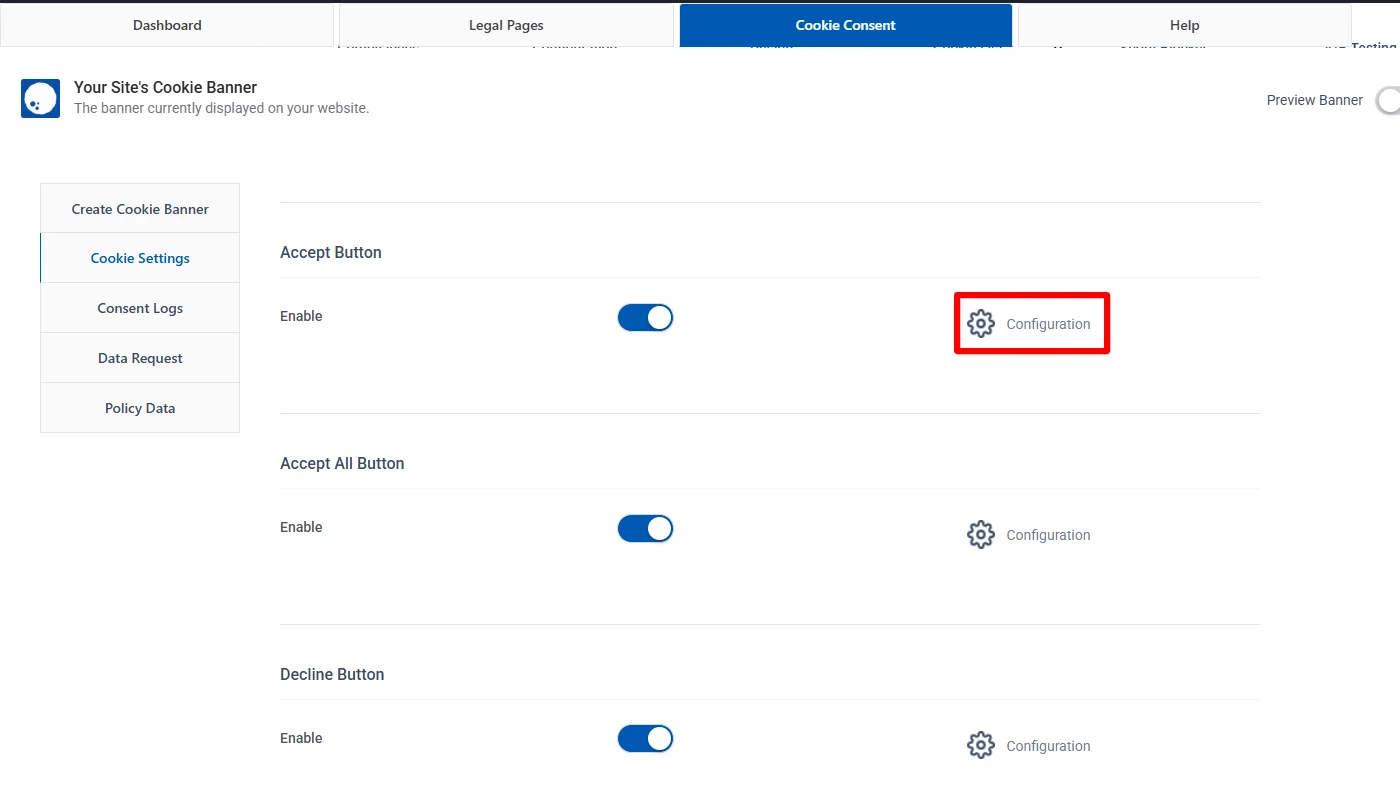
This allows you to style further various elements, as visible in the image below.
Cookie List
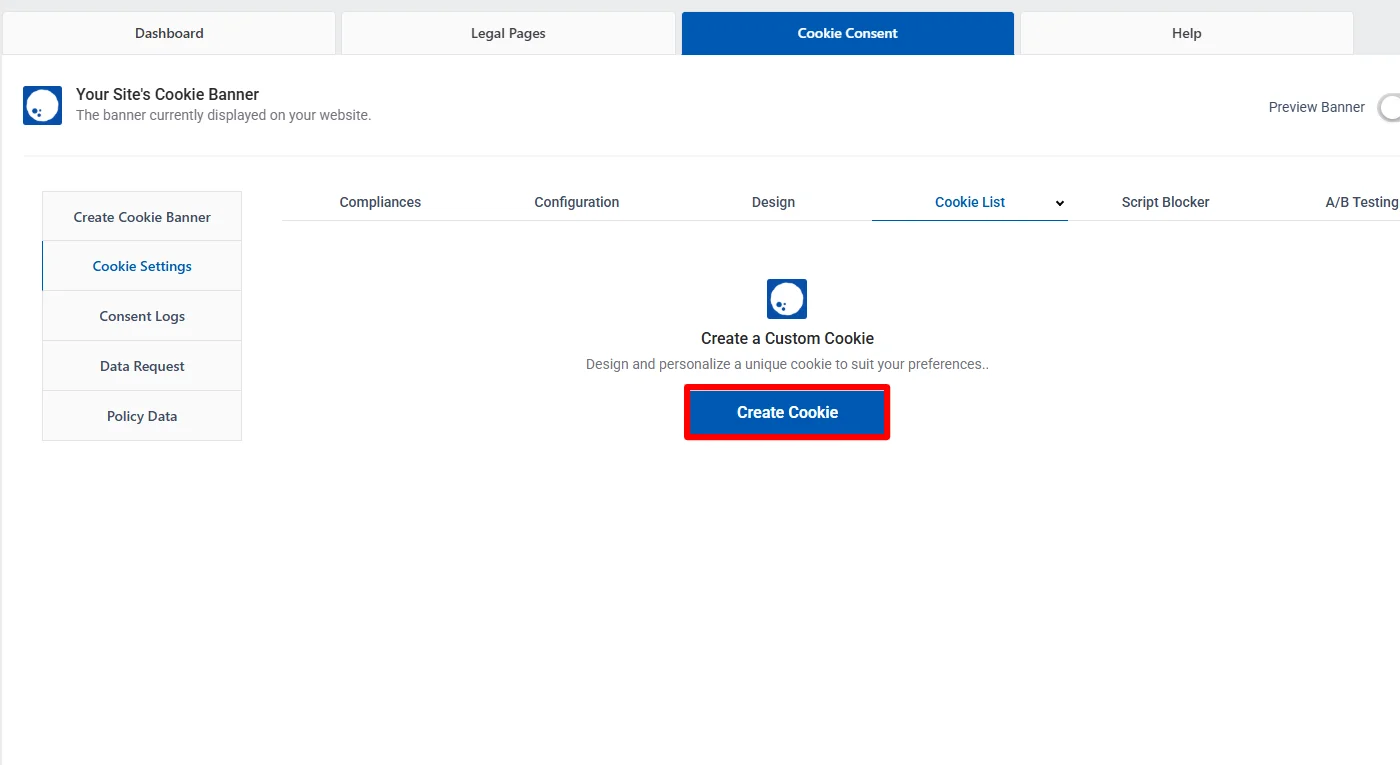
WP Cookie Consent also offers you the feature of a Cookie list that enables you to create custom cookies for your website, scan and discover the list of cookies the website stores.
However, to scan and discover website cookies, you must create an account and sign up on the website, giving you access to 100 page scans. You can upgrade to the pro version of WP Cookie Consent to access more scans.
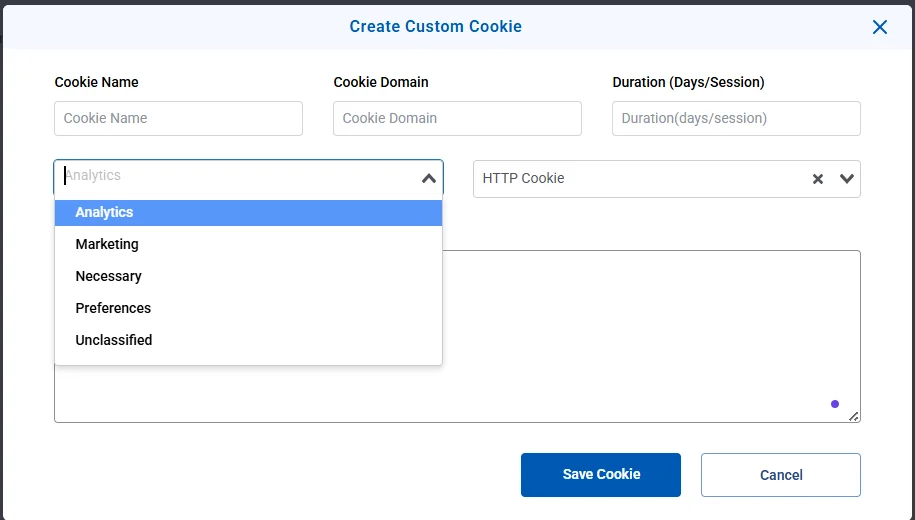
To add a custom new cookie, click the Create Cookie button under the Design customization in the WP Cookie Consent dashboard.
Next, you can easily add the name of the cookie you wish to add, the website domain where you want to add it, its duration, and purpose.
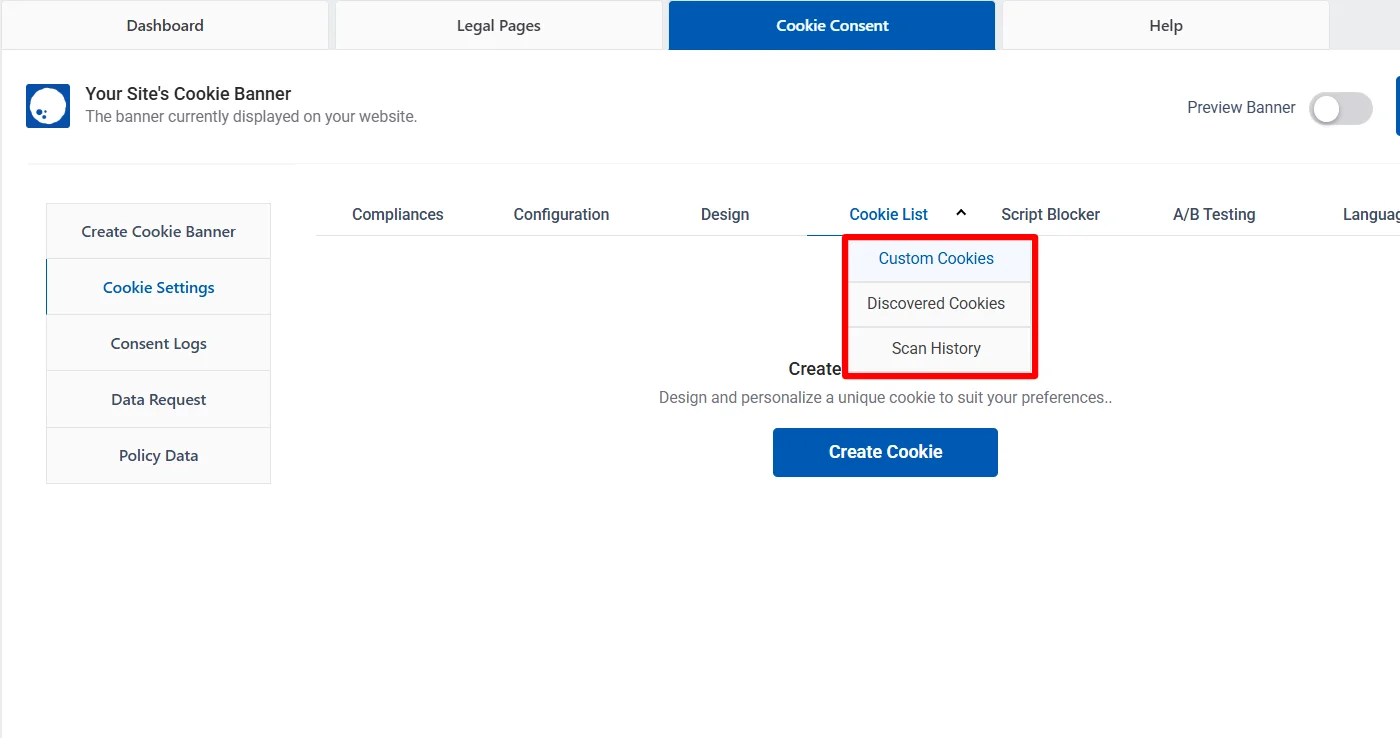
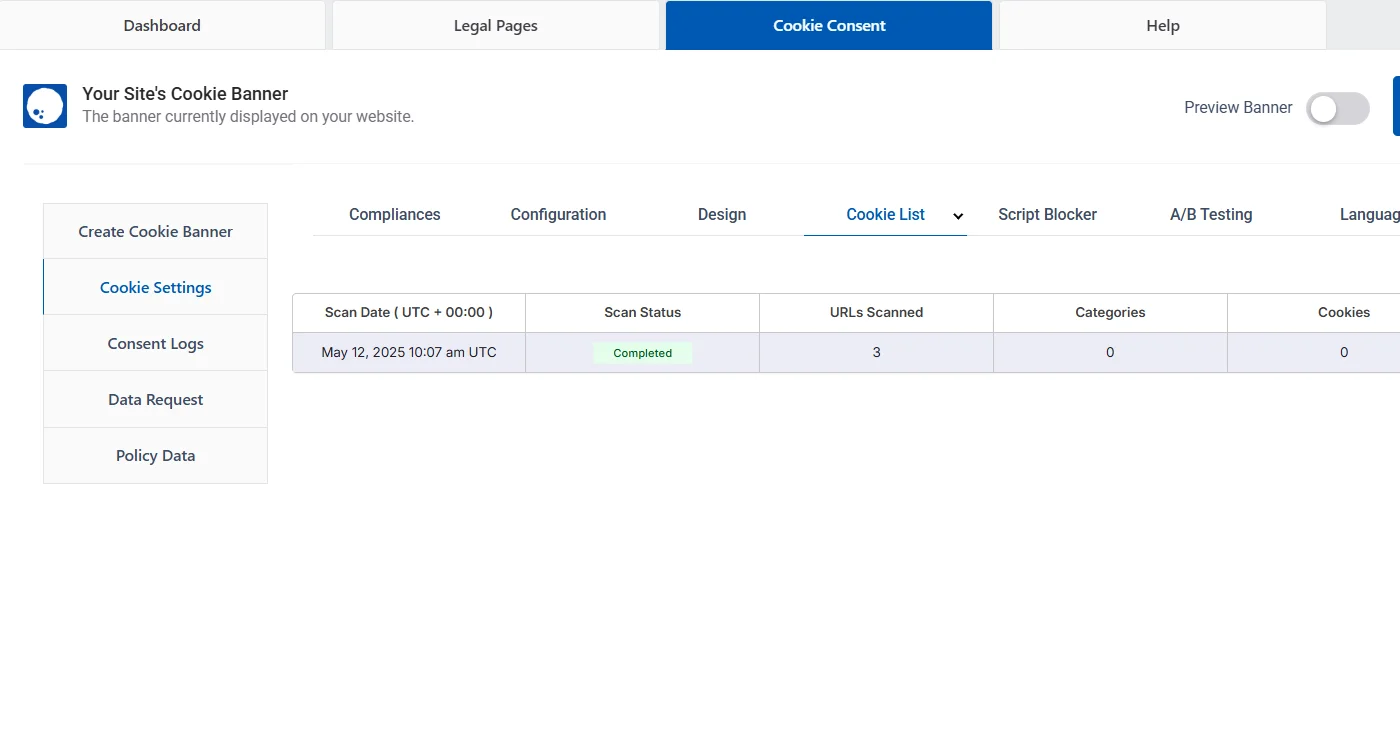
To further discover cookies on the site or check the scan history, you can switch to the option in the drop-down beside the cookie list.
In the discovered scans section, you can click on schedule scan or scan the website instantly for cookies.
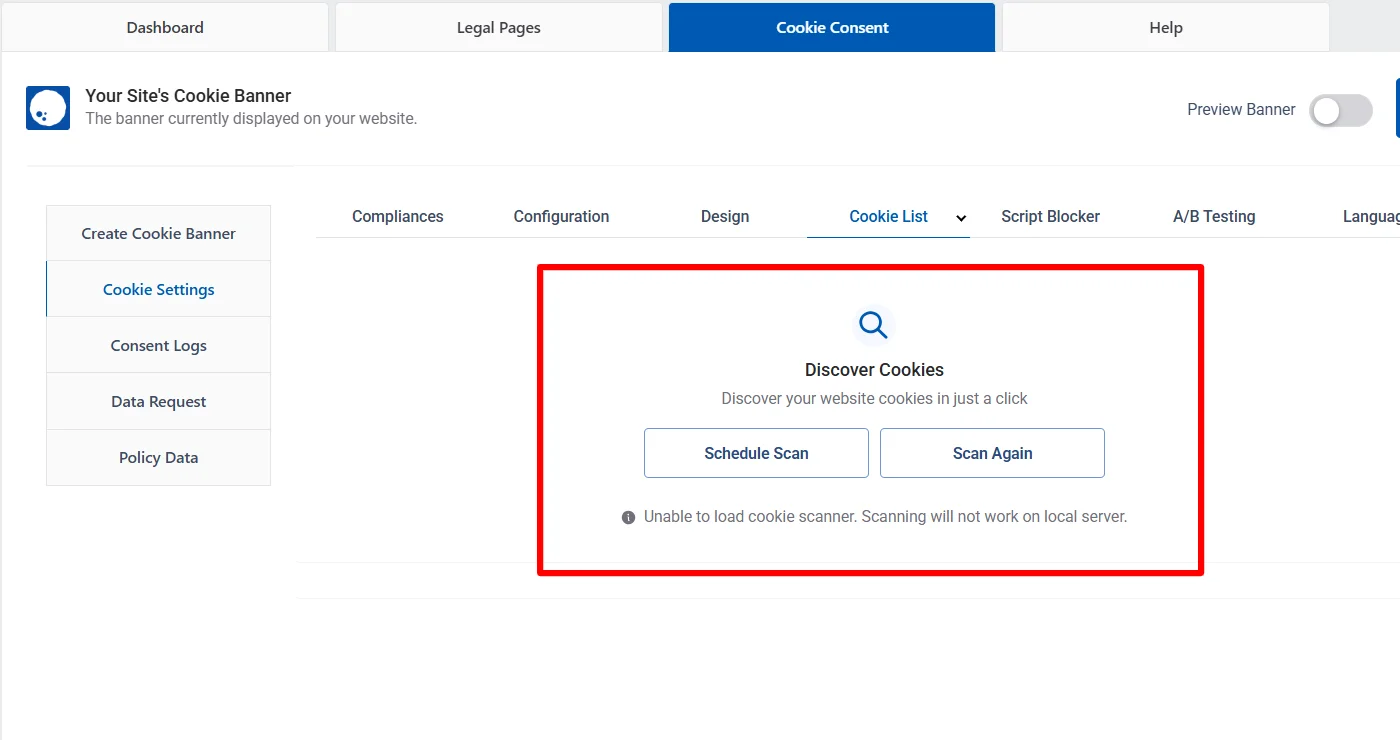
The scan history will accurately inform you of the details of the conducted scans.
(For a better explanation, you can see the details it offered when I conducted a scan of a dummy website.)
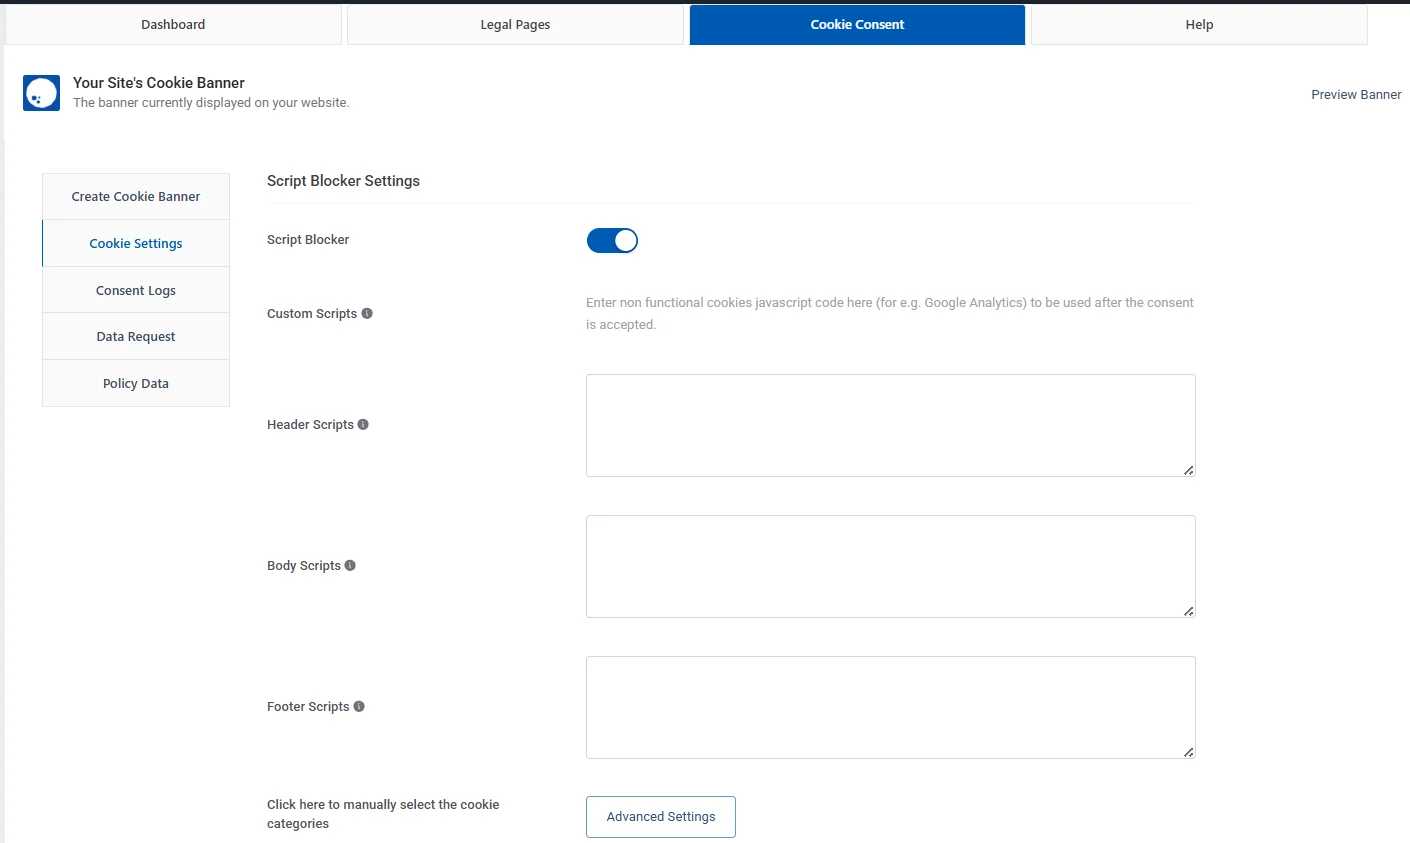
Script Blocker
With the Script Blocker customization, cookies used by third-party scripts (e.g., Google Analytics, YouTube video embeds, etc.) will be stored on visitors’ browsers according to their cookie preferences.
If a user decides not to allow marketing cookies, then third-party services will not run on that user’s browser. By default, the script blocker is off.
Enabling the script blocker setting in the WP Cookie Consent customizer enables scripts to block across different sections of the website.
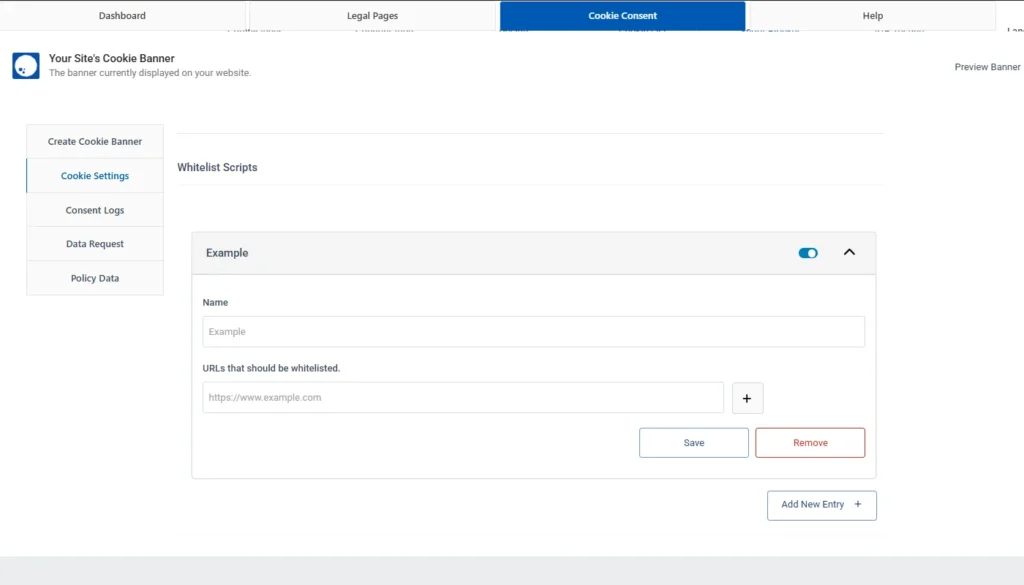
Additionally, the script locker allows you to whitelist scripts. Whitelist Script allows essential scripts to run without user consent, ensuring compliance with regulations and maintaining website functionality.
Learn more about The Benefits of using a Whitelist Approach for Cookies.
To whitelist a specific script, you can simply scroll the page and set up the required details.
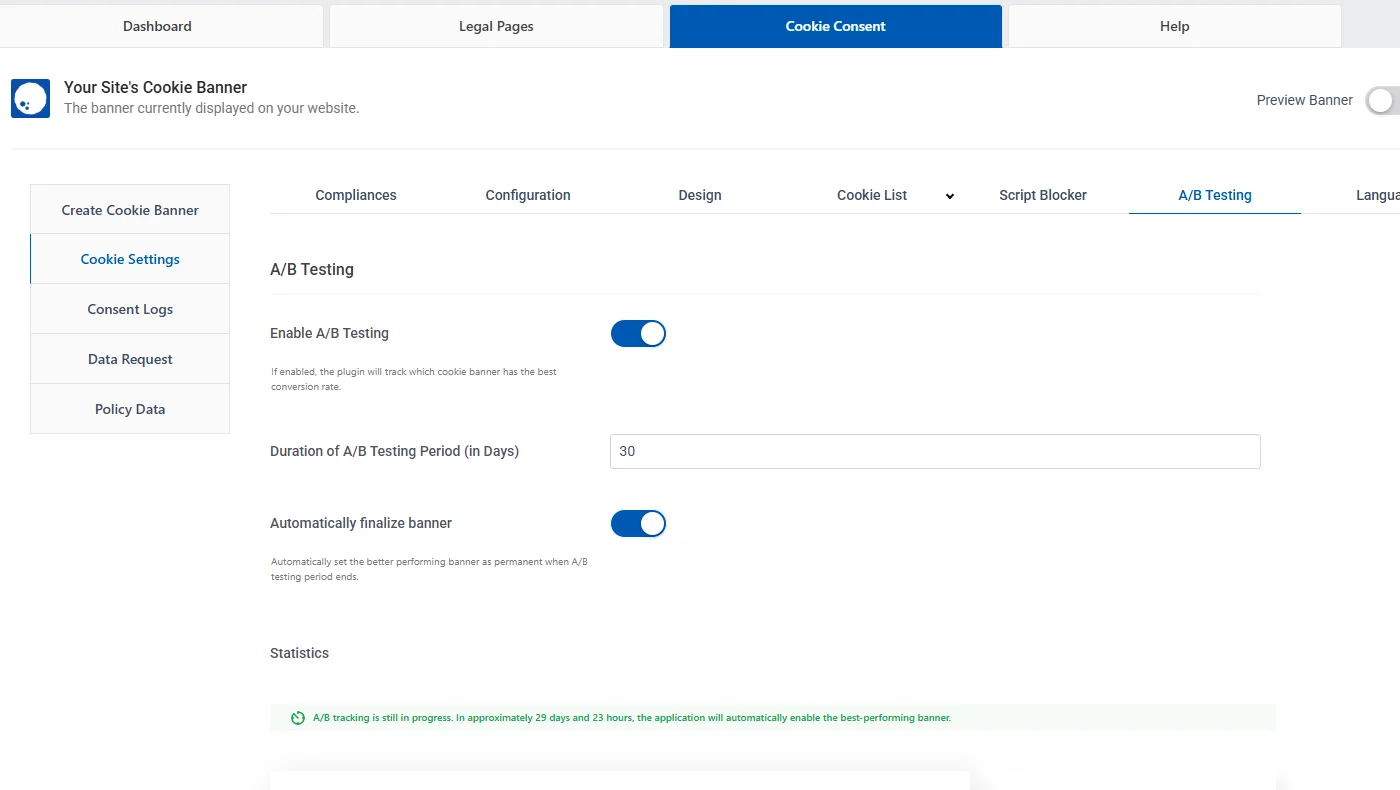
A/B Testing
The A/B testing feature in WP Cookie Consent allows users to compare the performance of two cookie banners. This feature is designed to help you identify which banner design, wording, or placement is more effective in gaining user consent, improving compliance, and enhancing user experience.
To use this feature, you can navigate to the A/B testing and enable the customizations. This allows you to set up and display two banners and test each of them for a period of 30 days, and gives you the data of the banner that performs best.
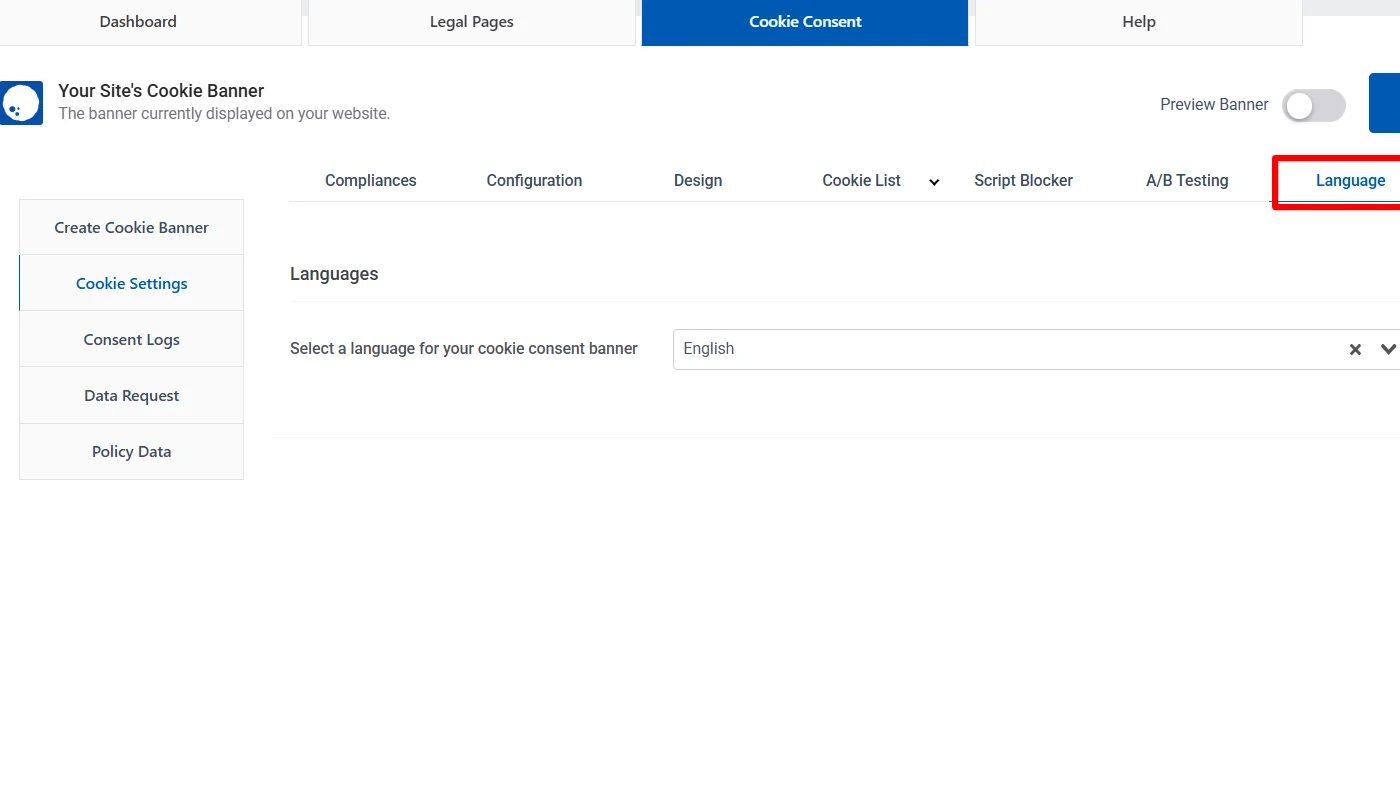
Language
The language customizations, as the name suggests, allow you to set up a language for the content to be displayed in the cookie pop-up.
Advanced Features Offered by WP Cookie Consent
In addition to all the extensive customization features of WP Cookie Consent, it also provides various additional features. Let’s explore:
Consent Logs
Consent logging is the collection of how users to a website opt in or out of the website collecting their personal data.
This data can be used to maintain a history of how users have interacted with a site. It can also be used to discover trends and improve the number of opt-ins on the site.
The log provides detailed information about user data, including IP addresses, visit dates, countries, consent status, and proof of consent. To access the user consent logs using WP Cookie consent, navigate to Consent Log from the Cookie Consent Dashboard.
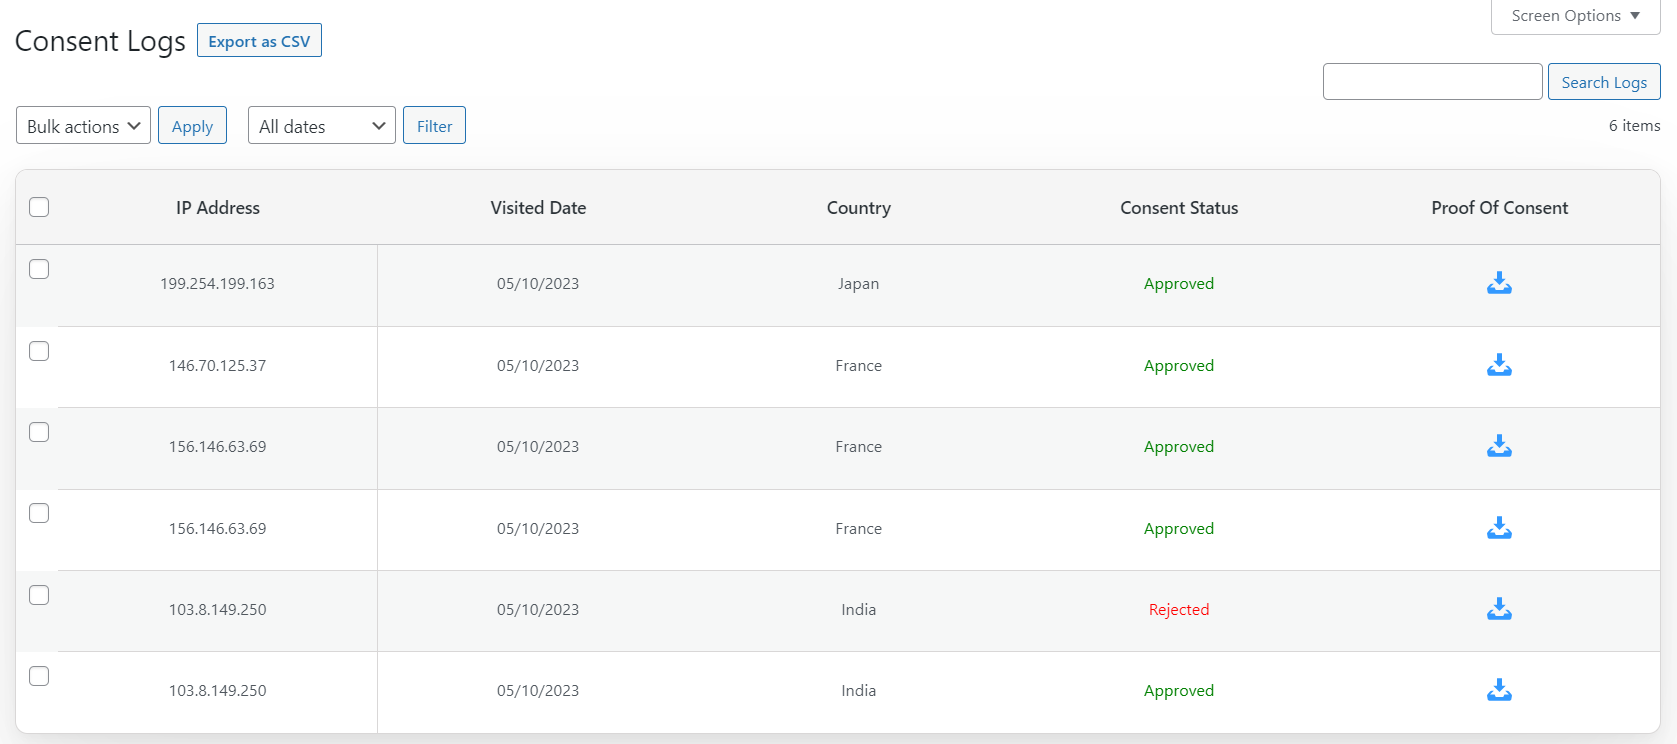
To learn more, check out our Consent Logging documentation.
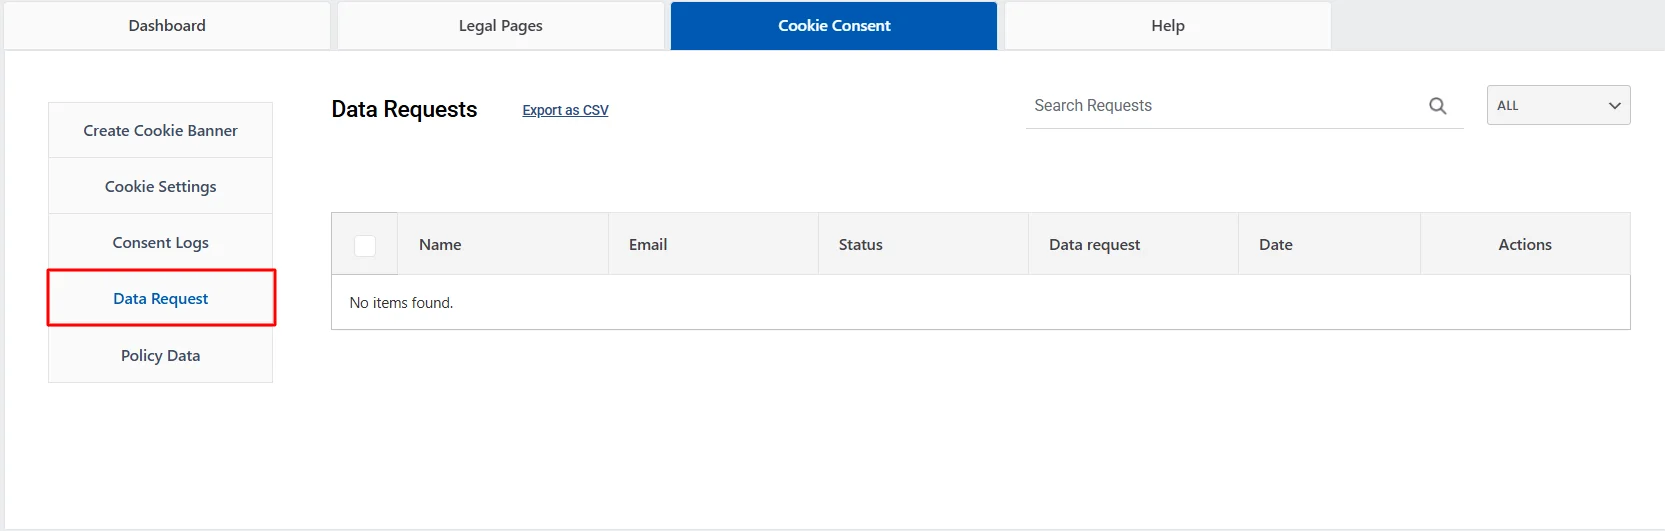
Data Requests
Similarly, like the consent log, the Data Request features allow you to keep a check and record of users’ data who agree to receive emails and notifications.
This log of data requests helps you maintain options as shown in the image below:
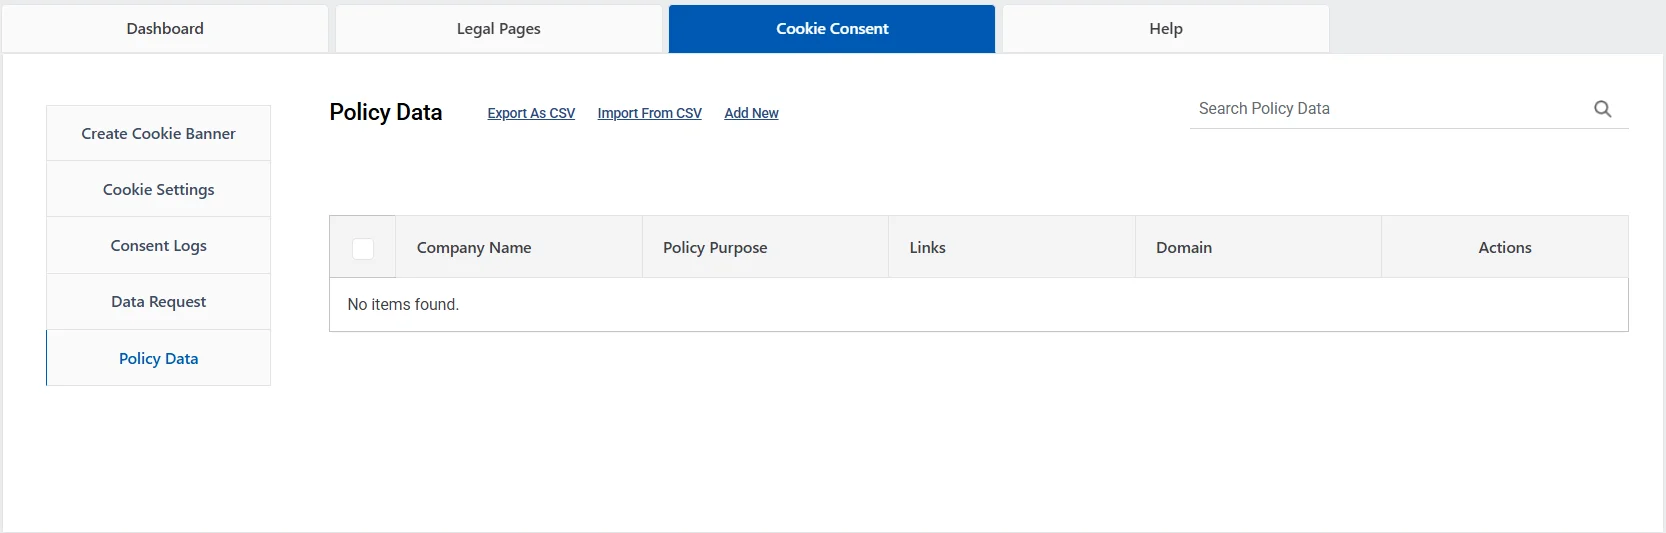
Policy Data
To generate a third-party cookie table, Policy Data shows a record of the third-party companies, their purpose, and applicable privacy policy or cookie policy link in the form of a table
Where to Display a Cookie Banner?
While it is completely up to your discretion to select the location to display the cookie banner on your website, it is recommended that you display the cookie banner where you can ensure its clear visibility.
The ideal placement is at the top or bottom of the page, as these areas are typically the first spots users notice. It can be a fixed banner that remains in view while users scroll, ensuring it captures attention without obstructing content.
Additionally, the banner should be styled to match the website’s design, using contrasting colors for clarity.
FAQ
A cookie banner is a notification that is shown on a website when a visitor accesses it for the first time. It lets visitors know that the website uses cookies and tracking tools, and allows them to accept, decline, or modify their cookie settings.
The easiest and most efficient method to add a cookie banner to your WordPress website is to use the WP Cookie Consent plugin. This free plugin allows you to create a compliant cookie banner in just a few steps:
1. Install and activate the WP Cookie Consent plugin
2. Navigate to WP Legal Pages > Cookie Consent.
3. Configure your banner preferences – choose your compliance laws (like GDPR), customize the look, enable consent logging, and select where the banner should appear.
4. Customize further if needed – edit design, behavior, and even run A/B tests to optimize the banner.
5. Preview and publish your banner.
A cookie banner should always be placed where it’s immediately visible to your visitors. The most recommended positions are:
1. Top of the page
2. Bottom of the page
Cookie banners must clearly inform users, obtain explicit consent for non-essential cookies, offer preference choices, link to a privacy policy, log consent details, and allow users to change or withdraw consent anytime.
Conclusion
A cookie banner on your WordPress website isn’t just a best practice; it’s a legal necessity in today’s data-driven world.
With plugins such as WP Cookie Consent, you can design, set up, and maintain a fully compliant banner without coding. It keeps you on the level, encourages user trust, and lets you make the necessary requirements for GDPR privacy legislation.
Further, if you liked this article, also check out:
- How to Make Your WordPress Website CCPA Compliant
- How to Write a Return Policy For Your Website
- How to Add a GDPR-Compliant Cookie Policy To Your Website (Step-by-Step Guide)
All consider checking out the WPLP Compliance platform, an all-in-one solution for all your website’s legal needs.