
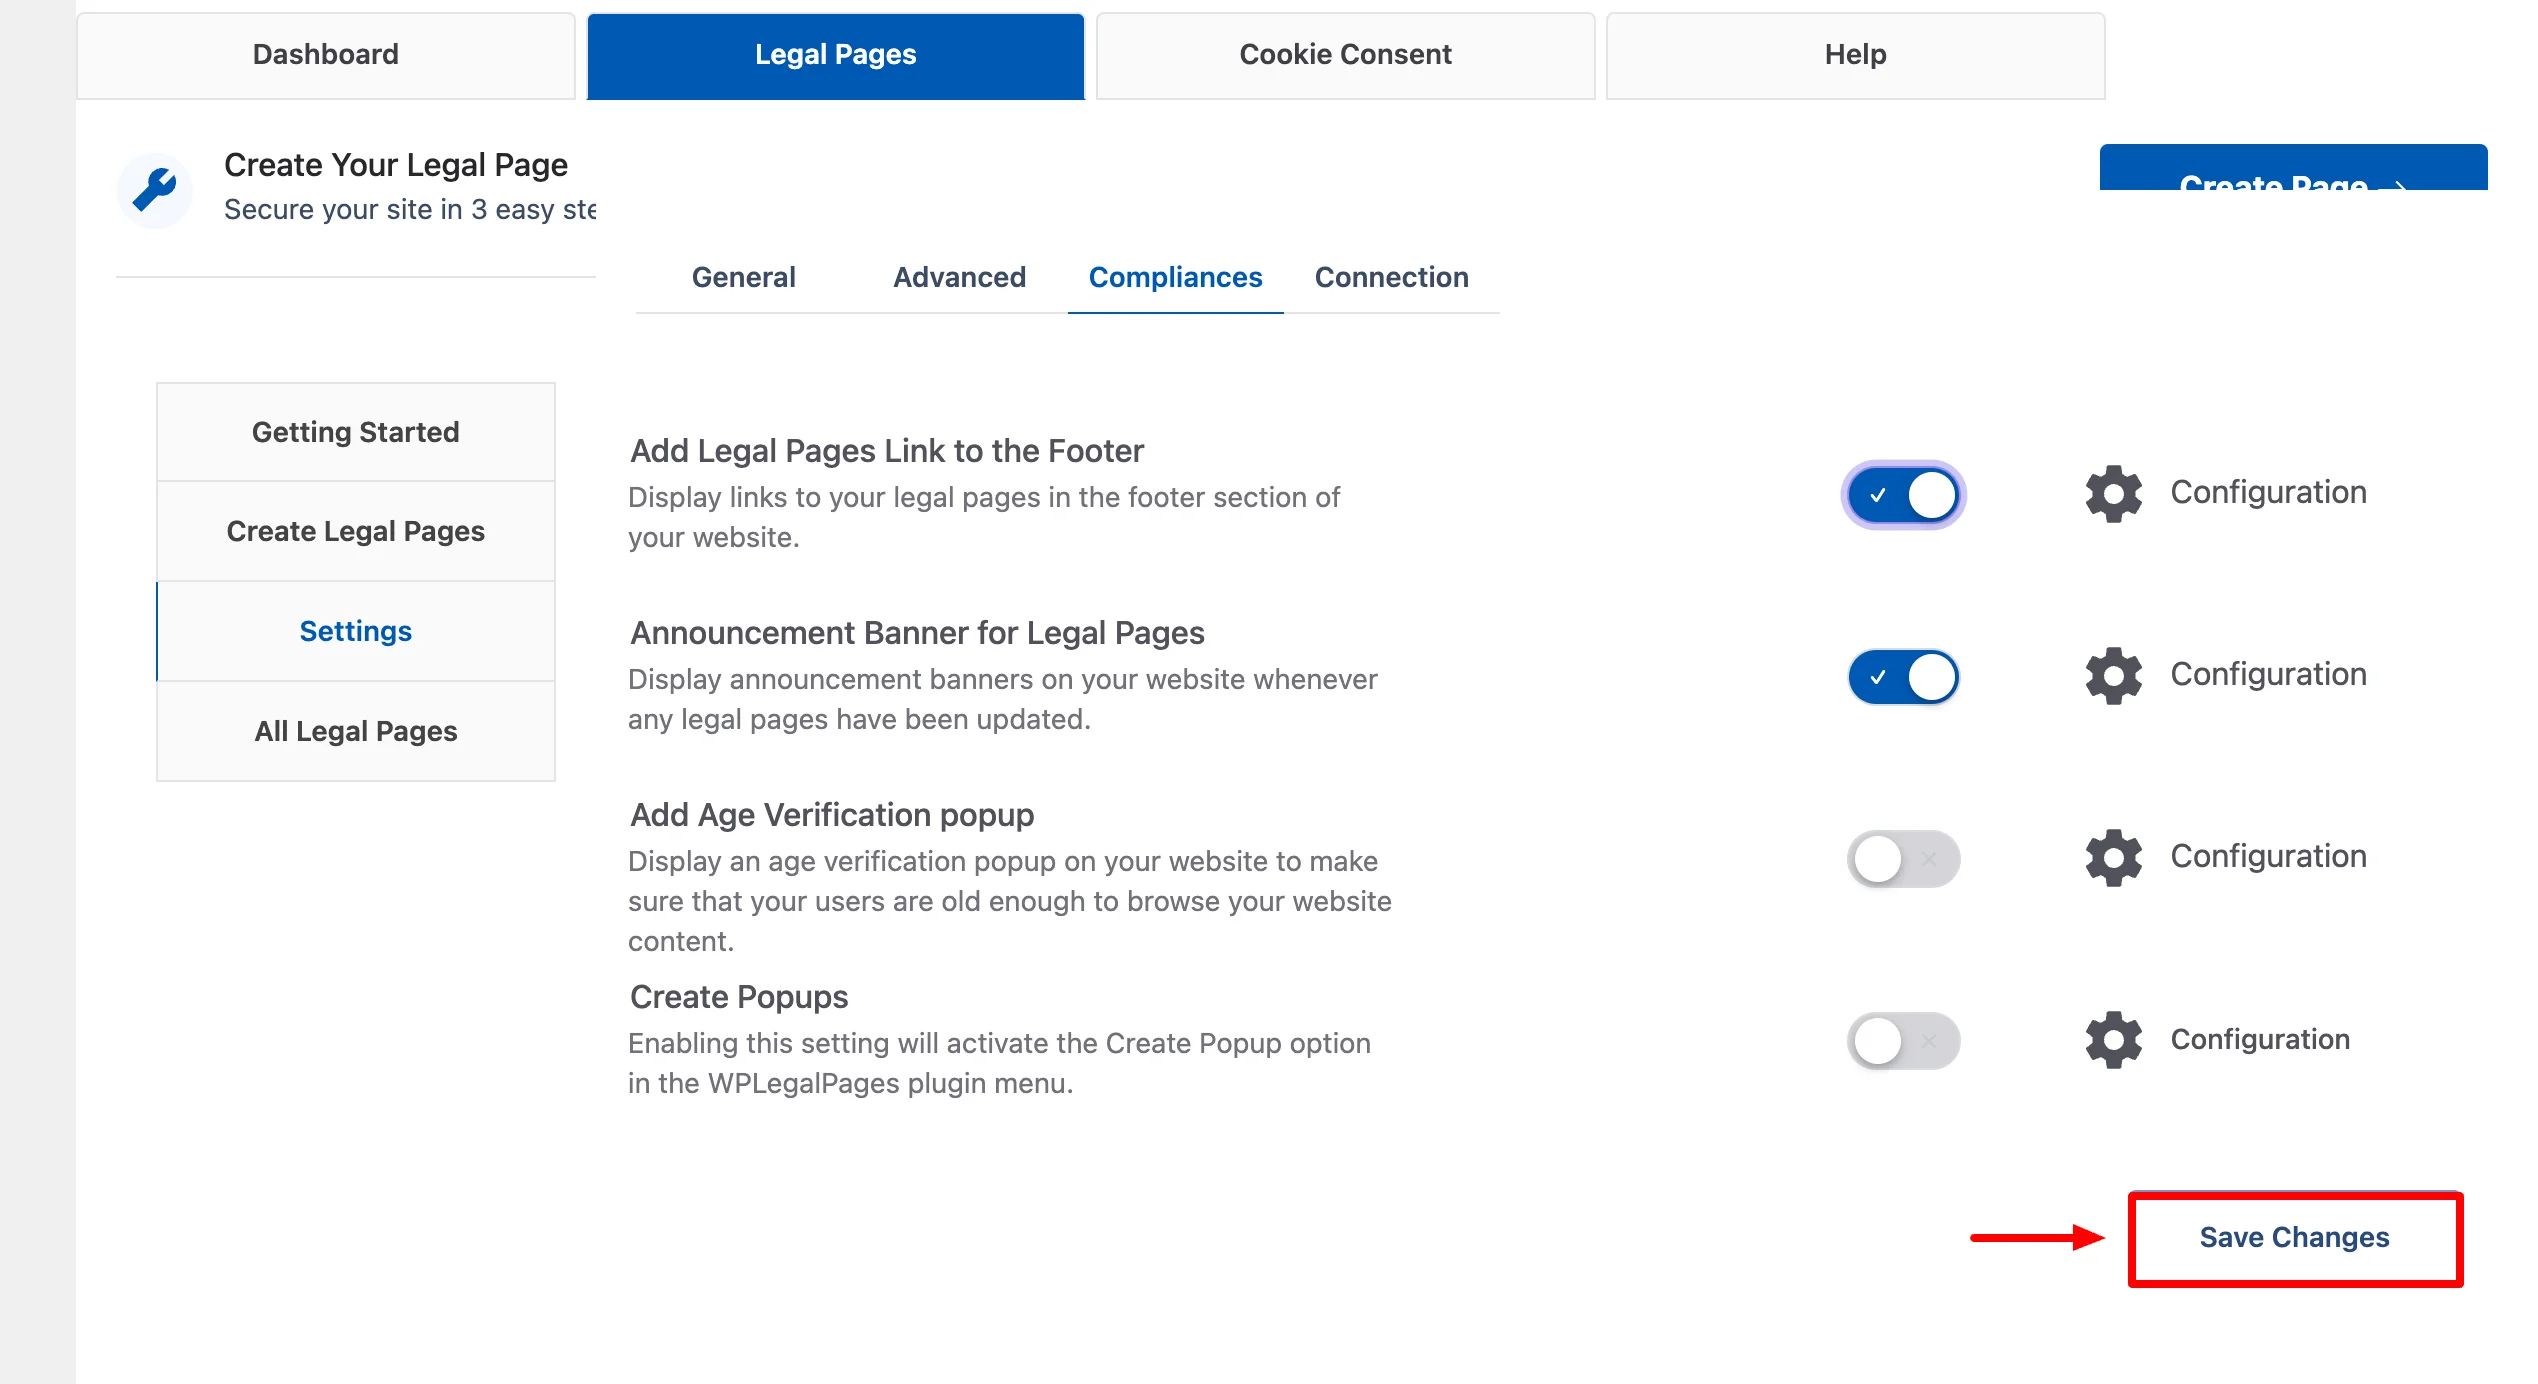
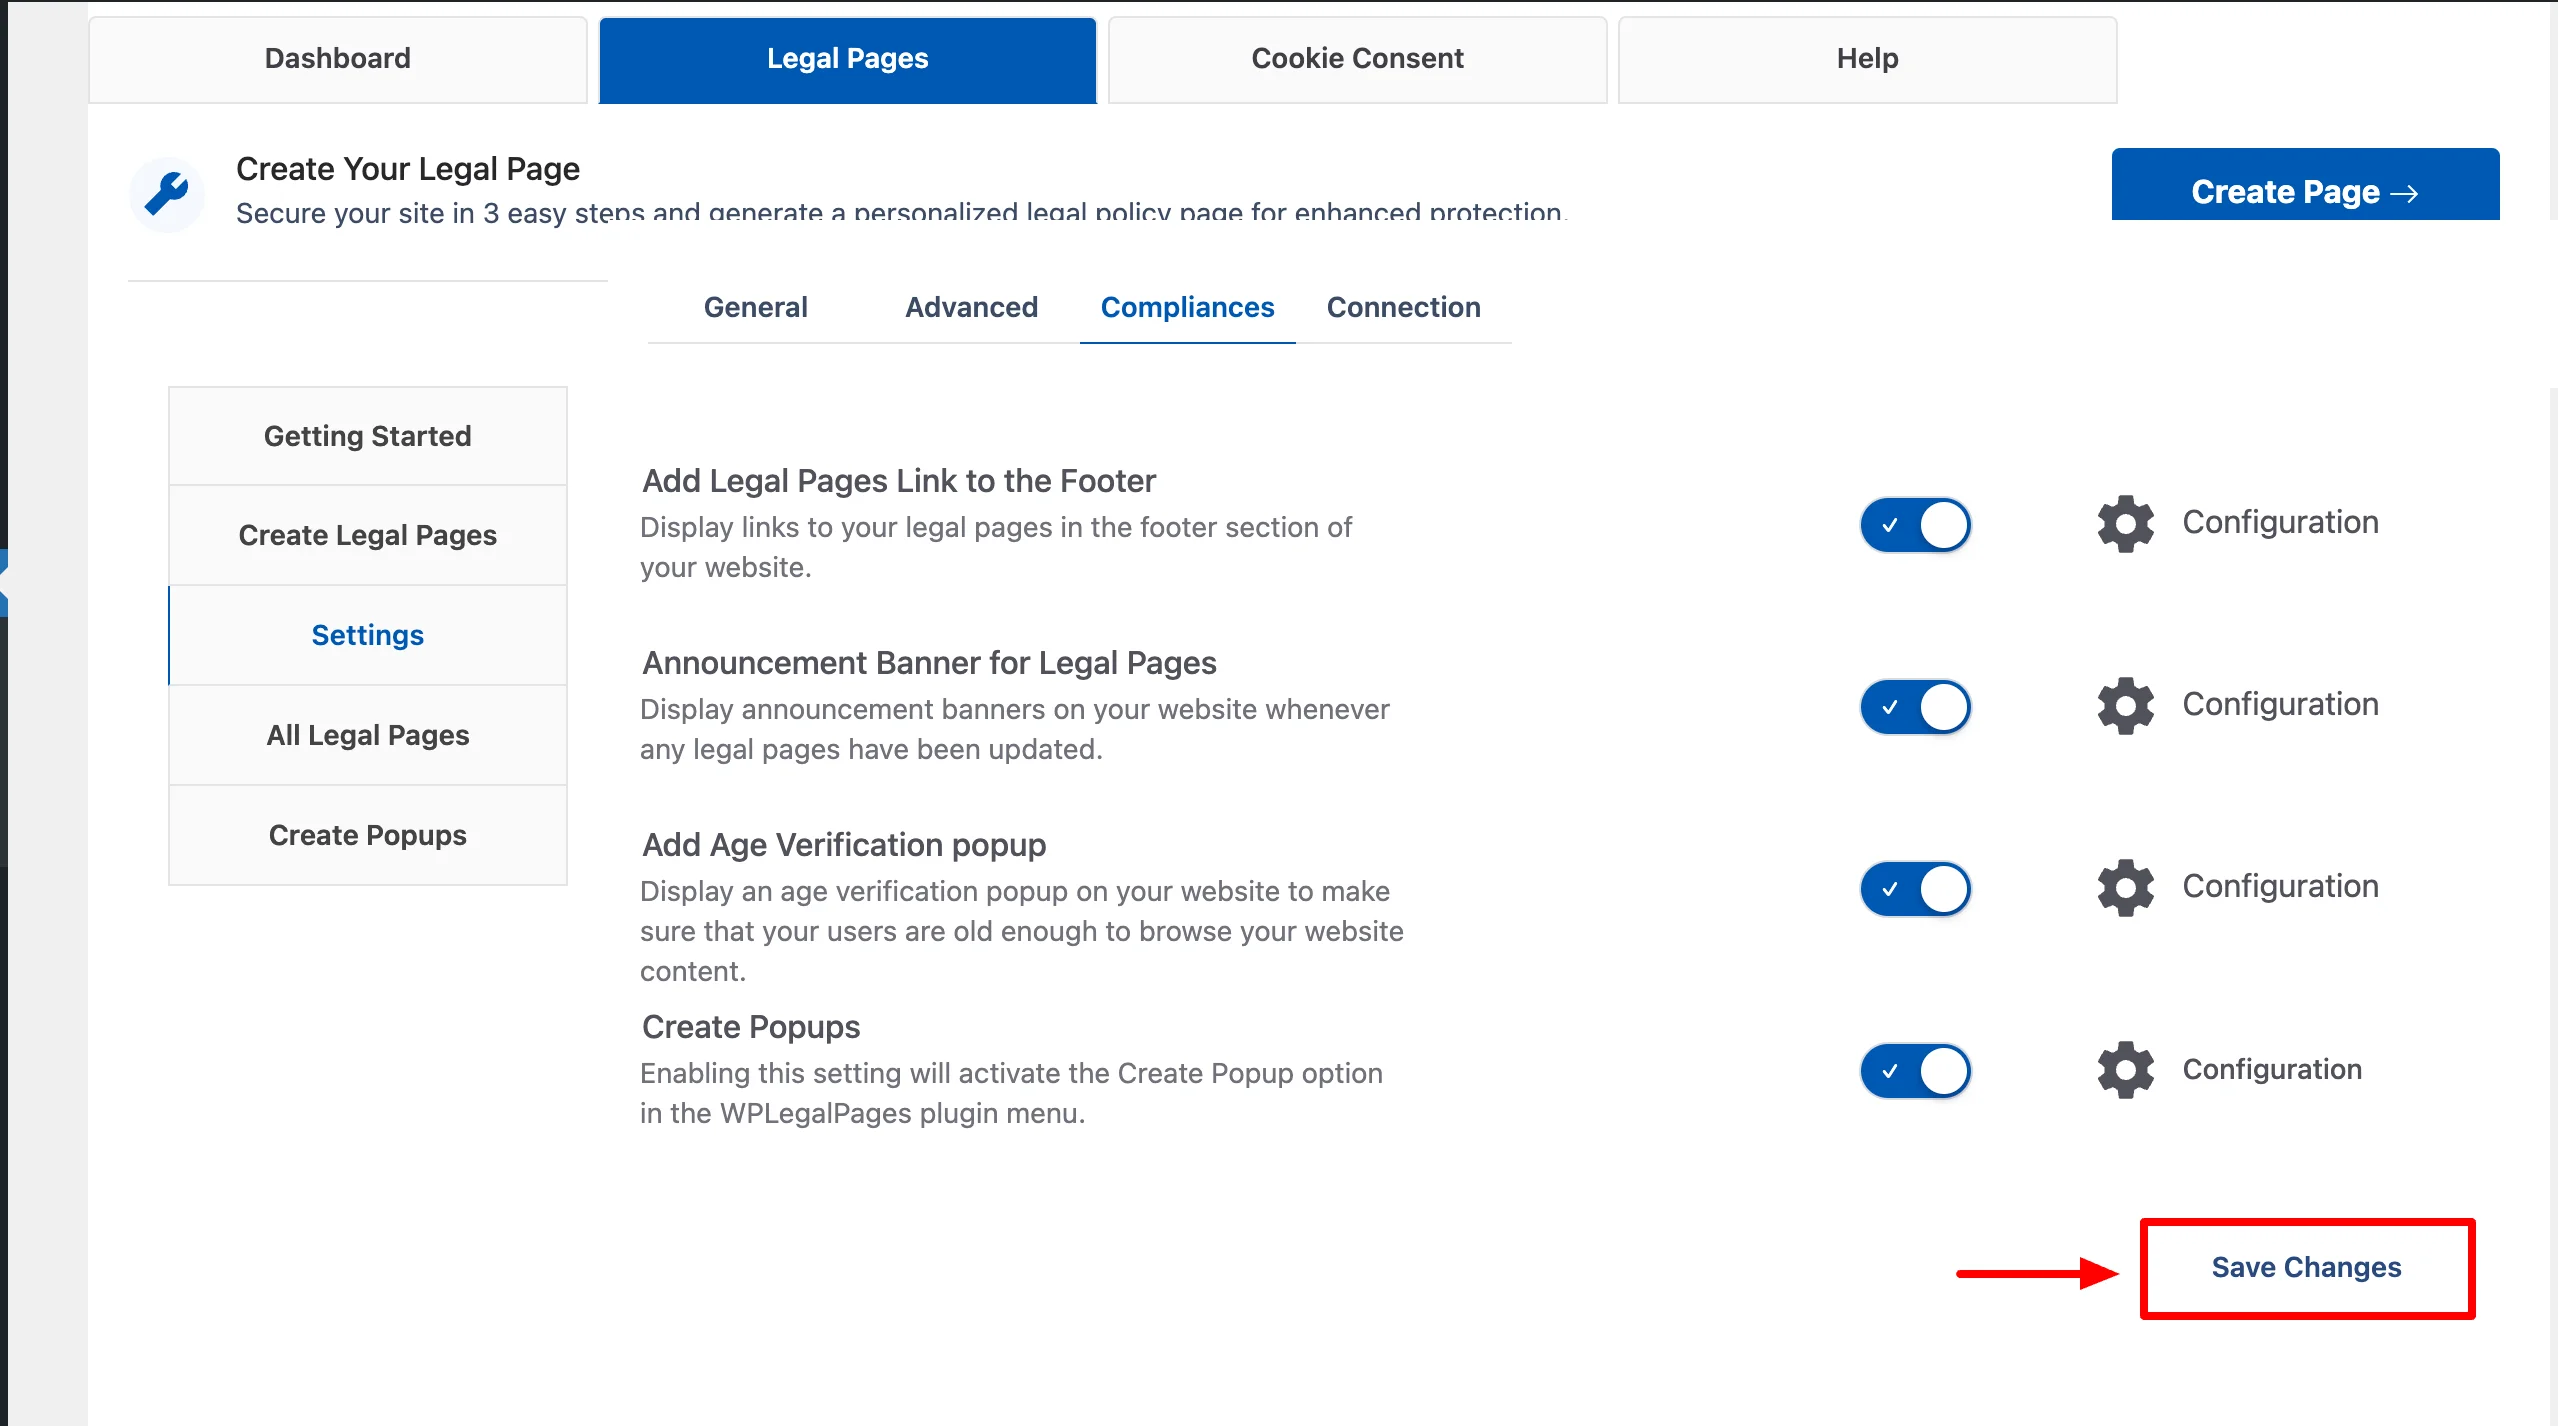
The Compliance Settings option features a set of useful settings that can assist you with specific legal requirements. WP Legal Pages has four compliance settings options:
- Add Legal Pages links to the footer
- Announcement banner for legal pages.
- Add an age verification pop-up
- Create popups
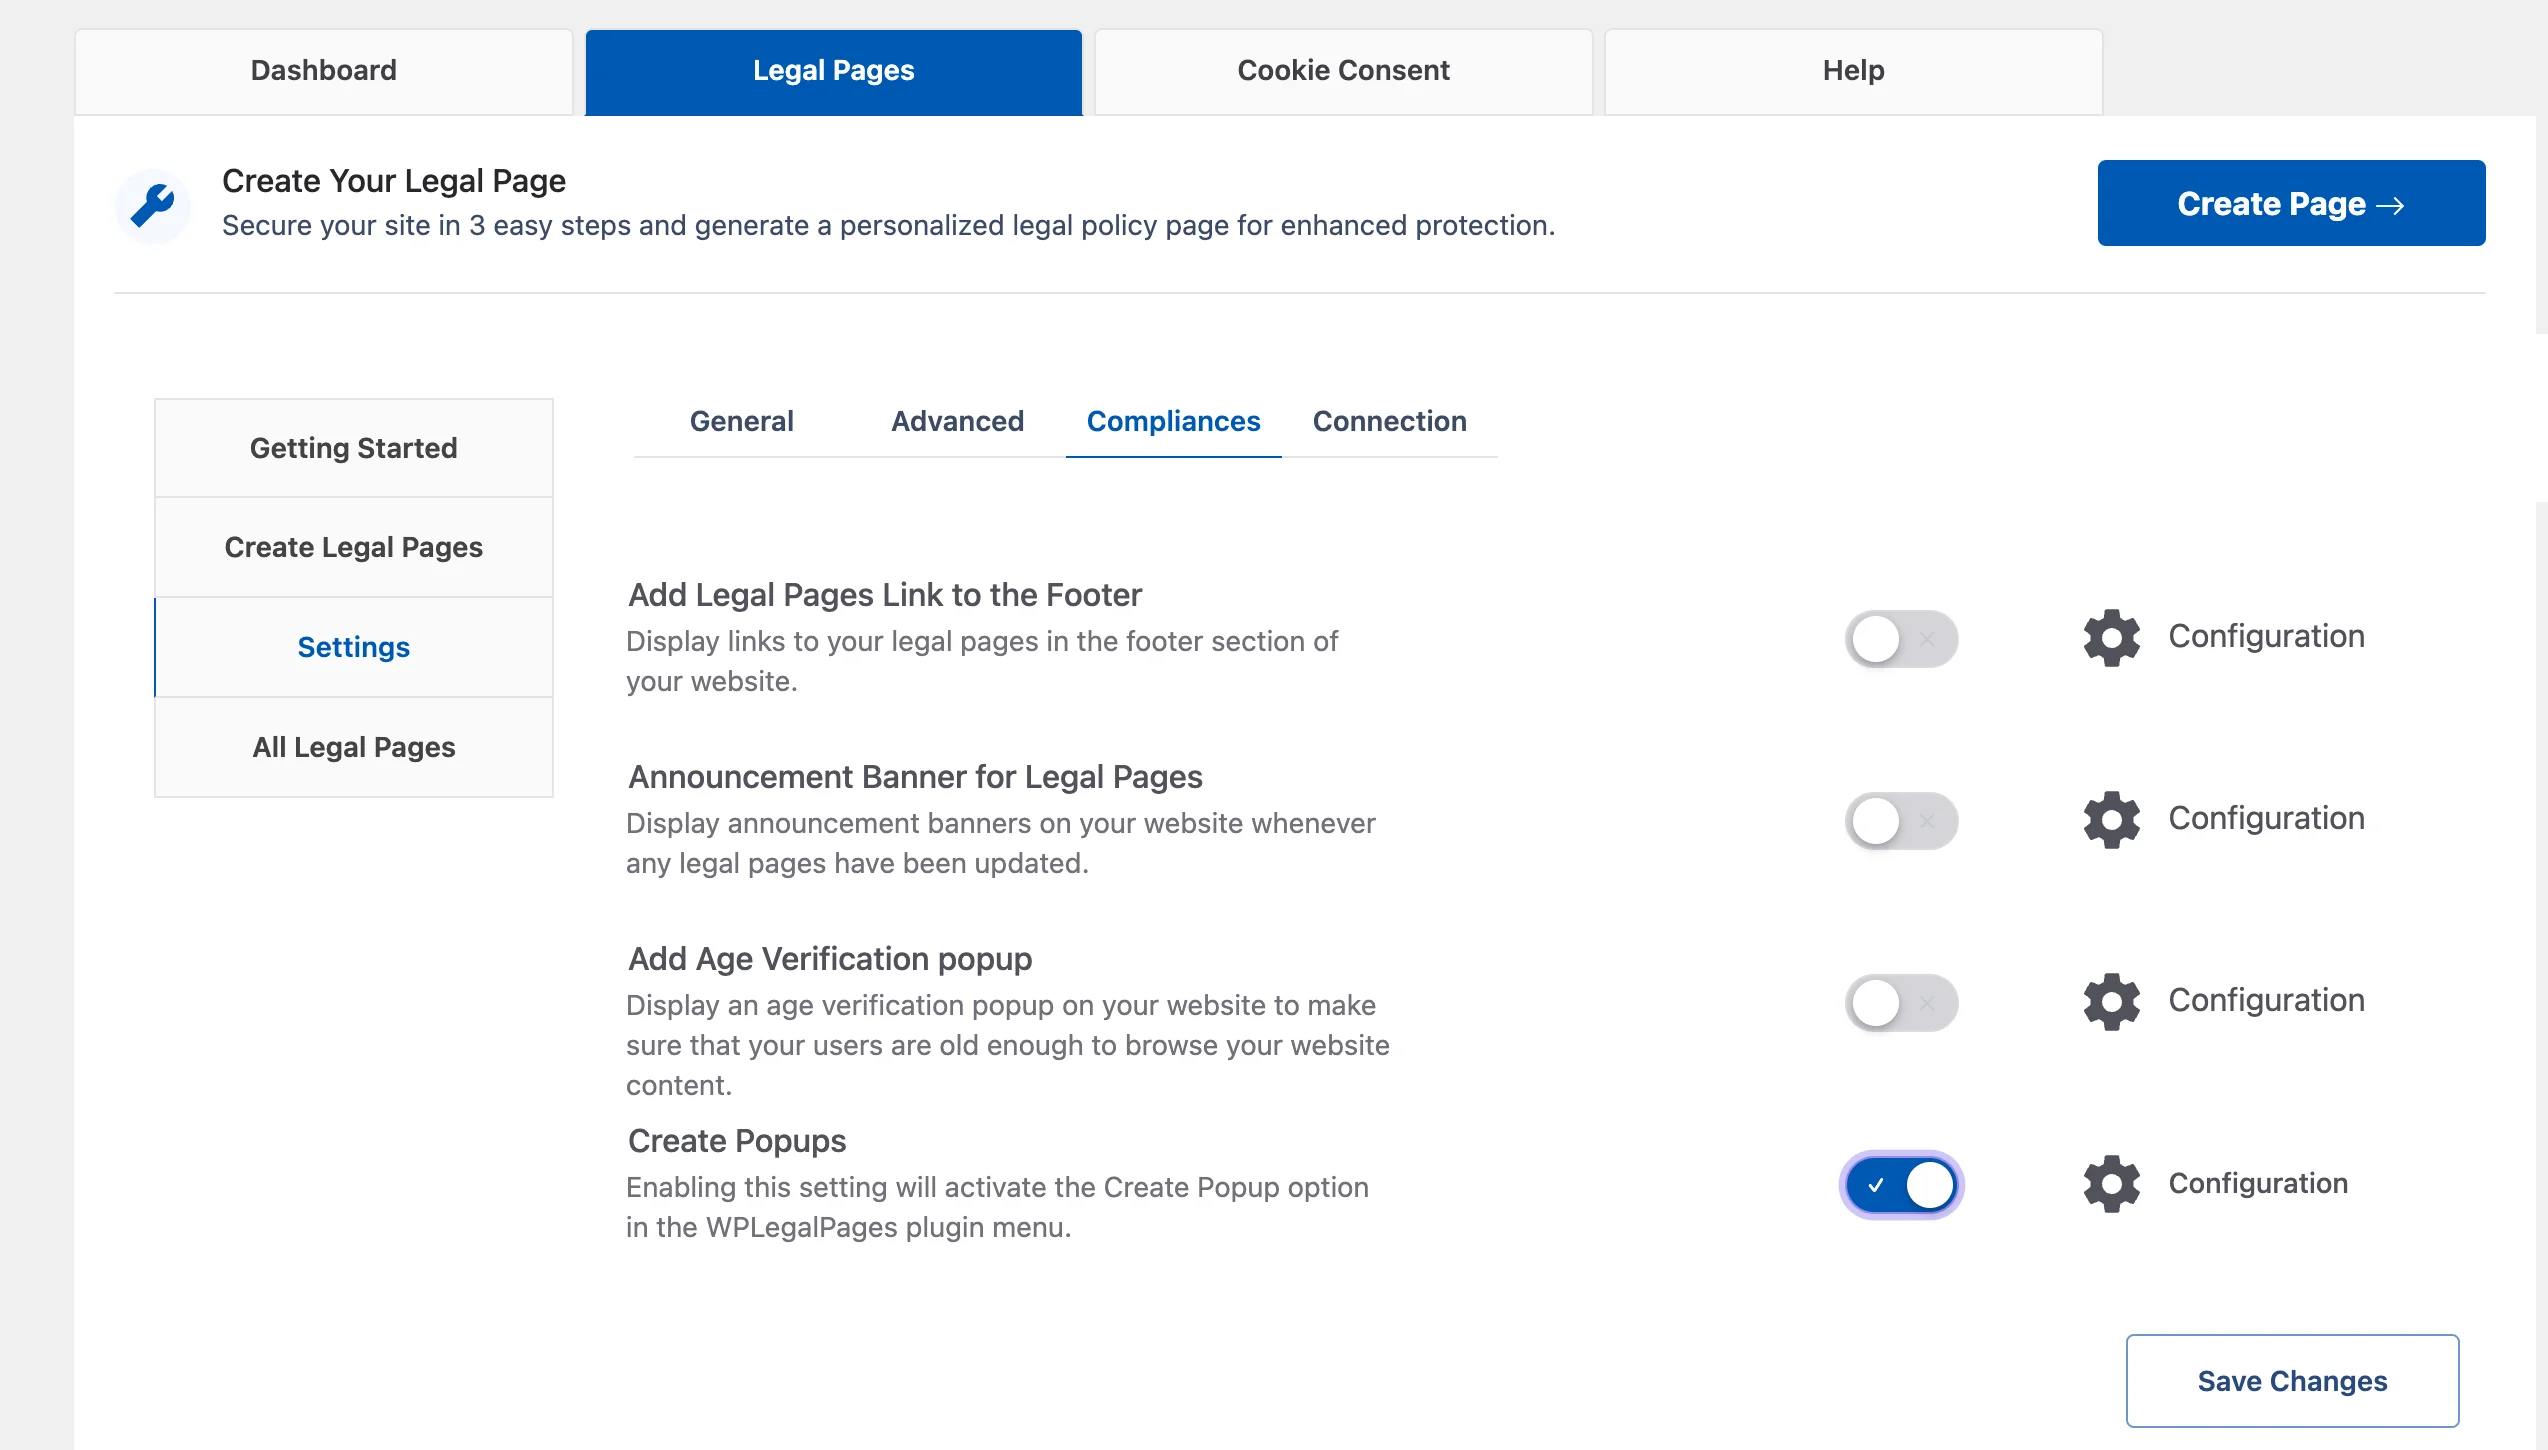
Compliance Settings #
Let’s check the settings of the Compliance tab.
1. Adding Legal Page Links to The Footer #
This feature allows you to display links to your legal pages in the footer section of your website.
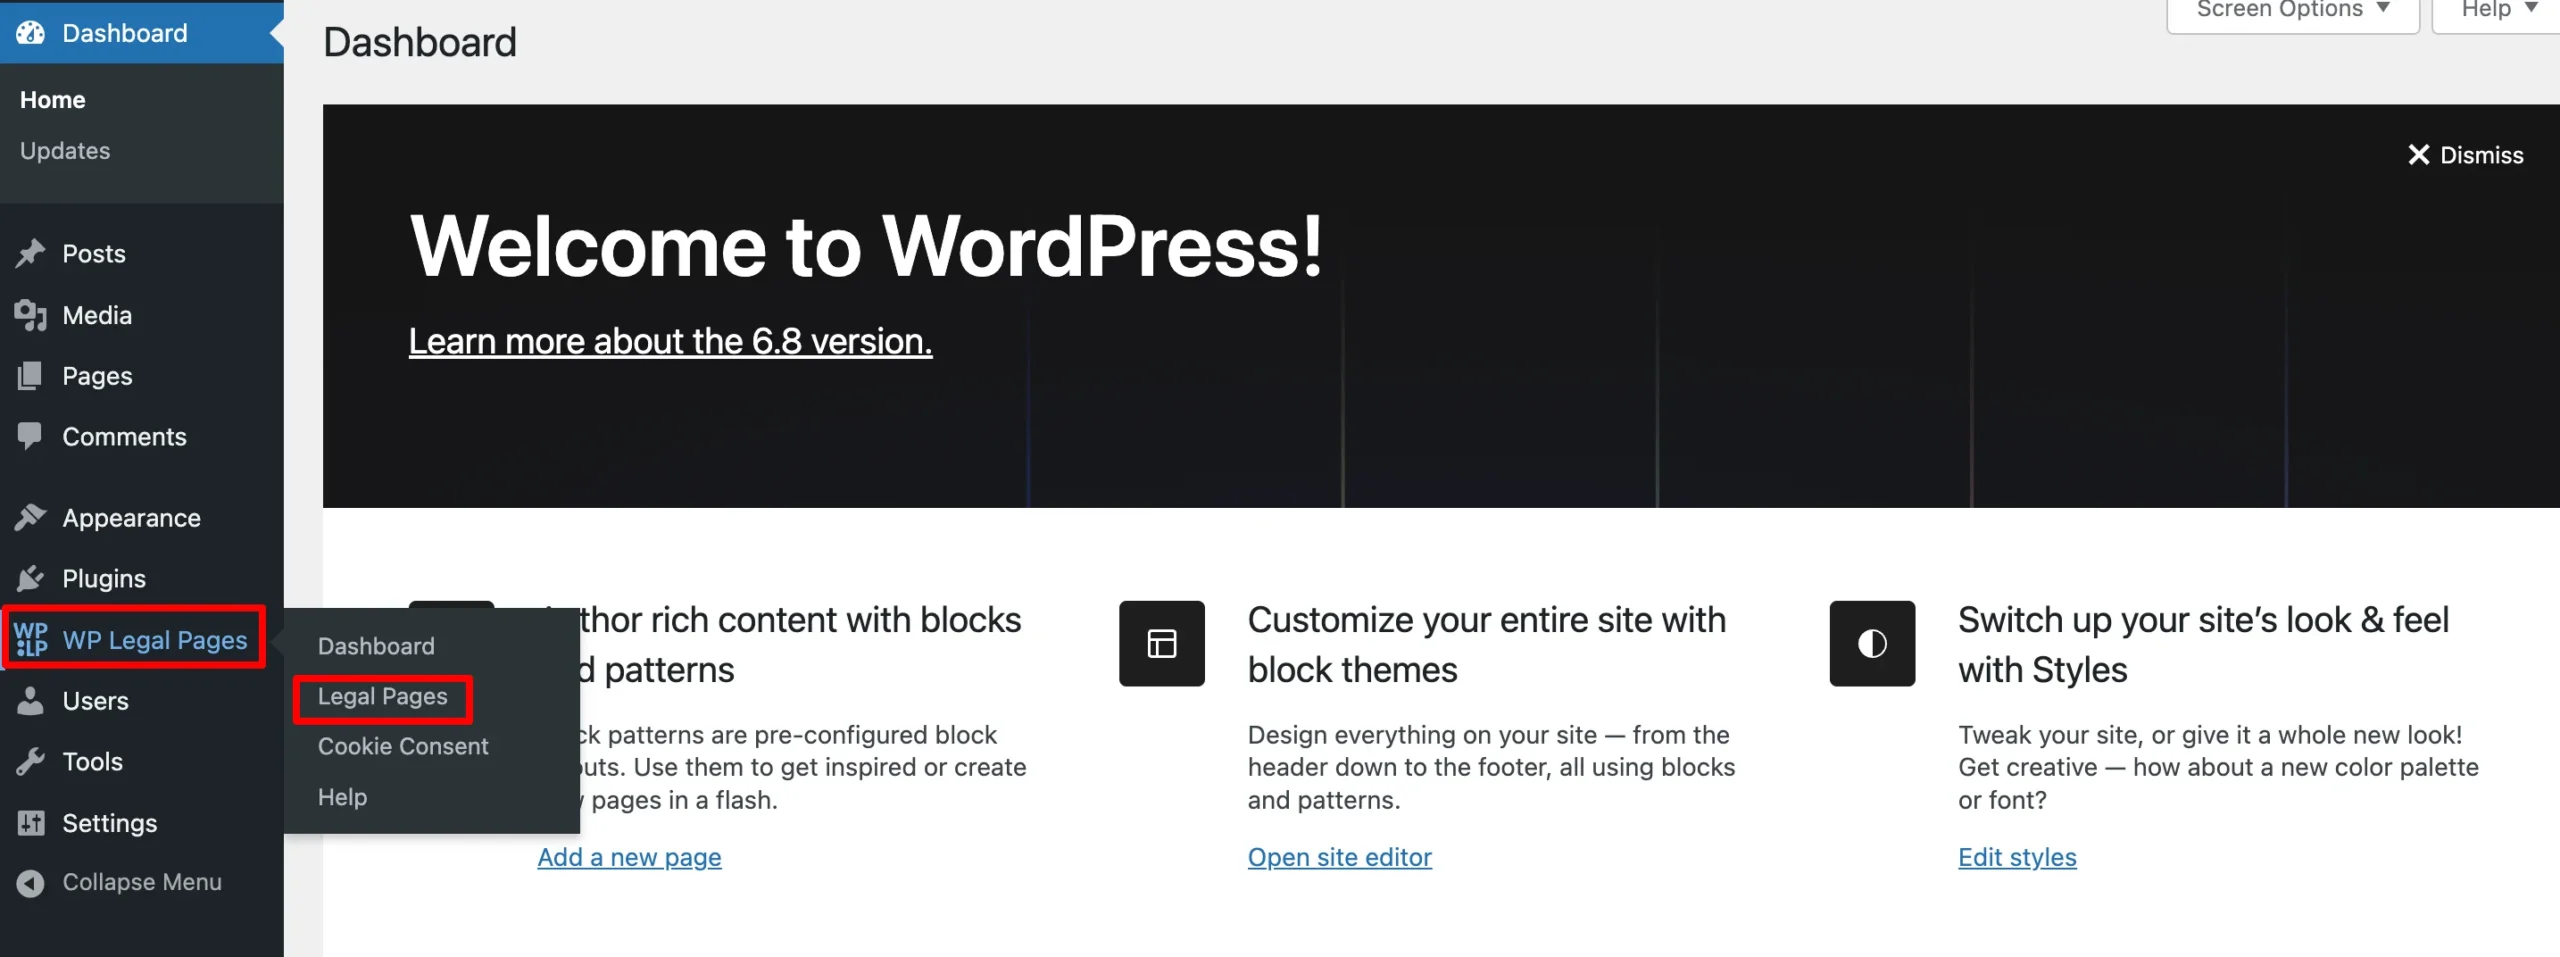
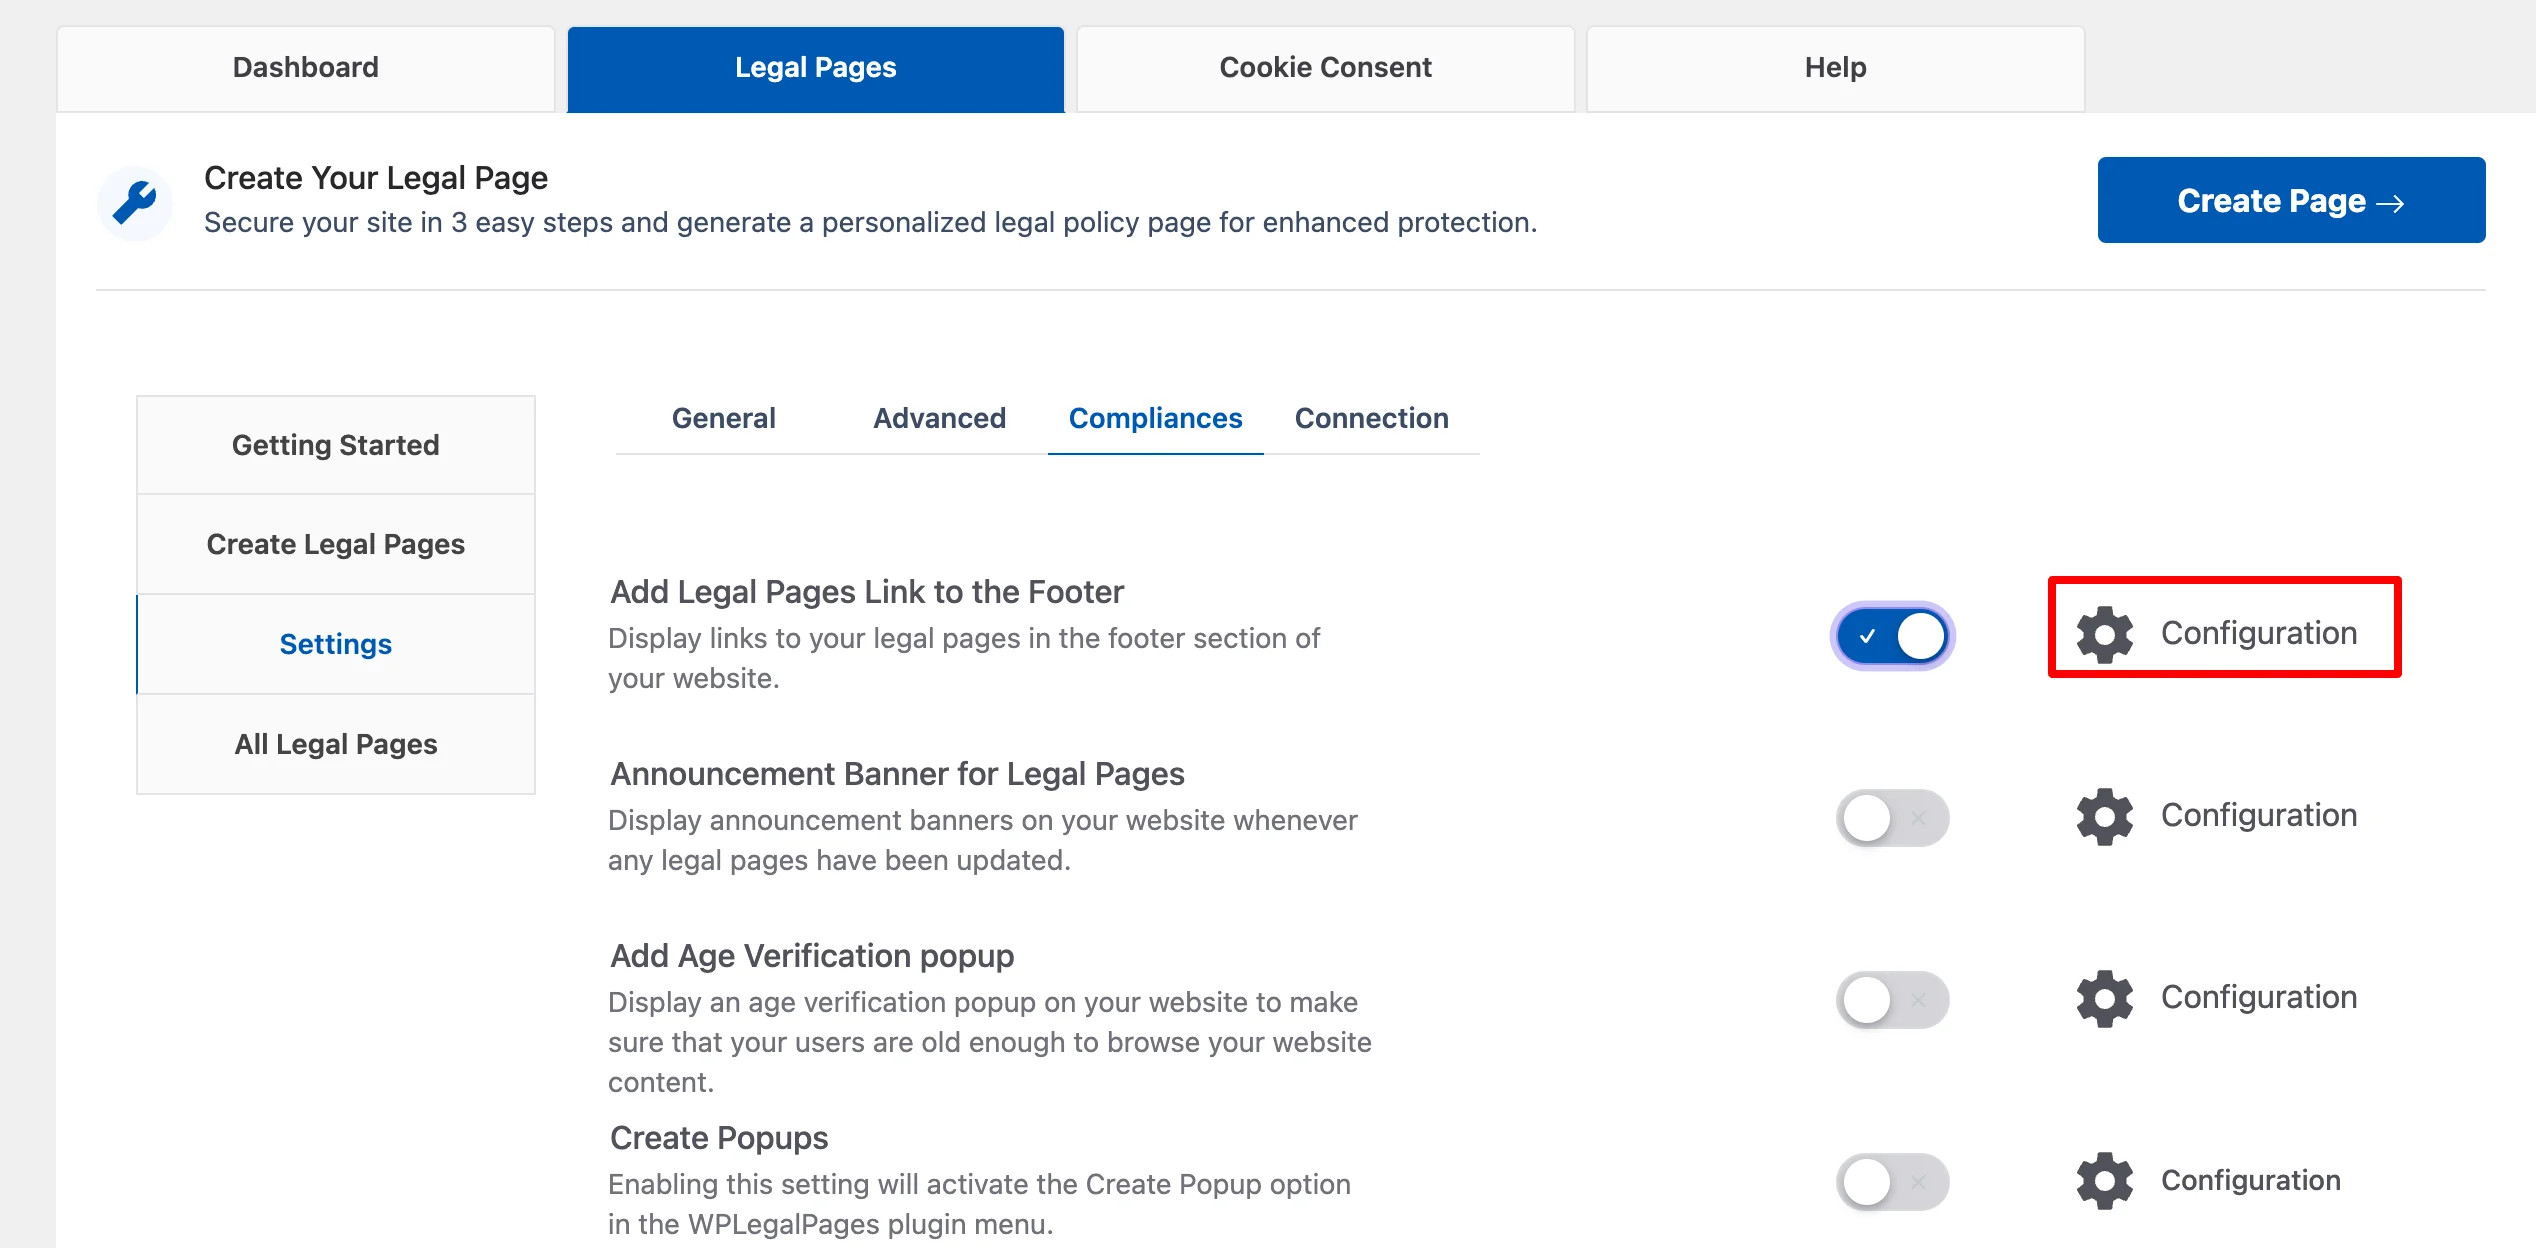
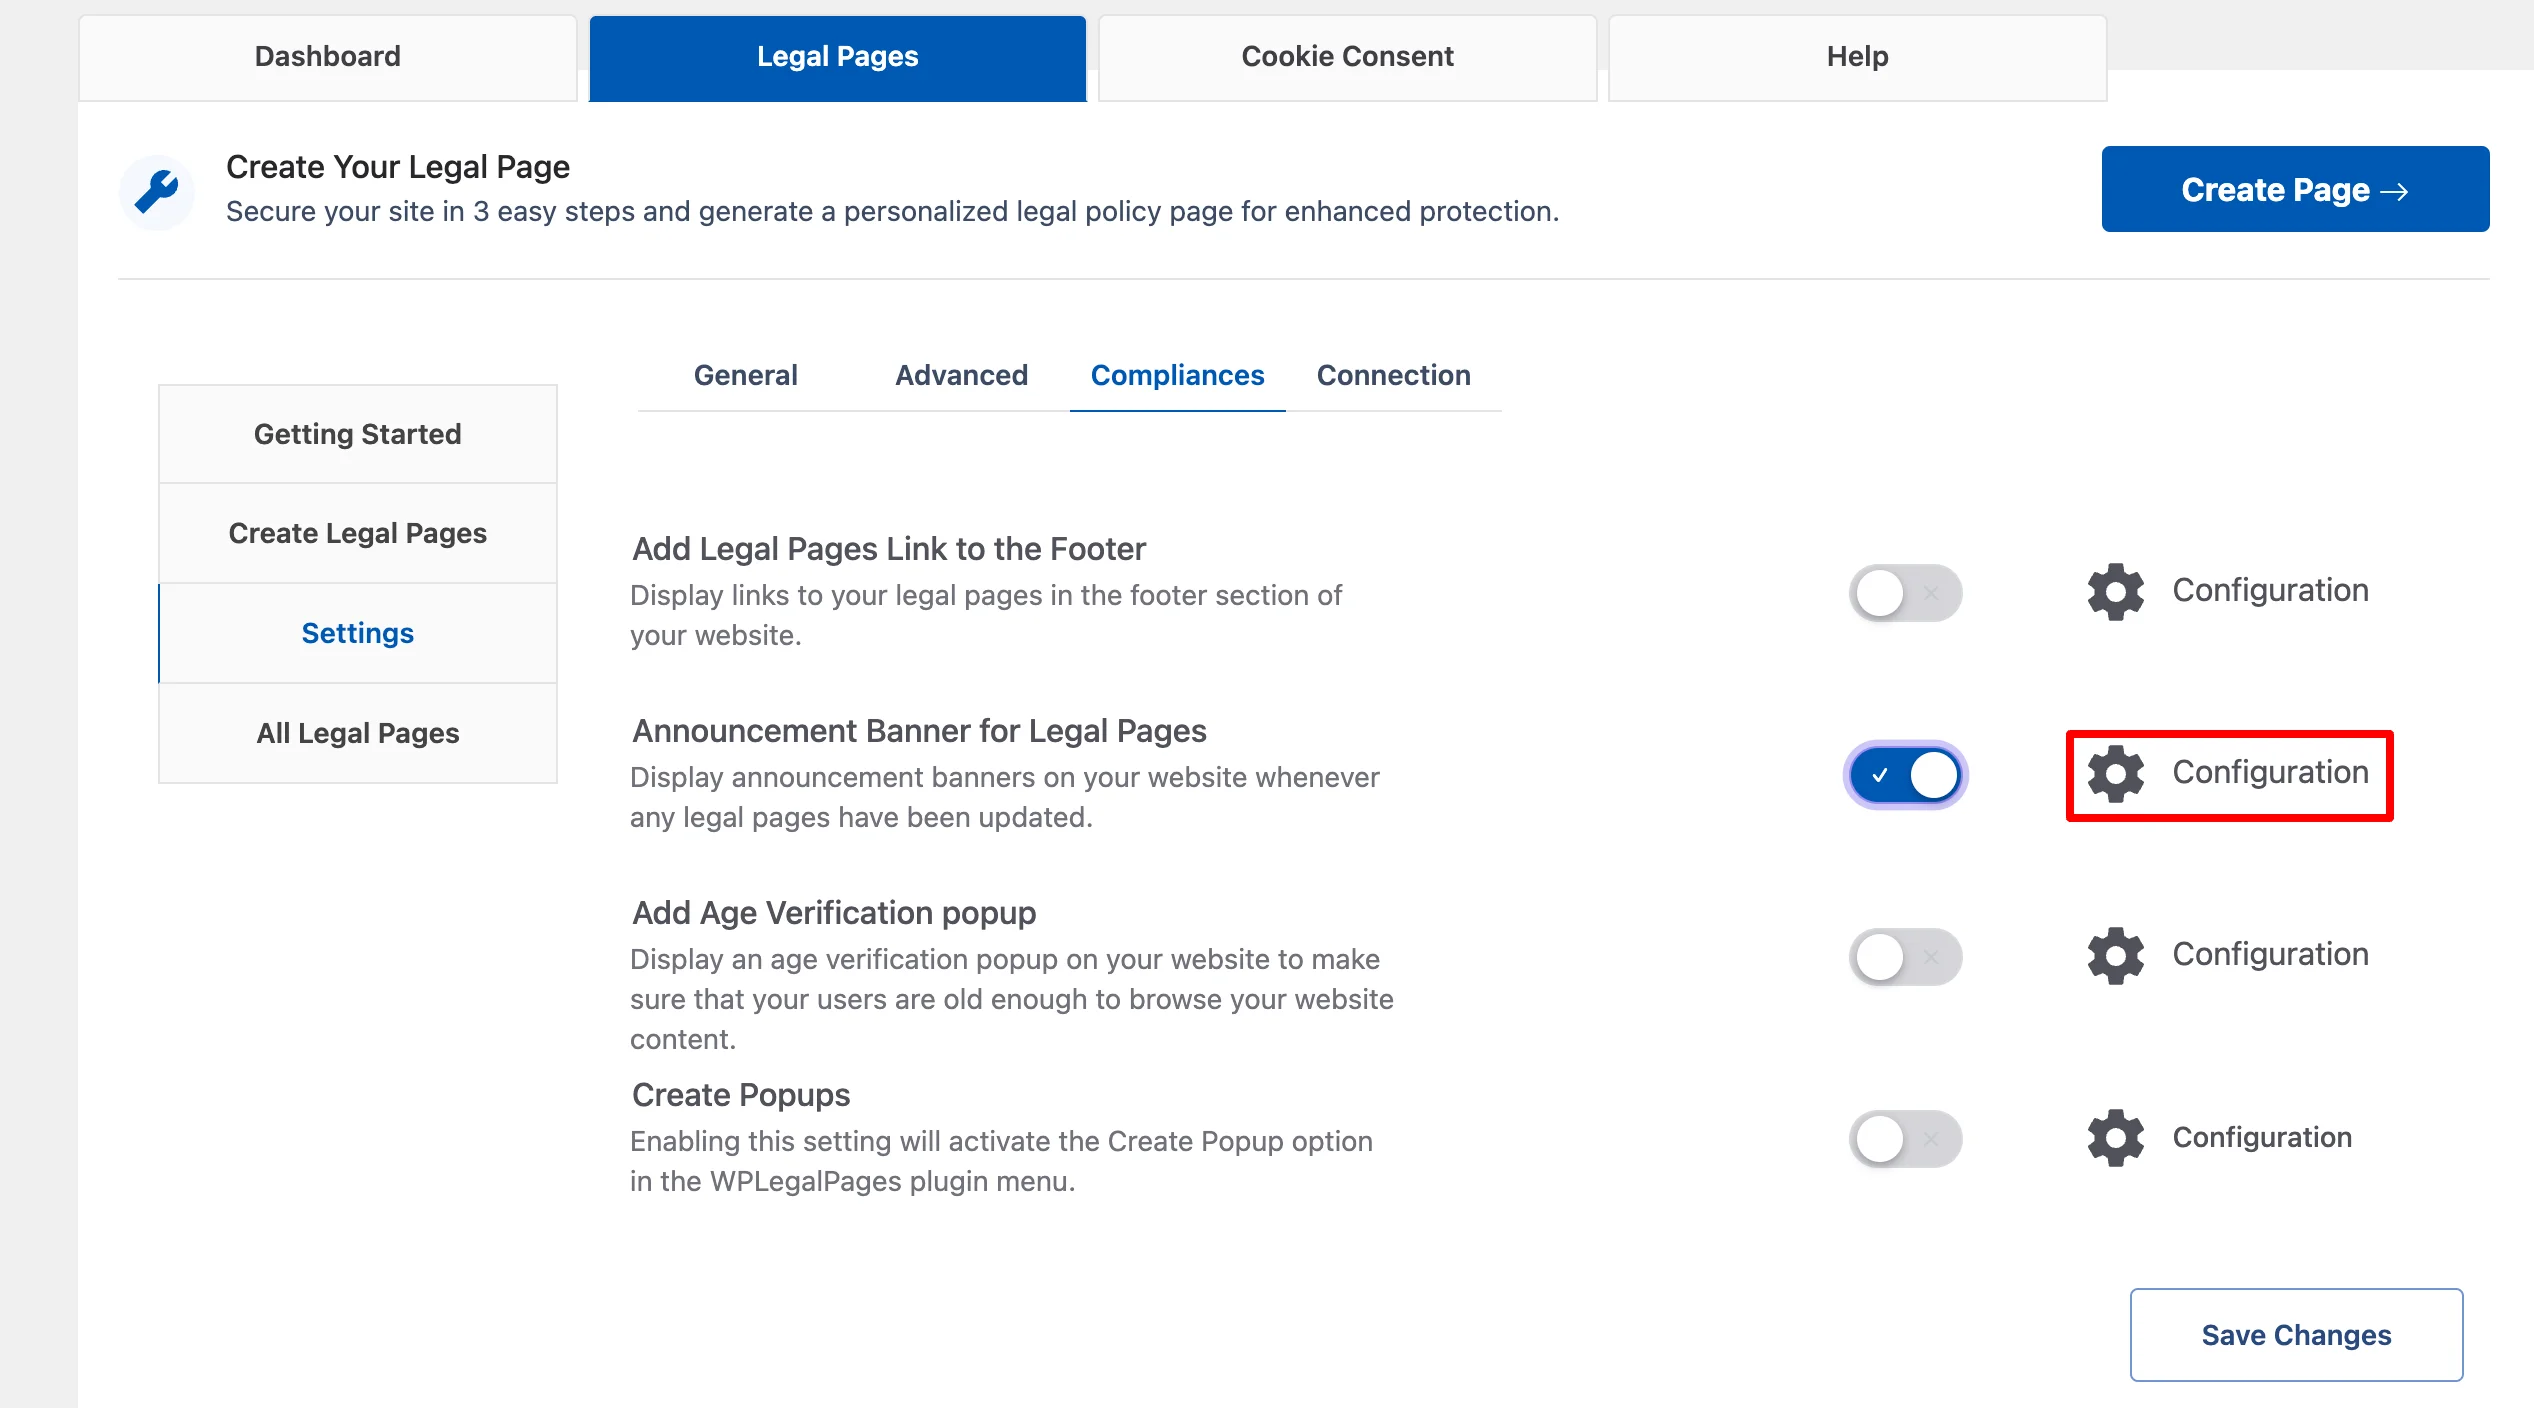
Select the WP Legal Pages option in the left side panel from your WordPress dashboard and click on Legal Pages.
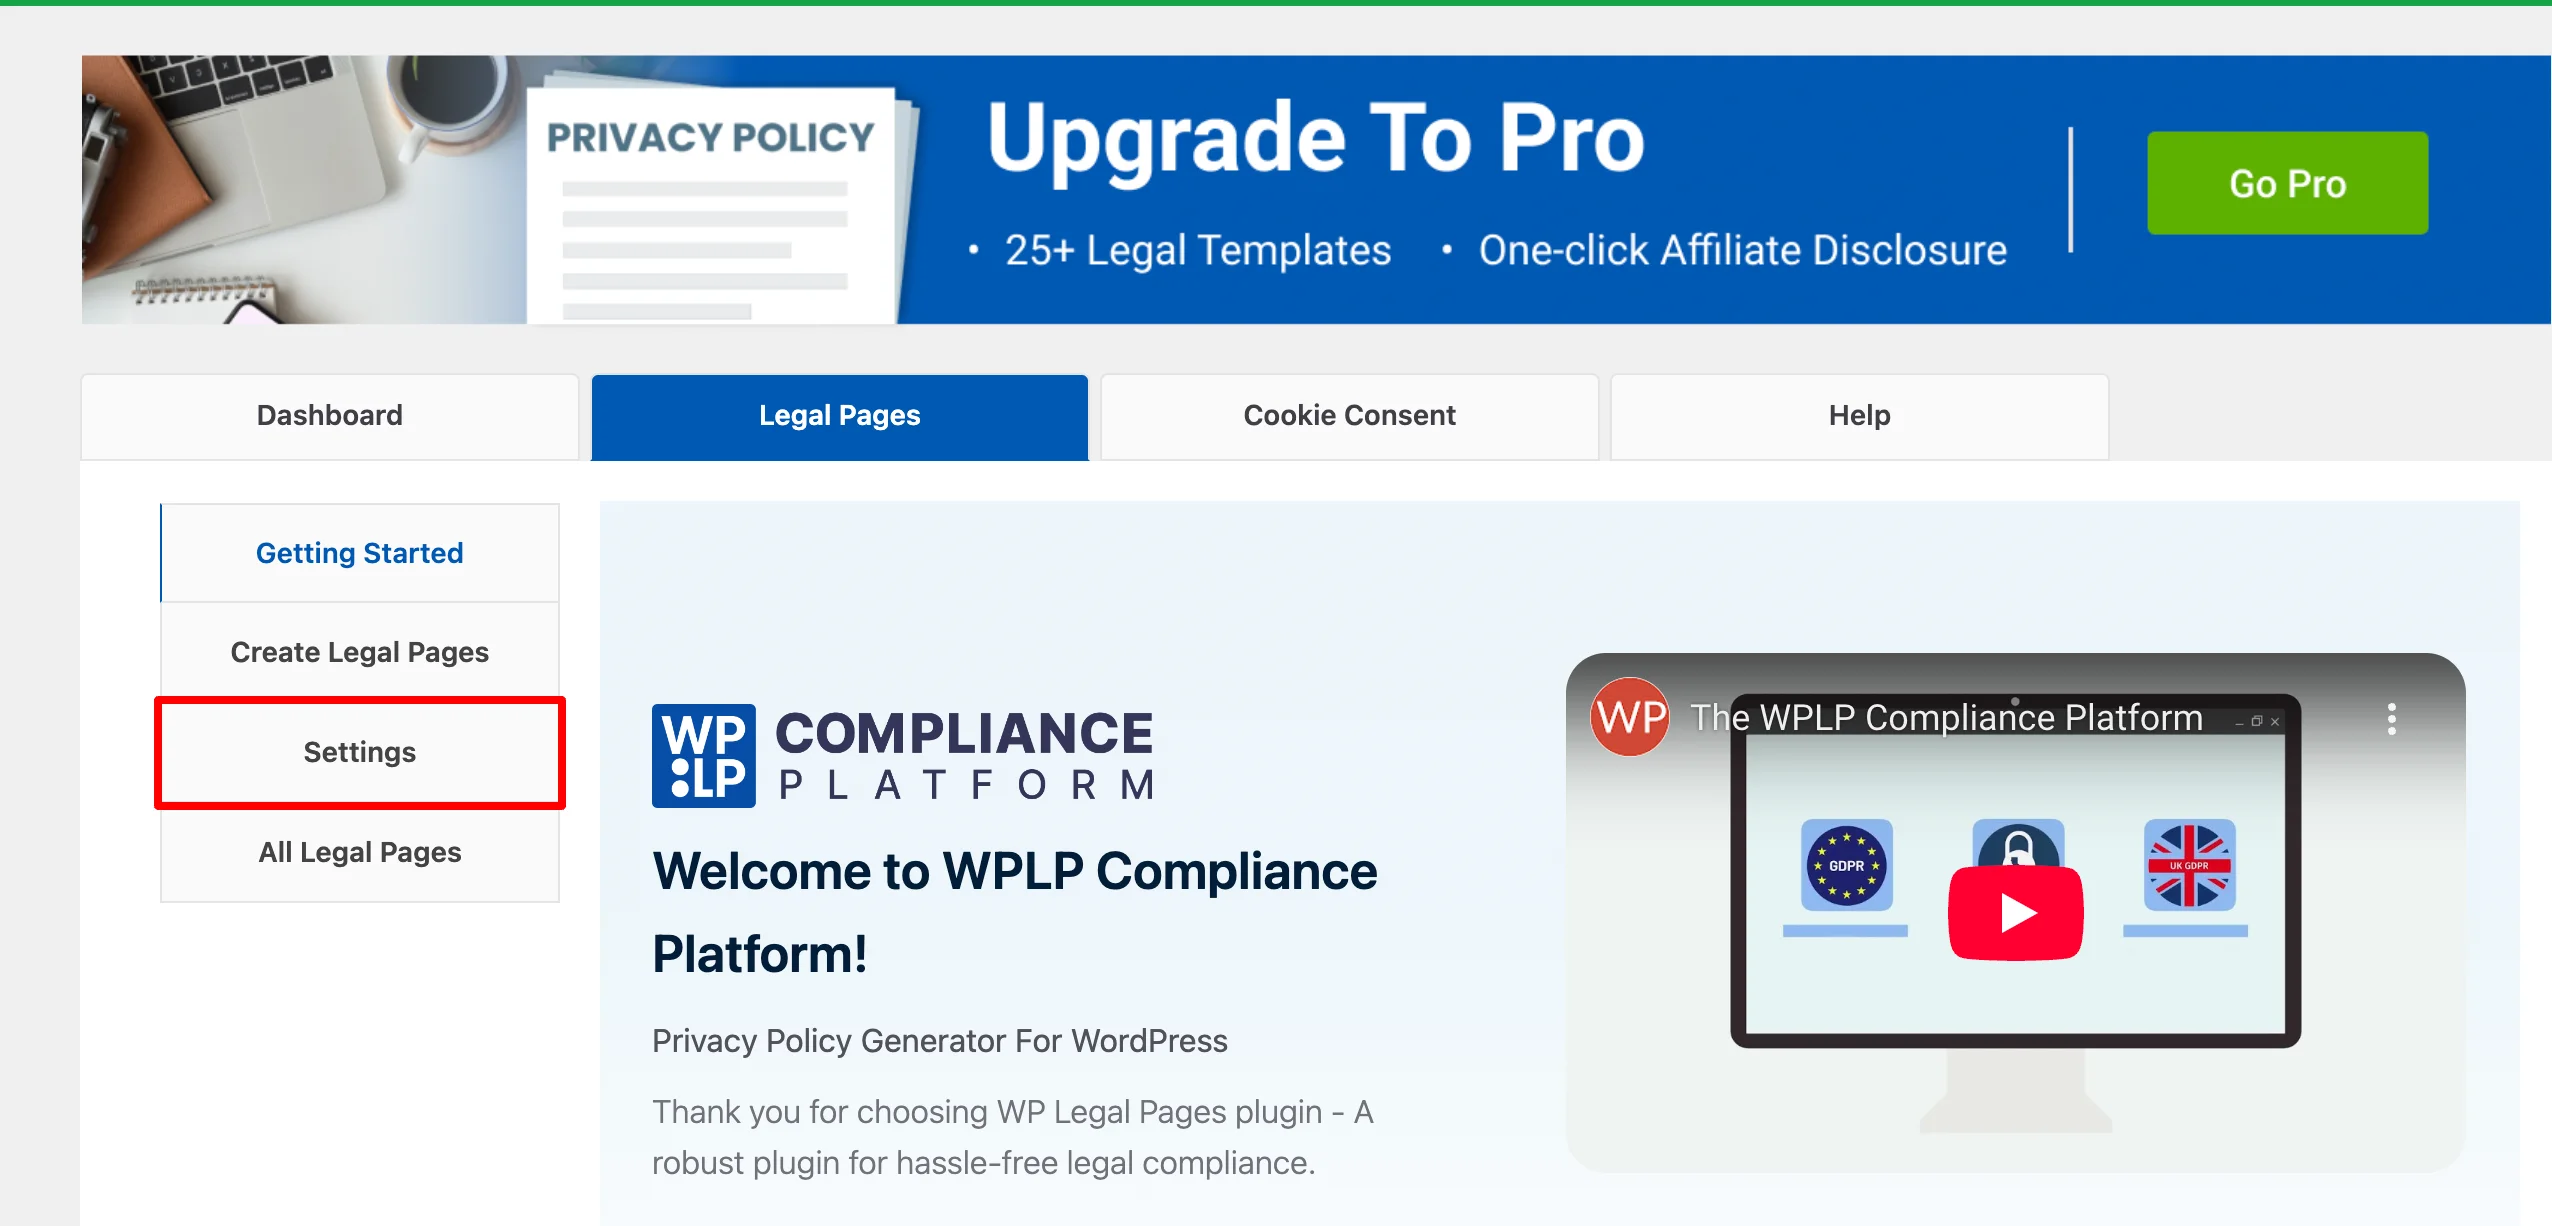
From the plugin’s dashboard, click on Settings.
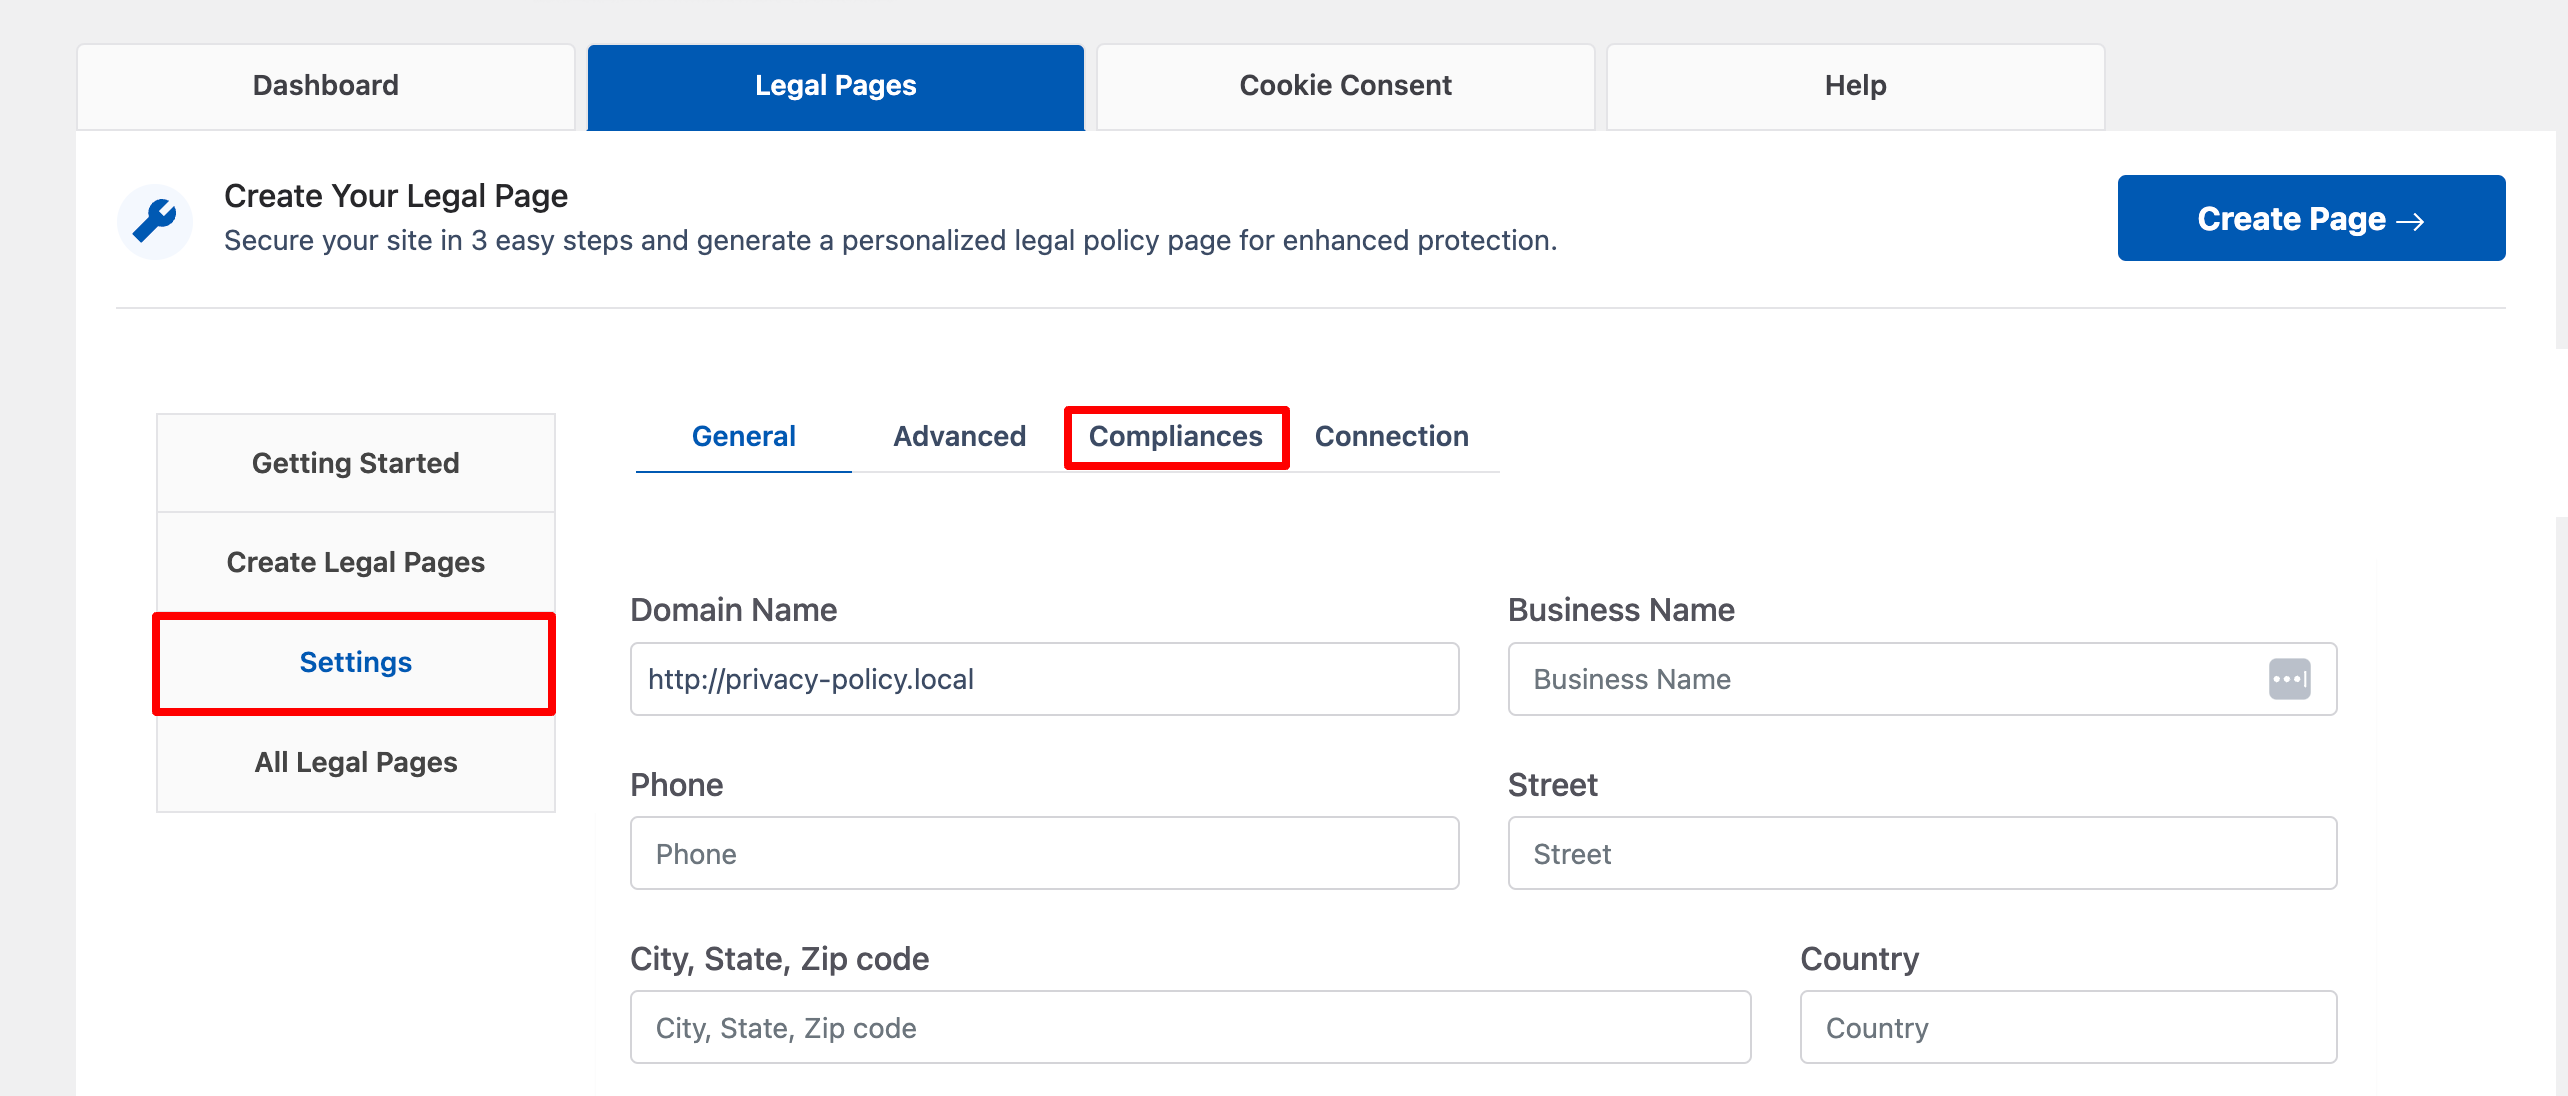
Once you are in the settings page, click on the Compliance tab.
To access the compliance settings, go to the Add Legal Pages Link to the Footer section and click the Configuration button.
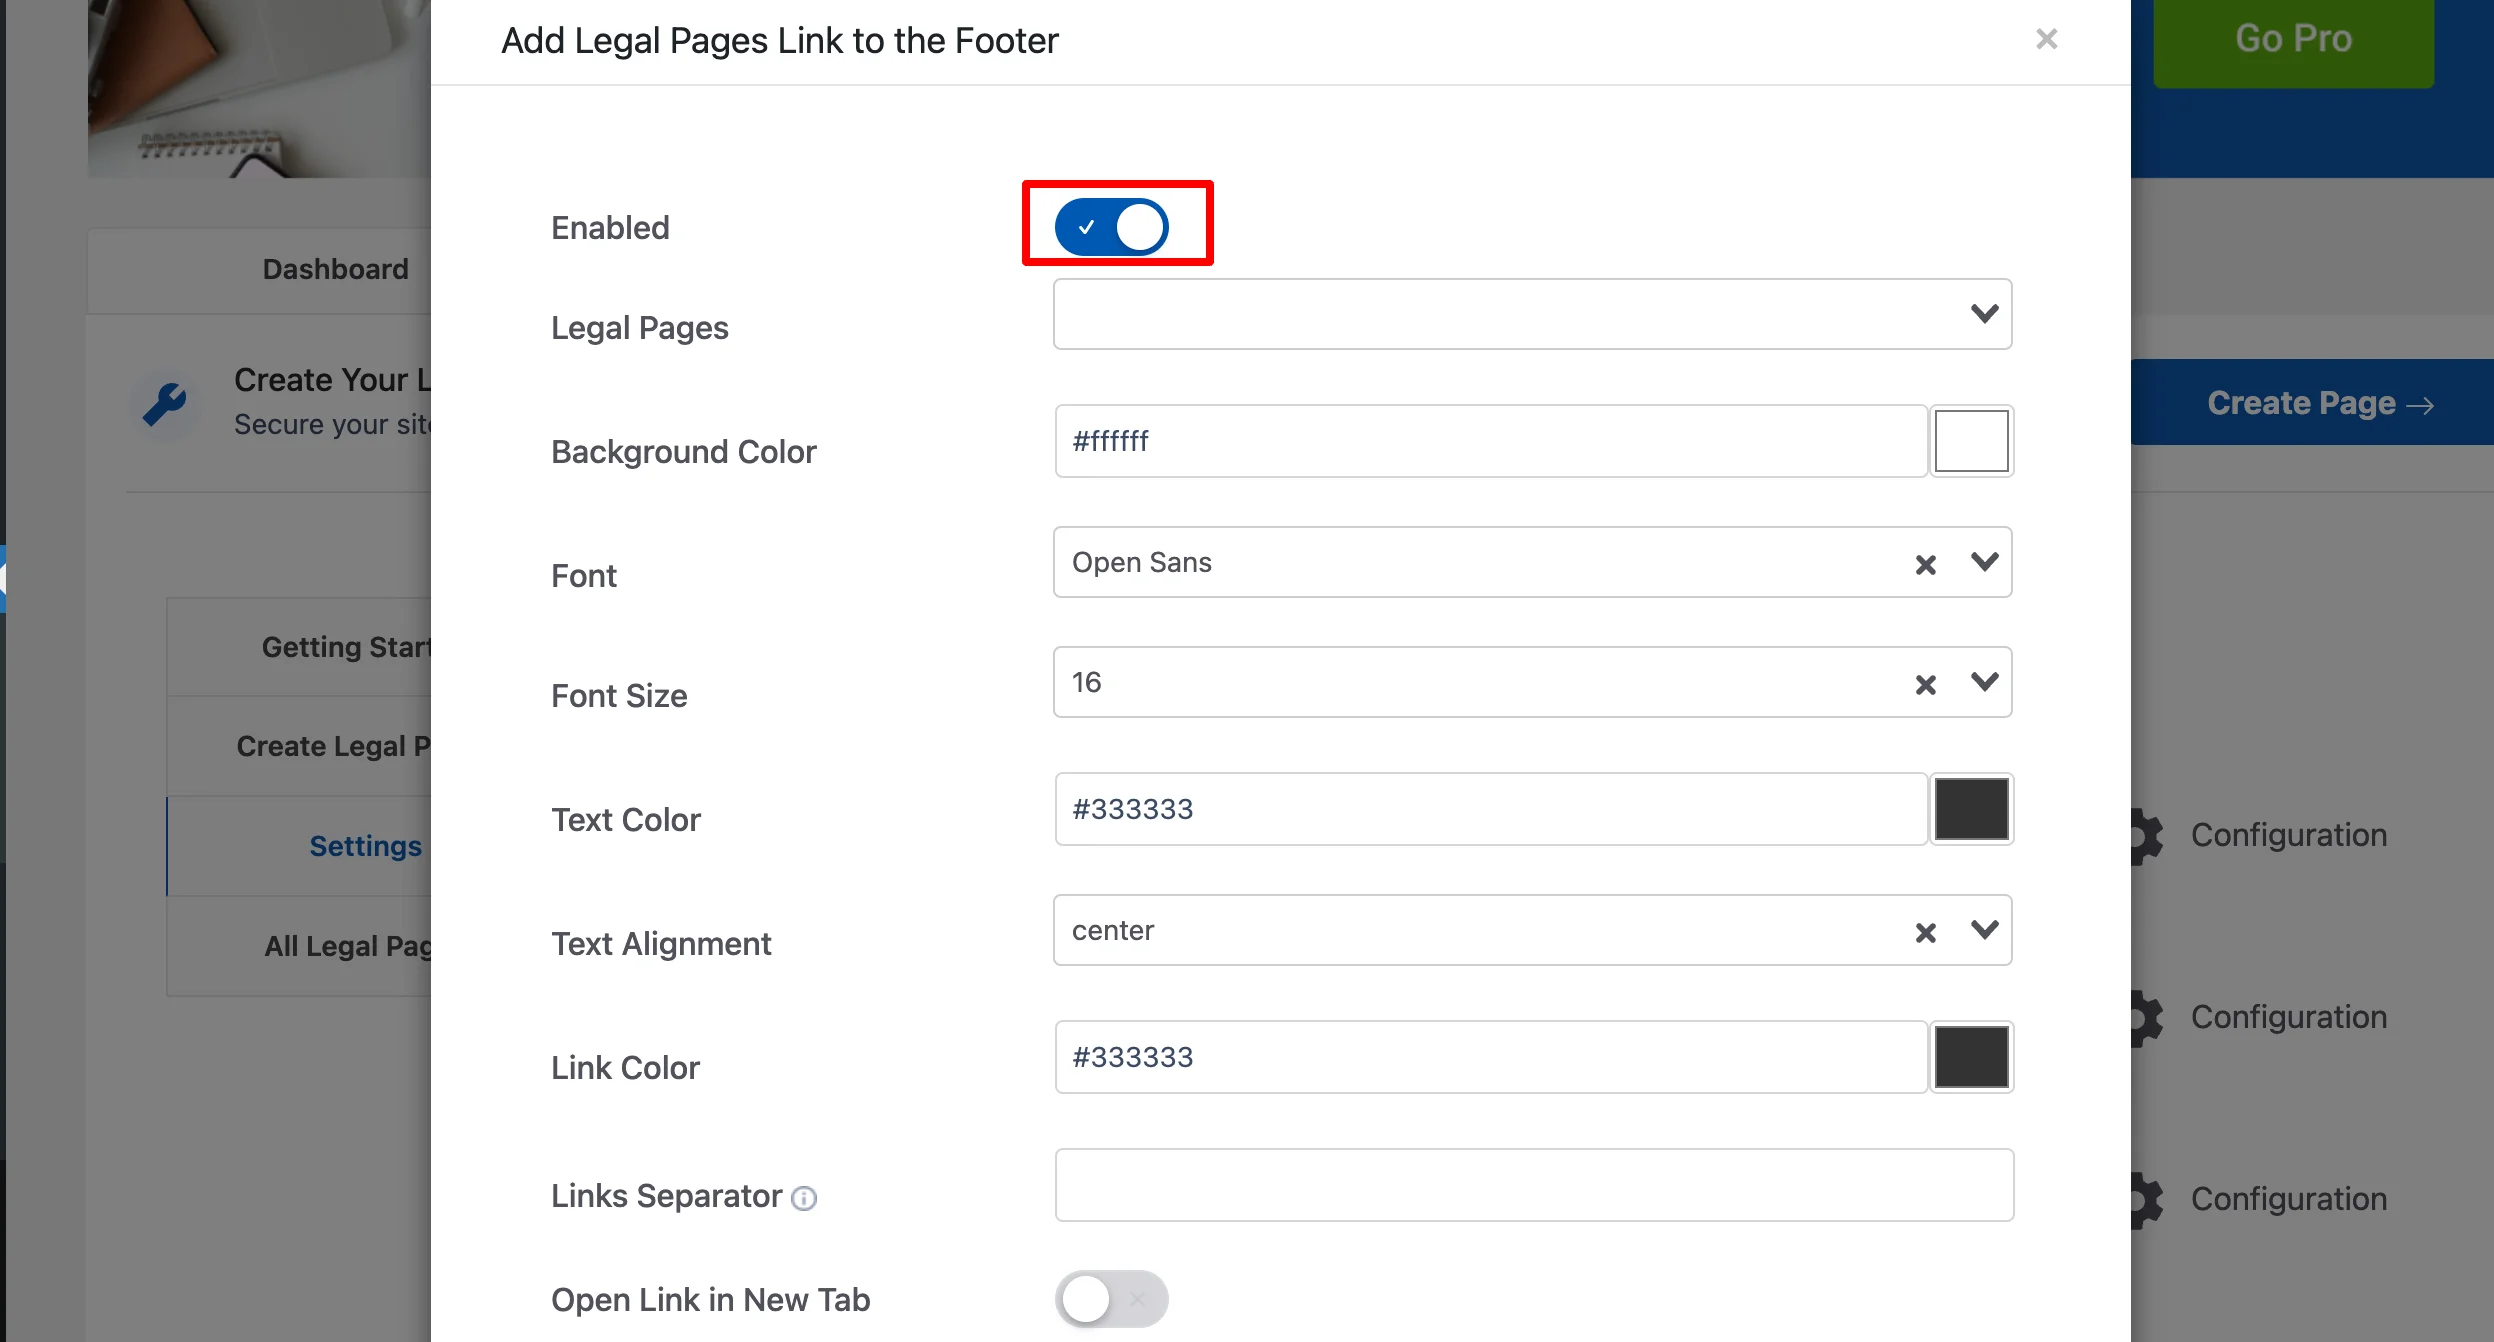
Once you are in the configuration tab, you can enable this option by clicking on the Enabled toggle button.
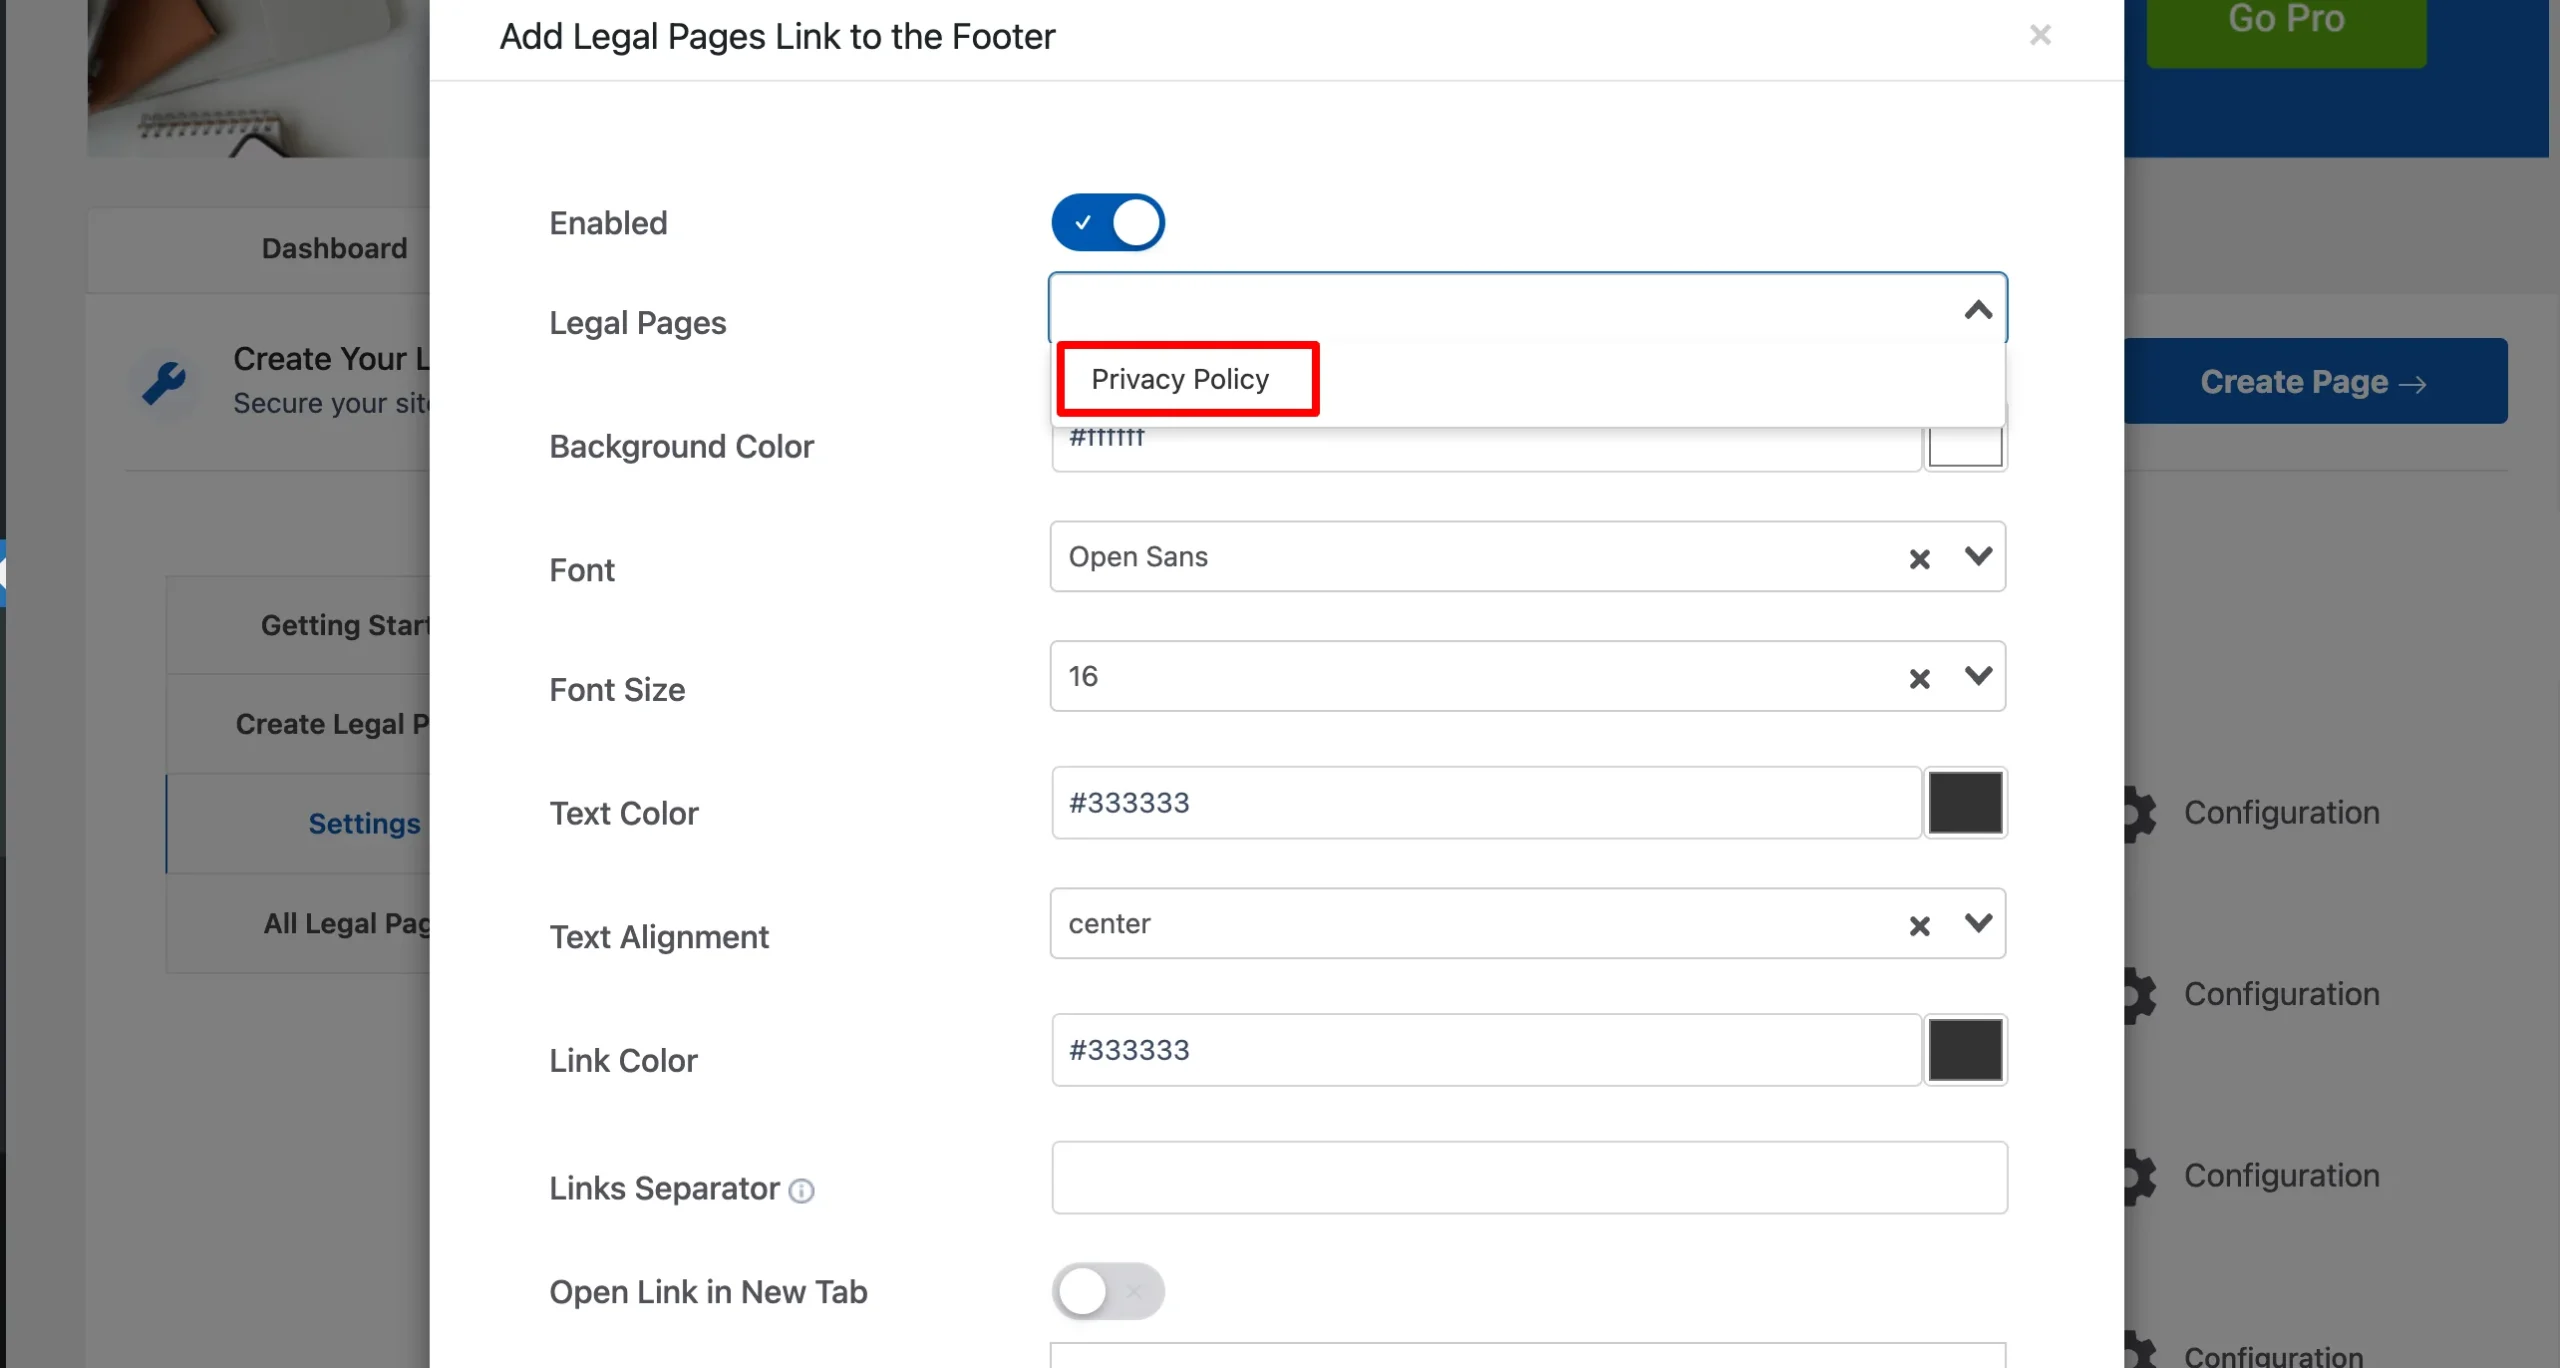
Click on the drop-down box of Legal Pages and select the pages that need to be added to the footer.
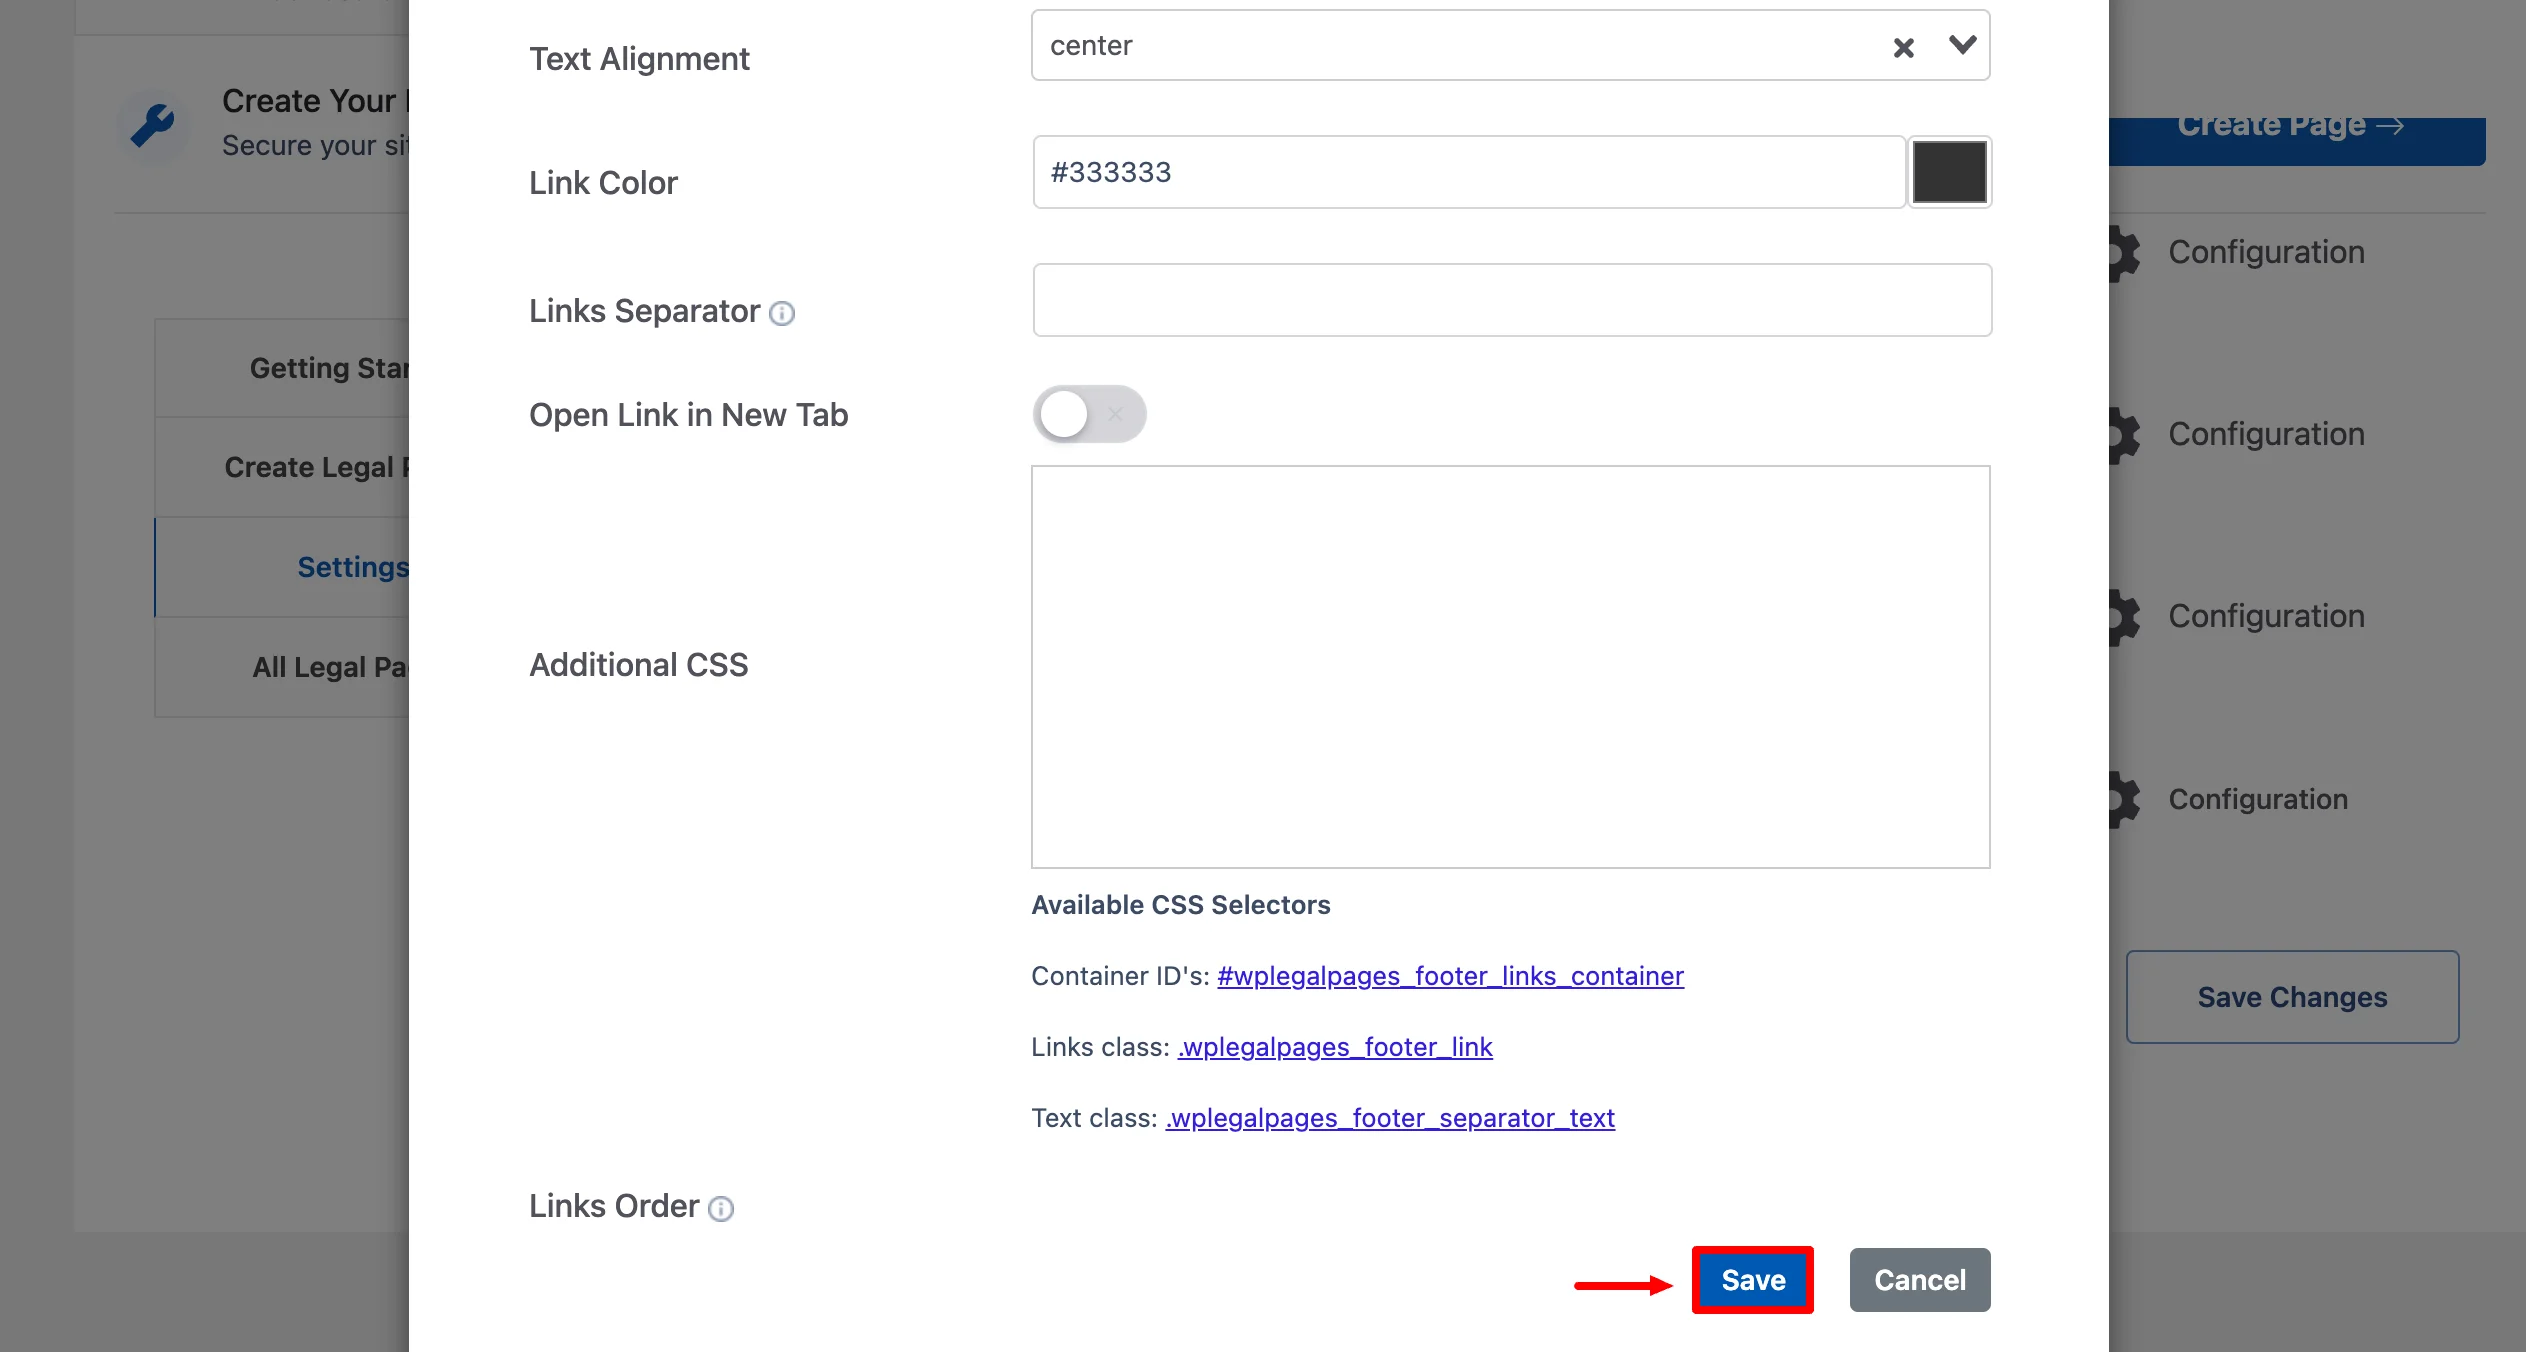
You can experiment with settings such as Background Color, Font, Text Color, and Text Alignment, and Add Custom CSS code using the available styling options.
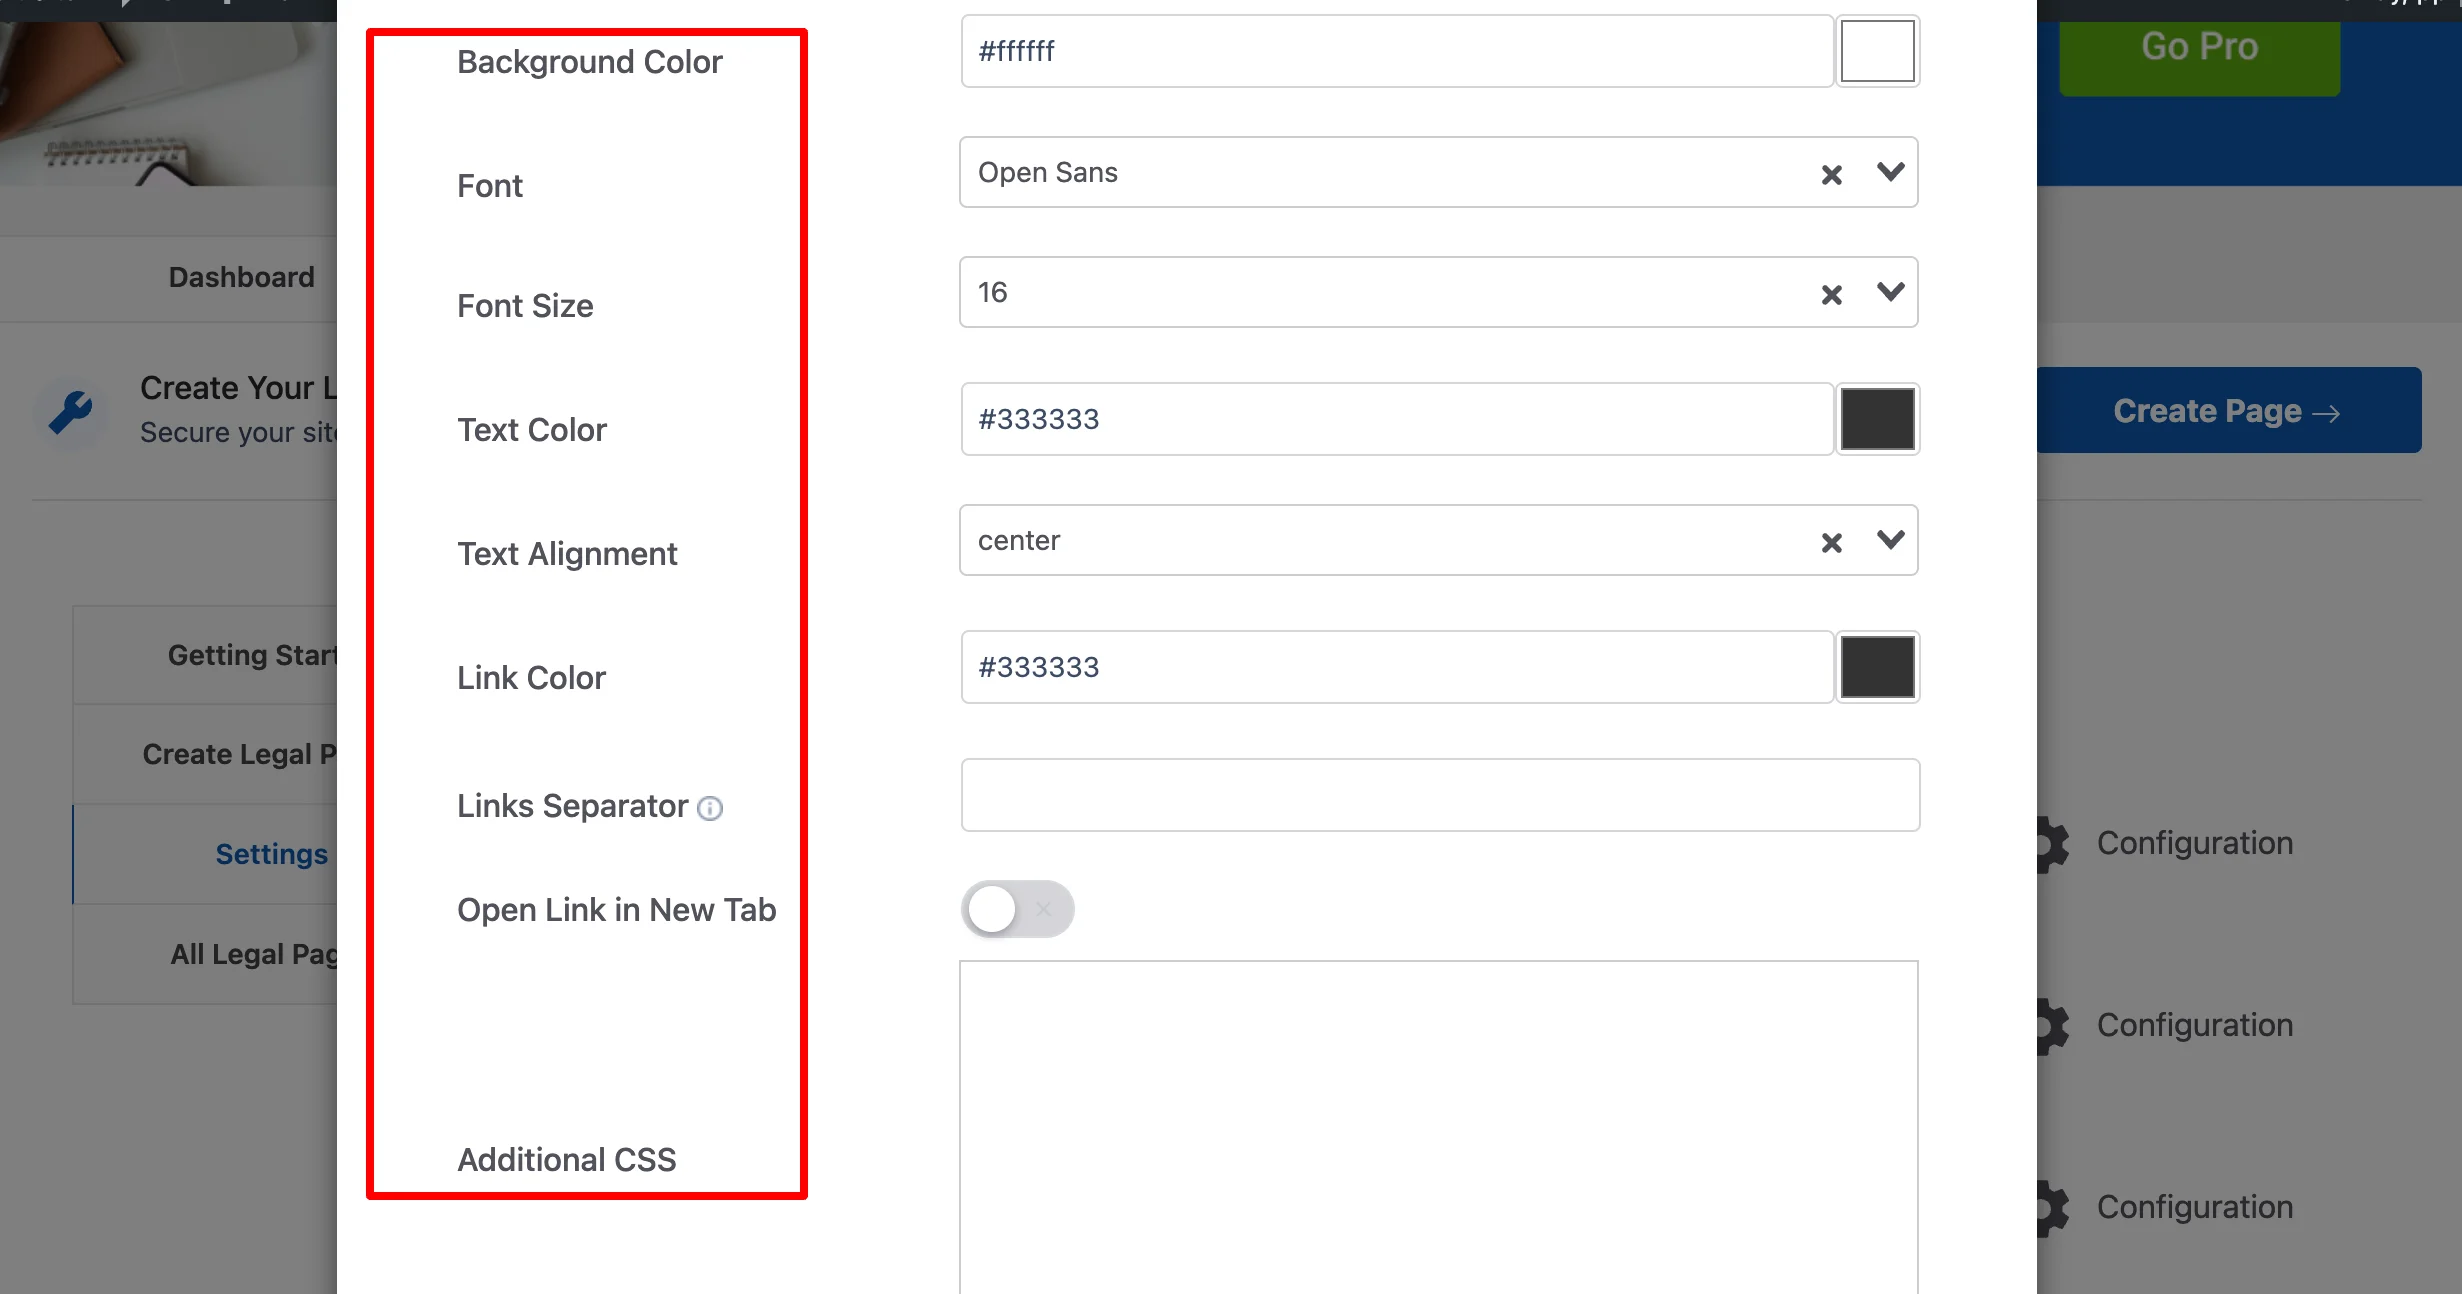
You can also change the order of the links using the Links Order feature.
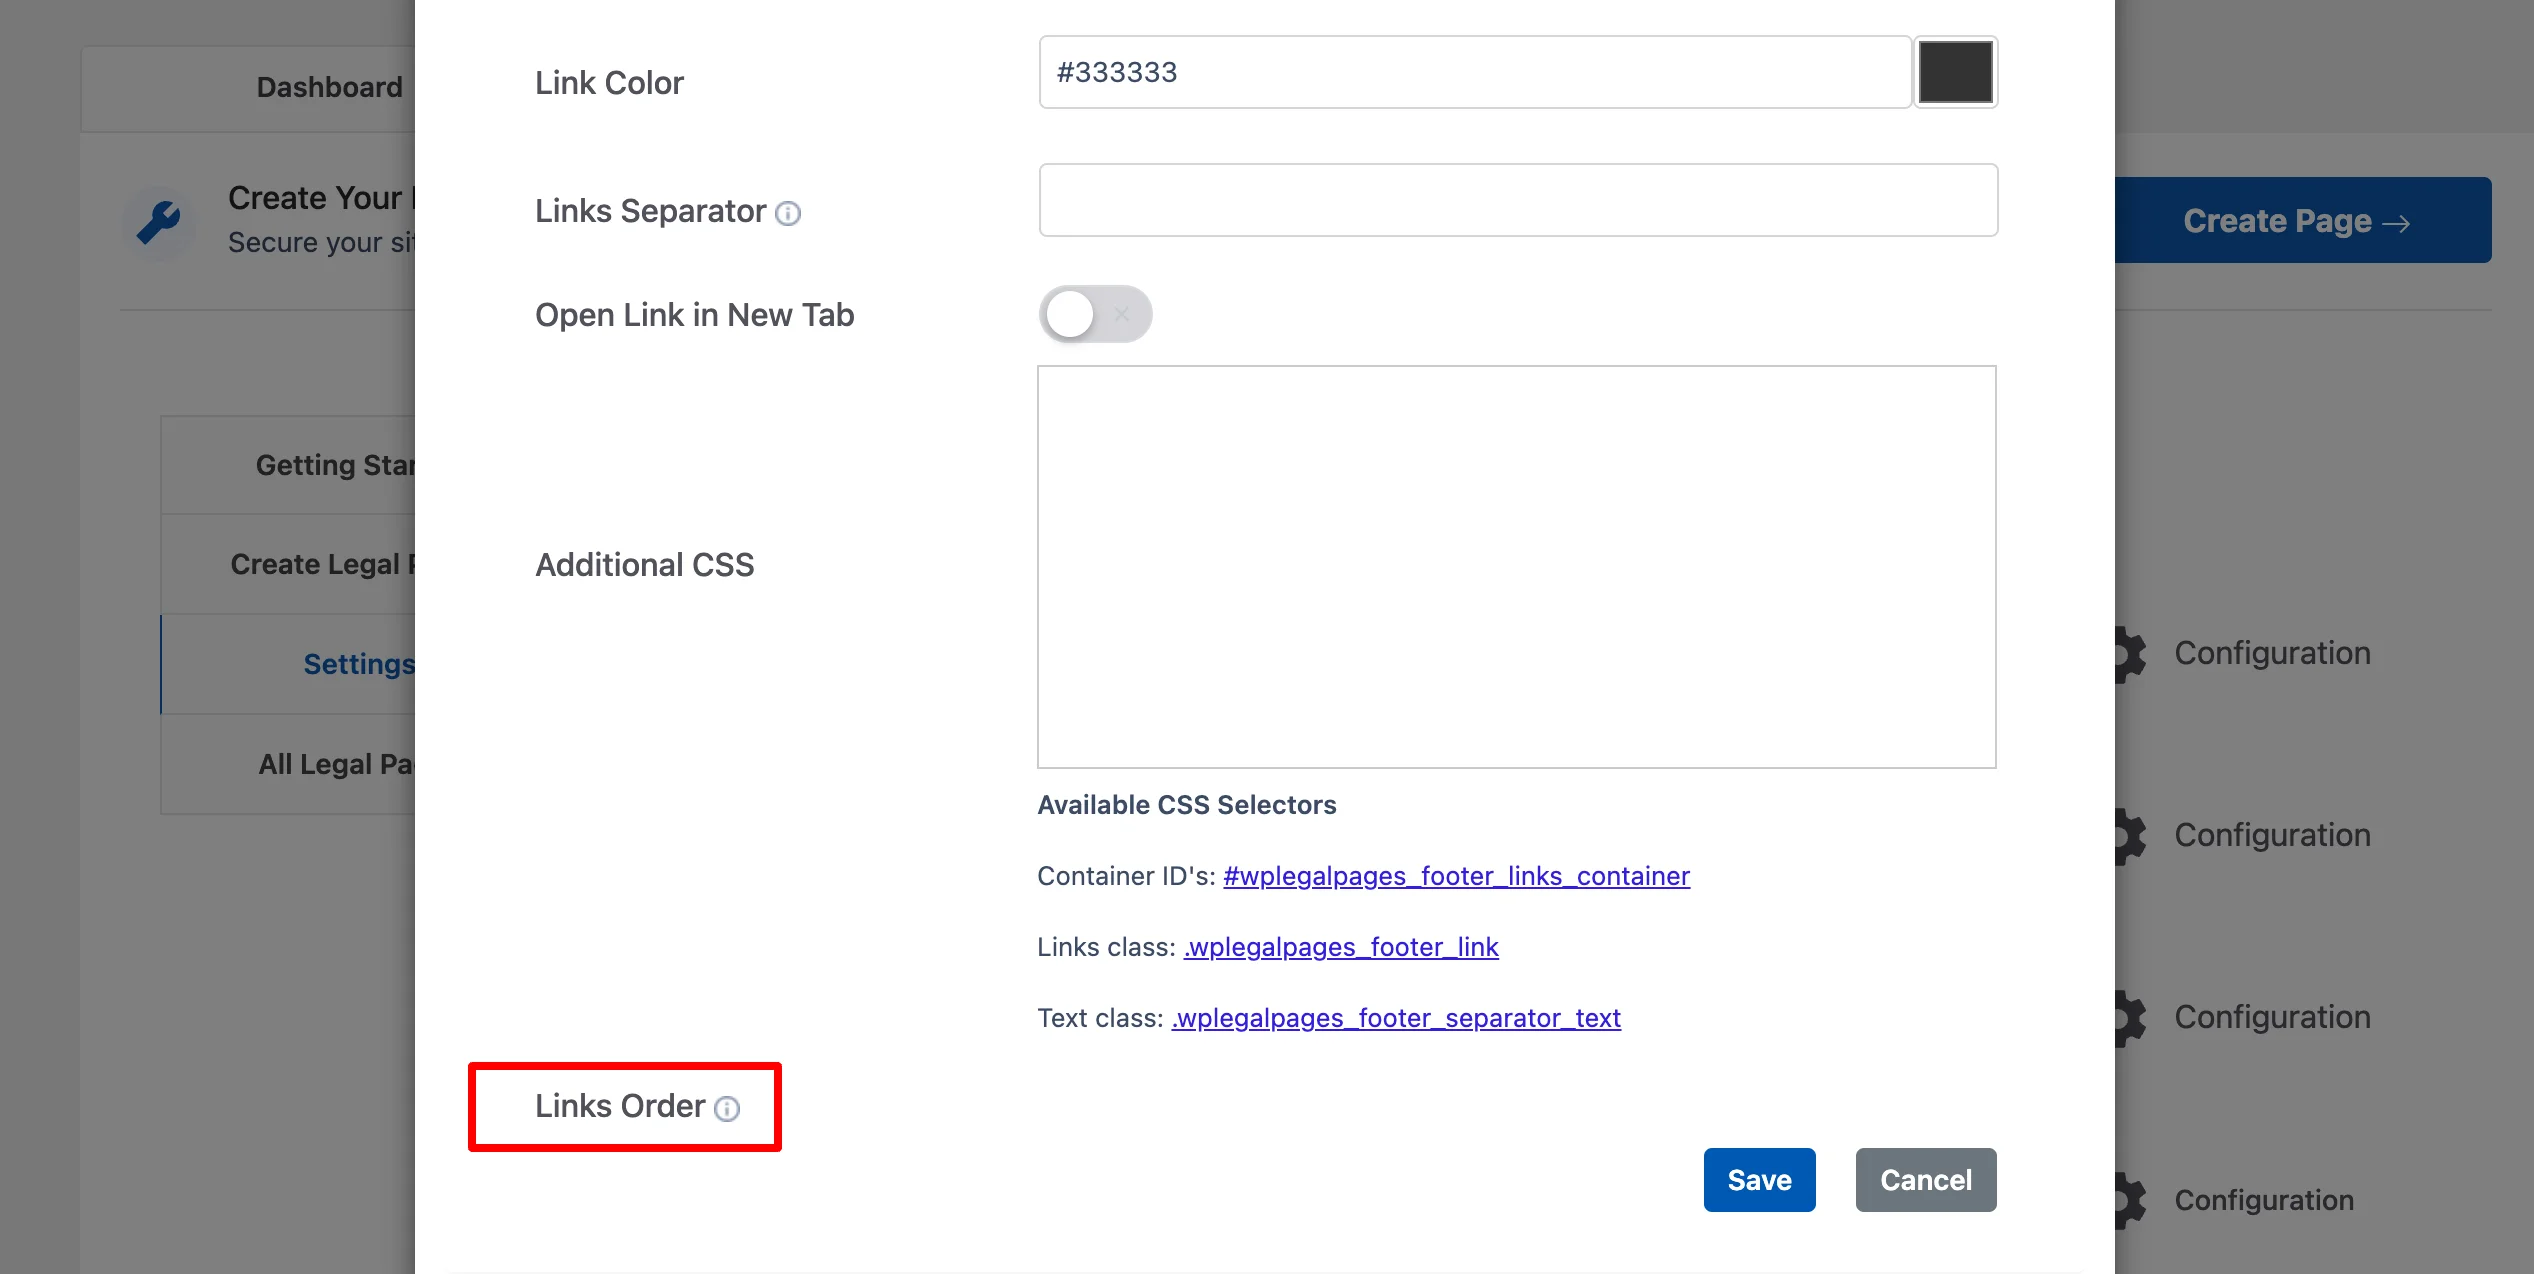
Finally, click on the Save button to save the changes.
2. Announcement Banner for Legal Pages #
This feature allows you to display announcement banners on your website whenever any legal pages have been updated.
In the Settings section, under the Compliance tab, click the Configuration button in the Announcement Banner for Legal Pages section to access the settings.
Click on the Enabled toggle button to enable this feature. You can also change the position, type, and duration of the announcement bar.
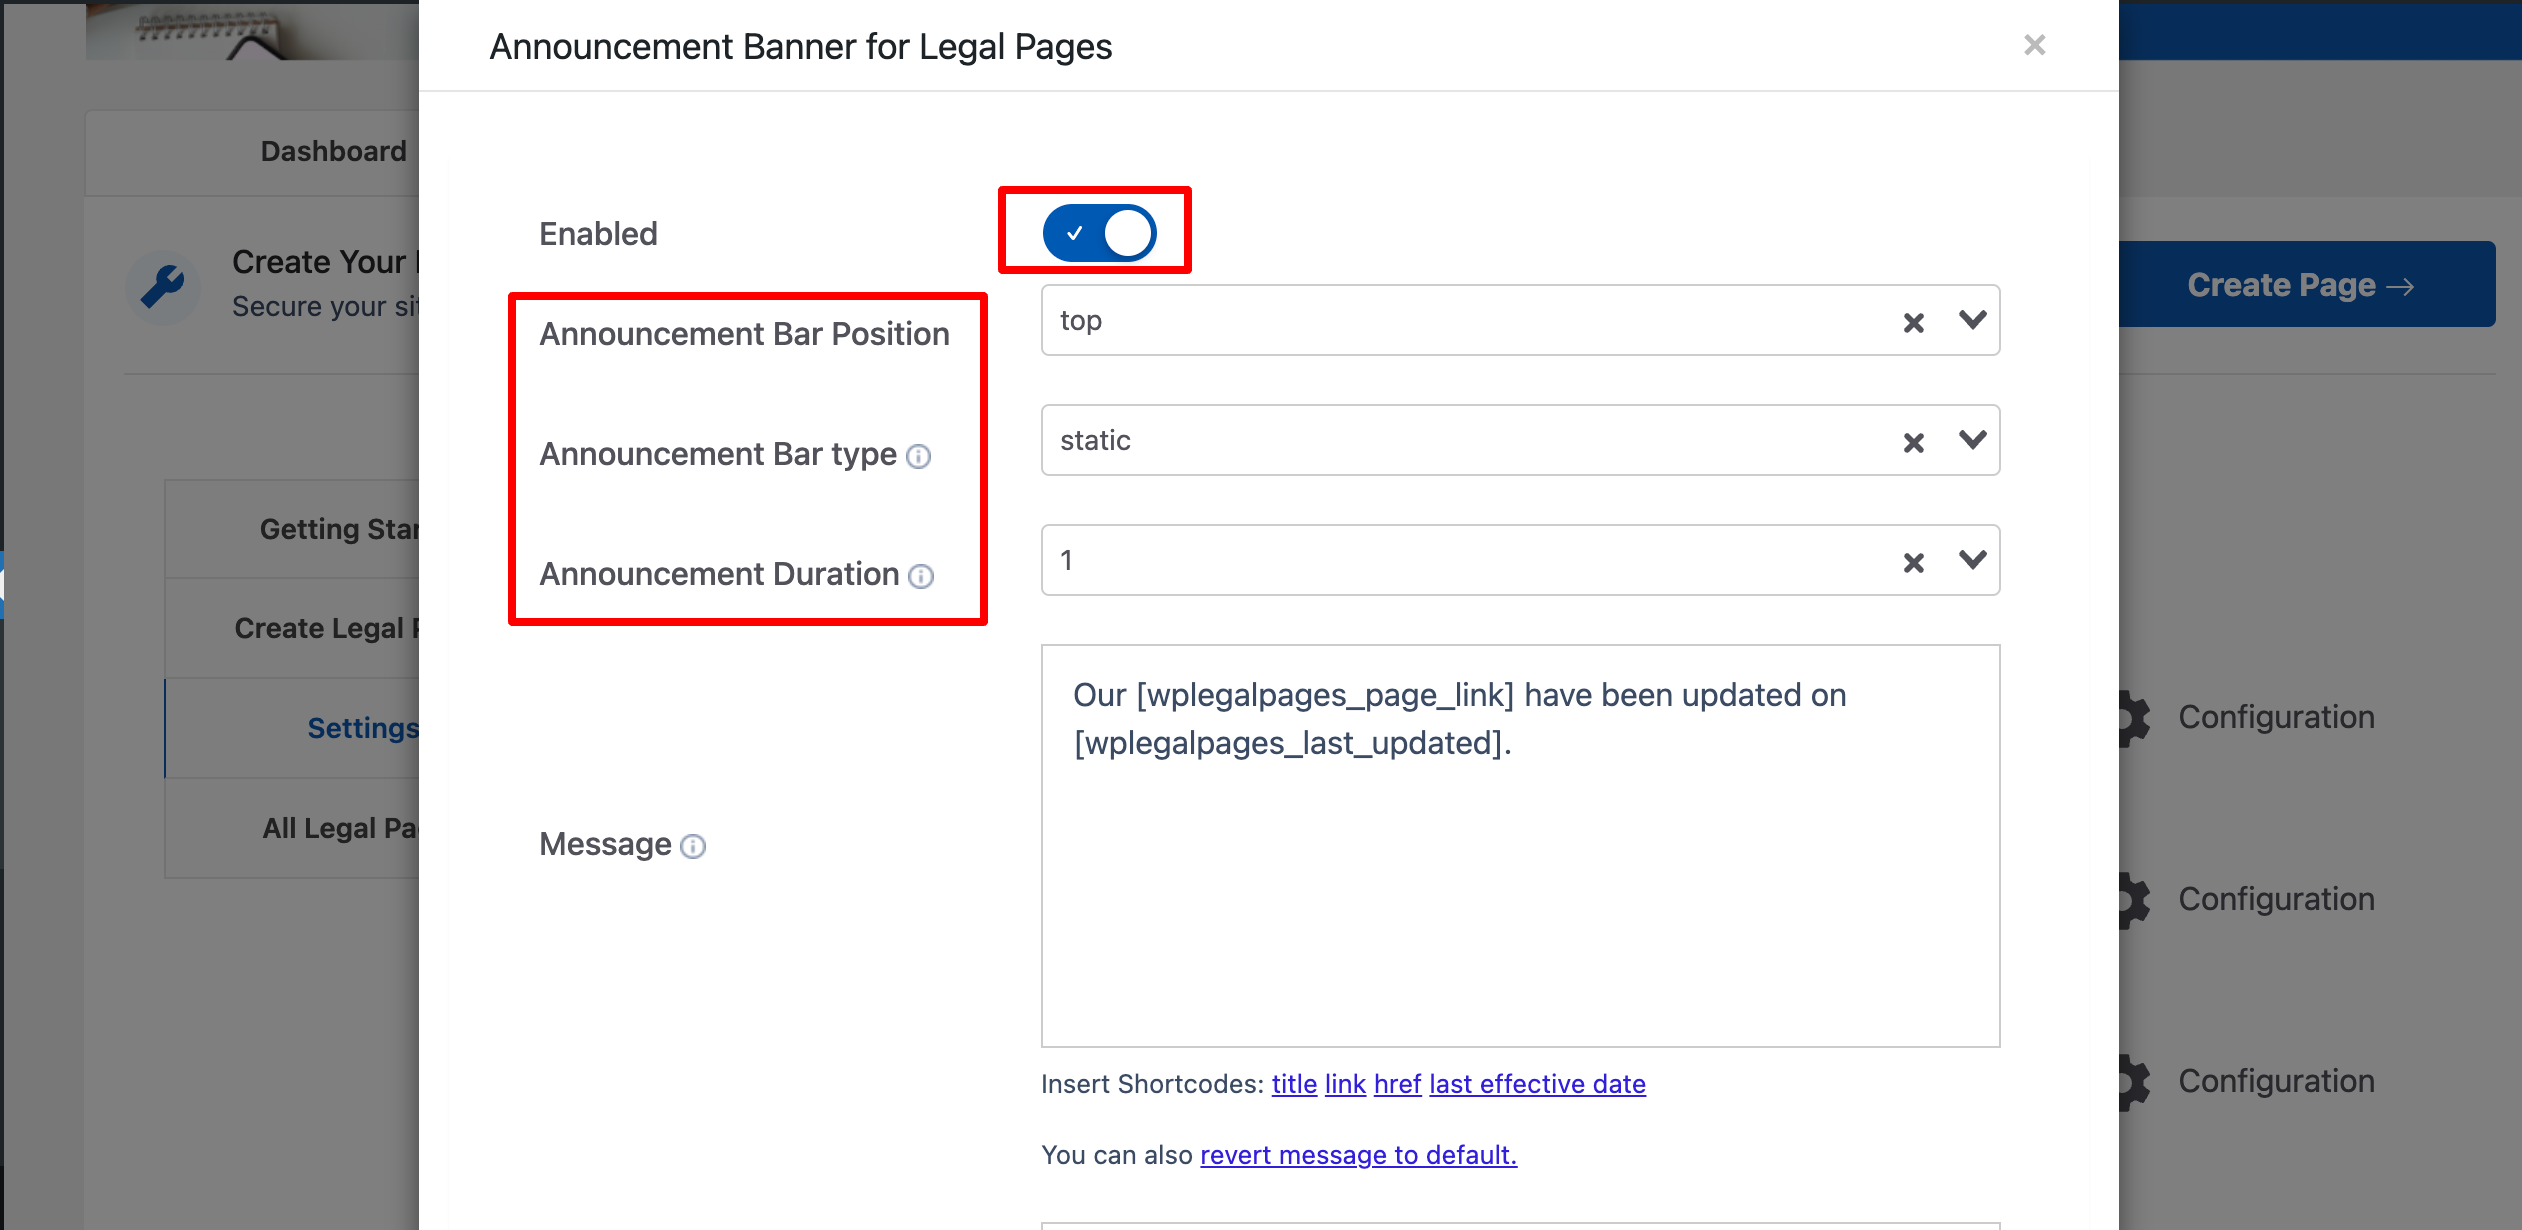
In the Message section, type the message that you want to be displayed on the Announcement Banner.
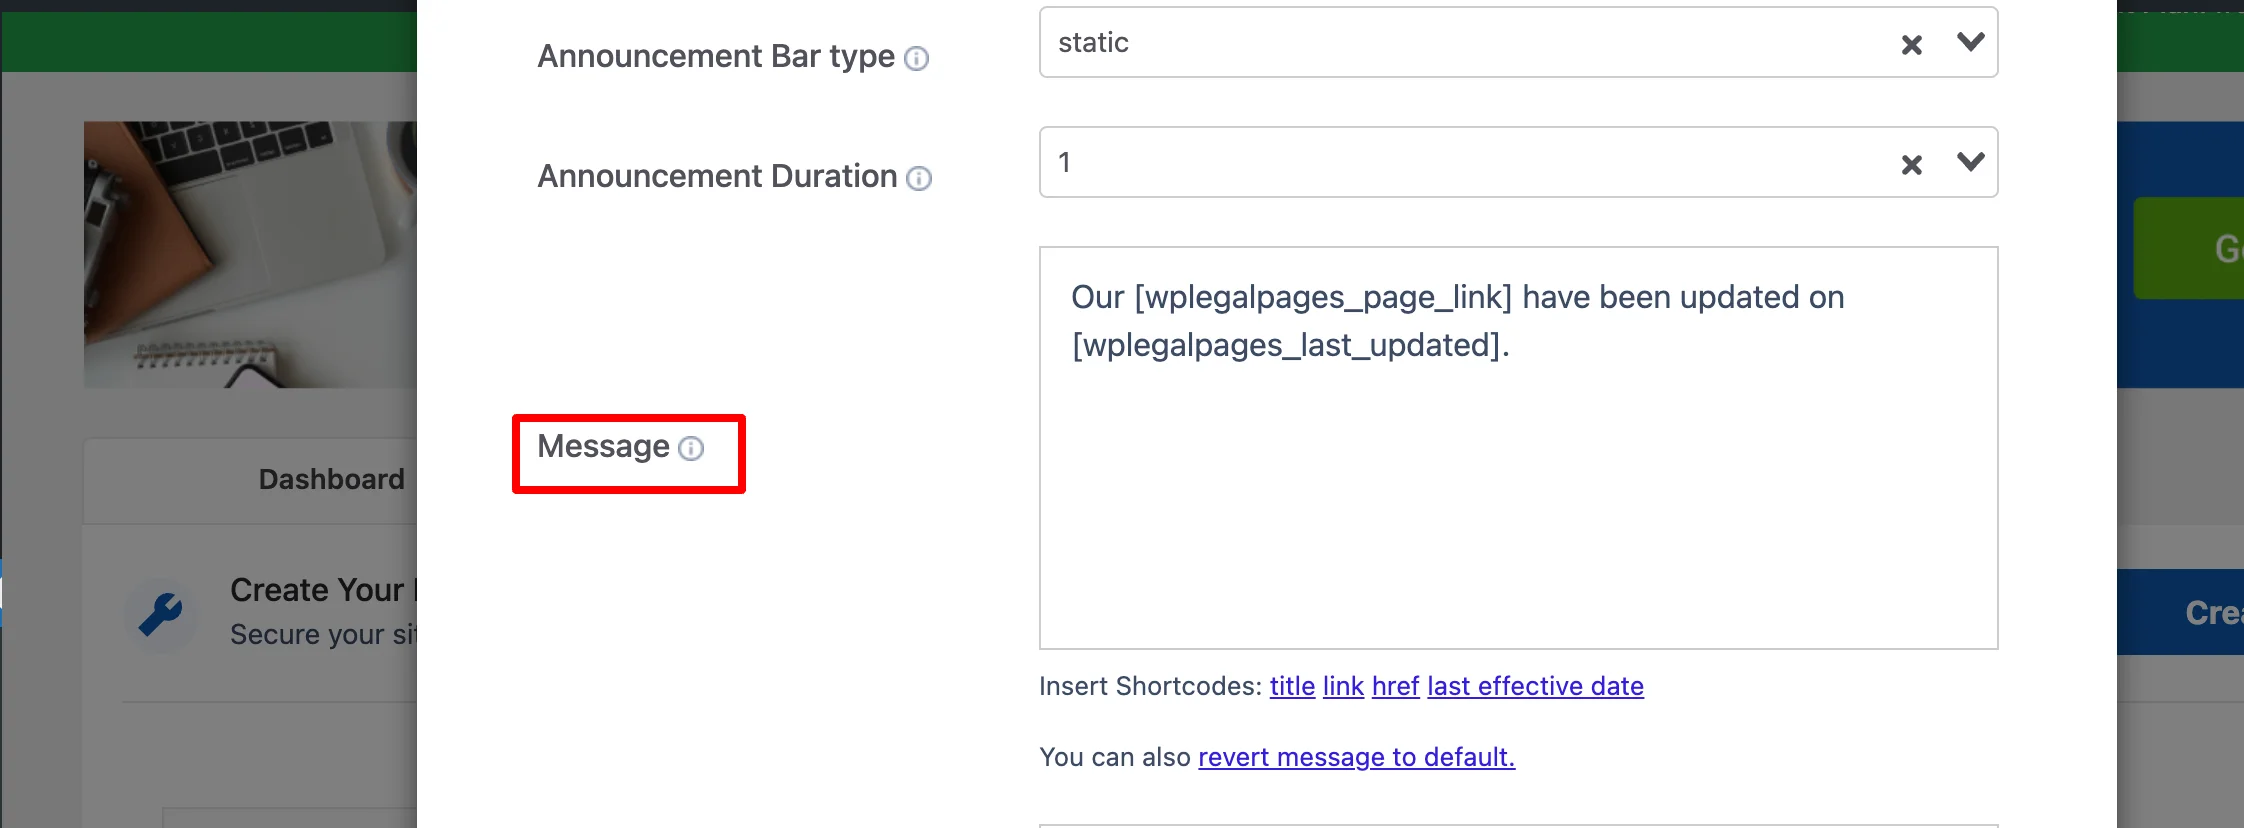
If you want to display messages for several updated pages, enter those messages in the Message for Multiple Updated Pages field.
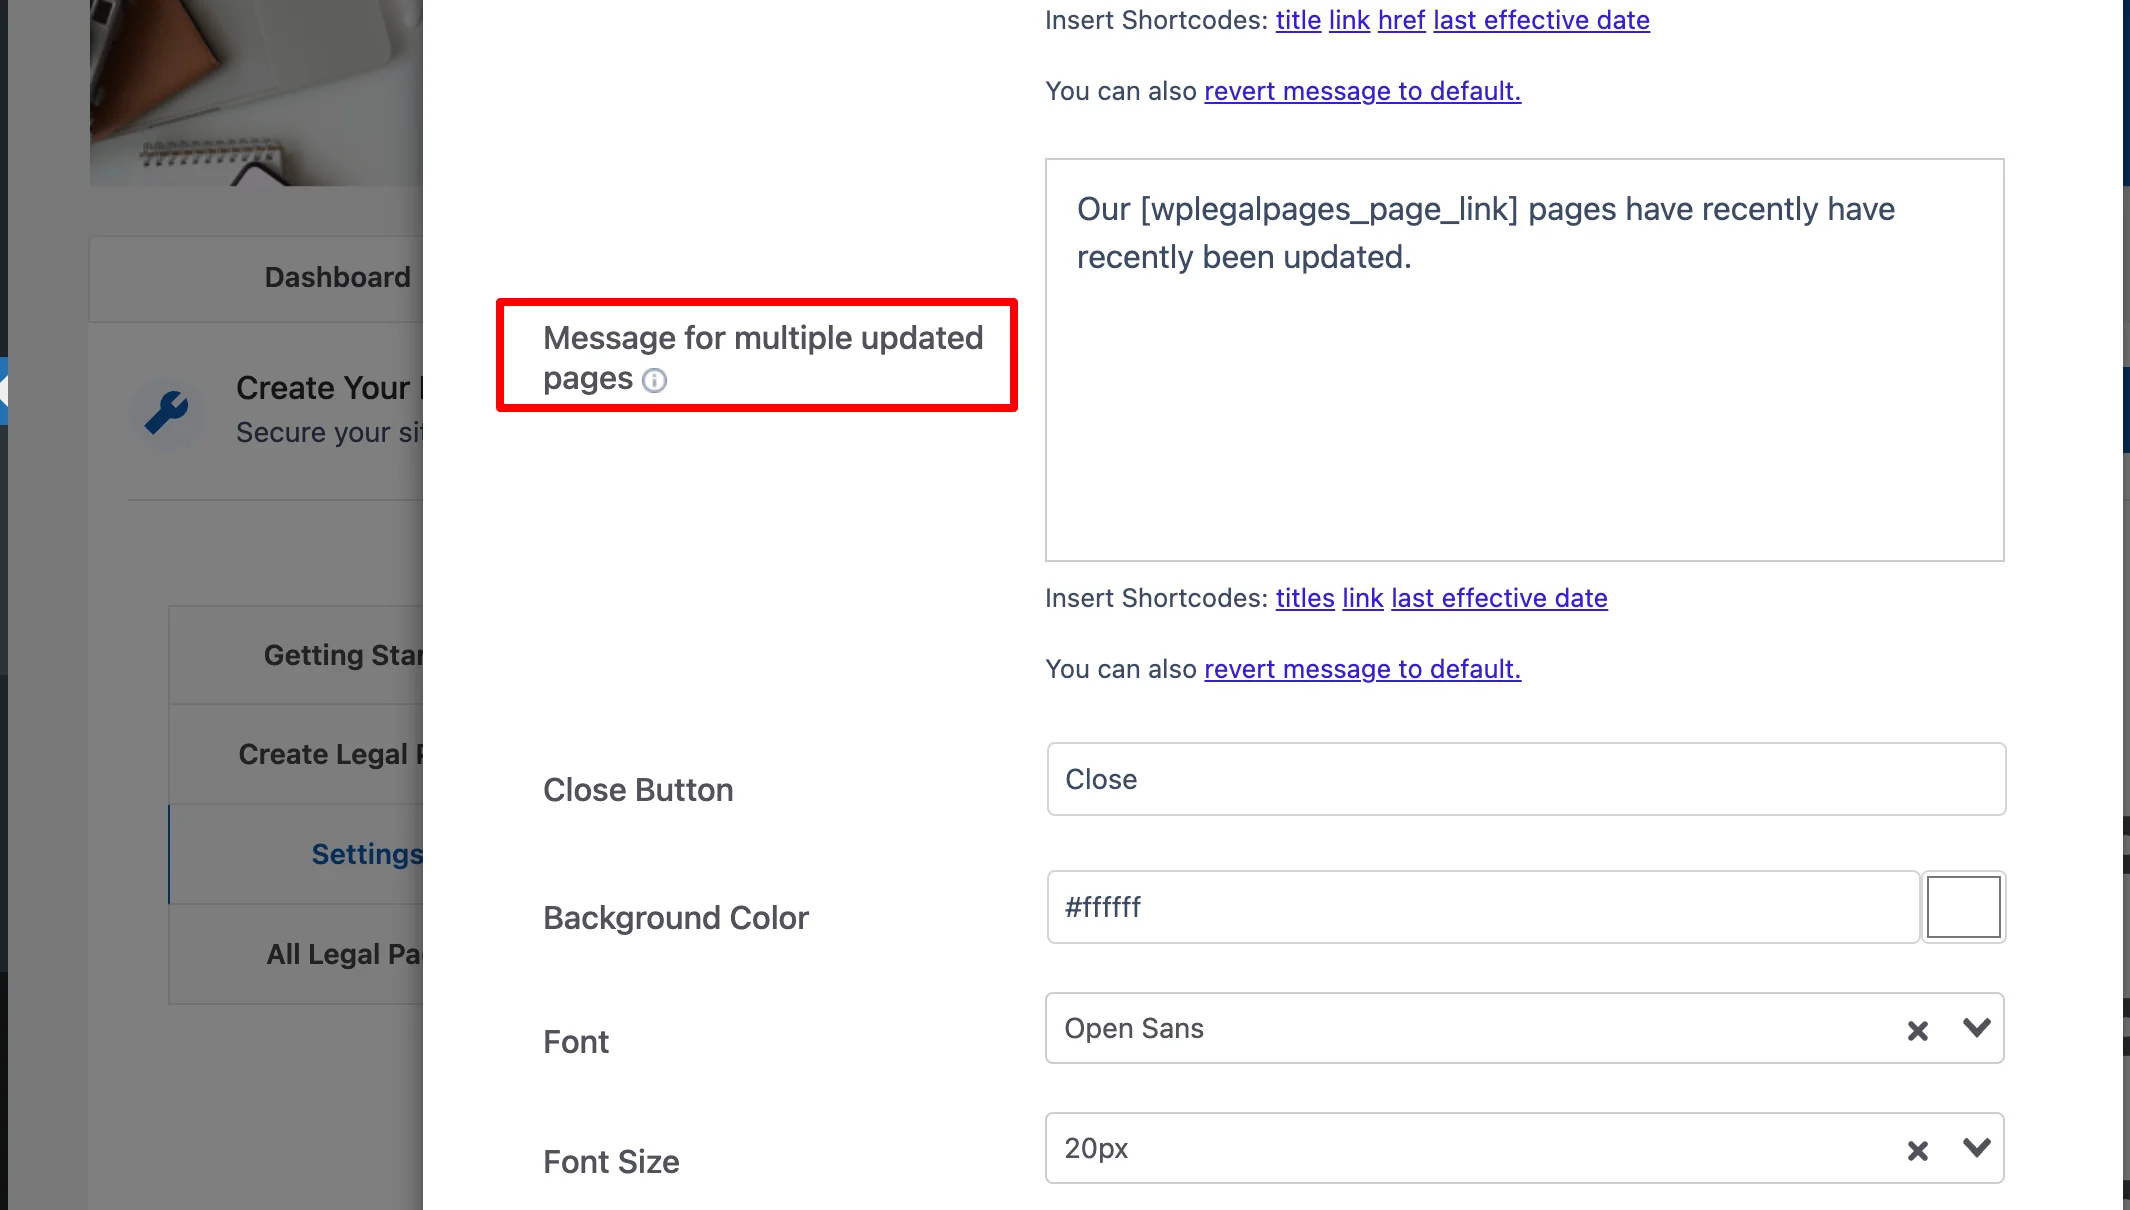
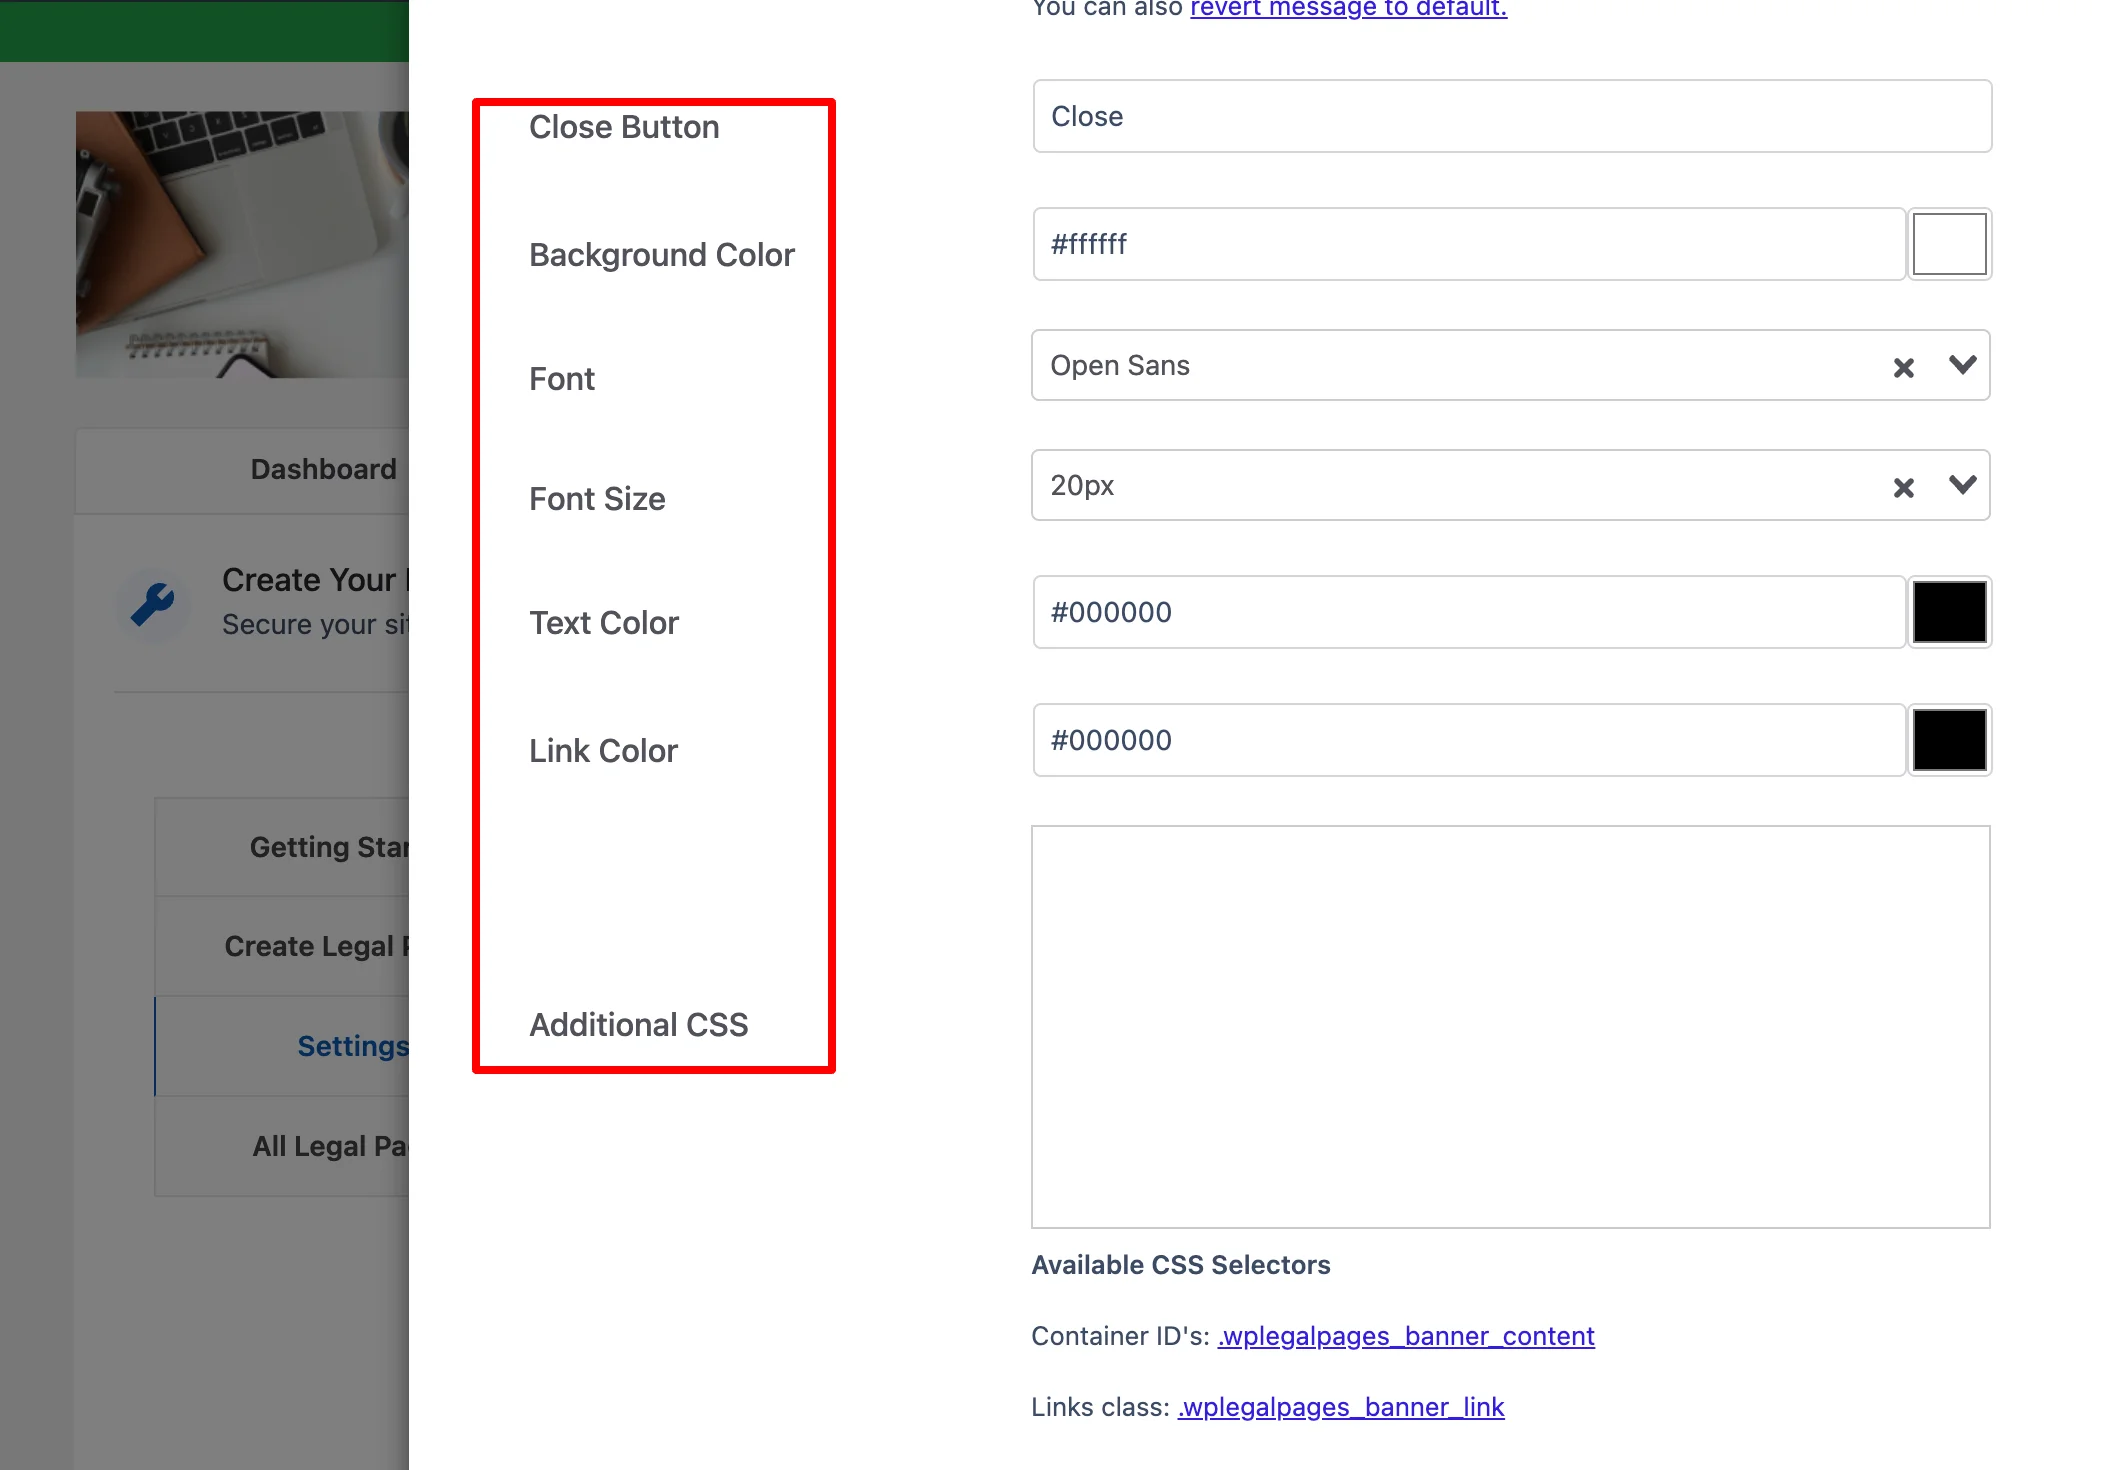
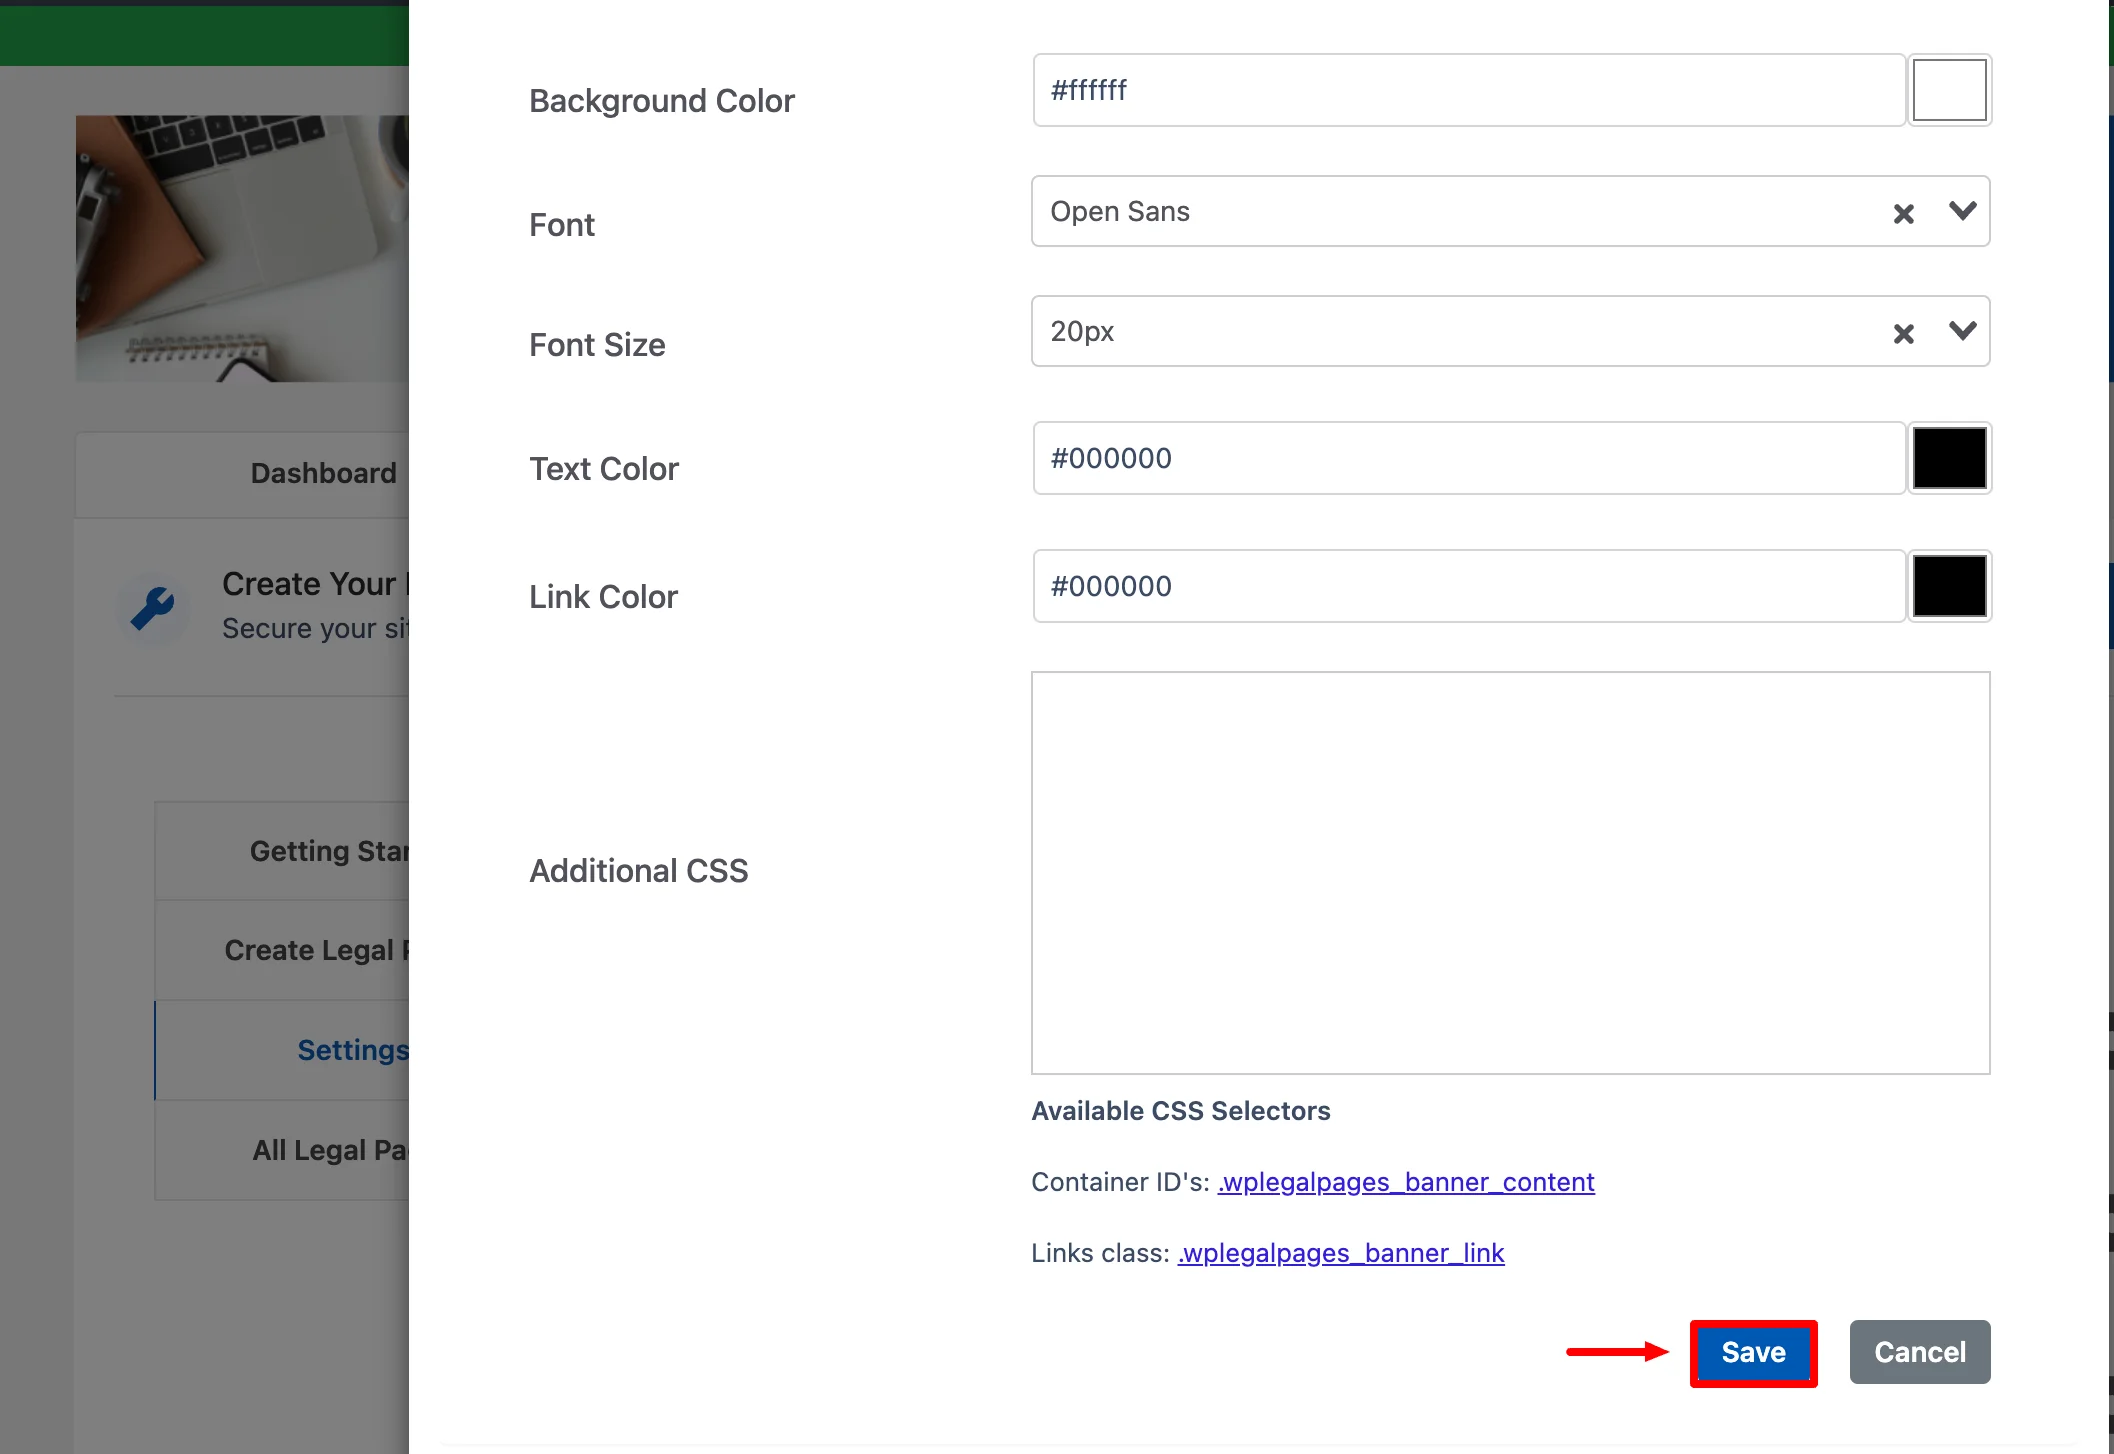
You can experiment with settings such as Background Color, Font, Text Color, Link Color, and more, as well as Custom CSS code using the available styling options.
Finally, click on the Save button to save the changes.
After configuring both settings, click on the Save Changes button to save all changes.
3. Add Age Verification Pop-up #
Using this feature, you can put a pop-up to restrict users below a particular age from entering your website.
To access the settings, go to the Settings tab, select the Compliance tab, and click on the Configuration button in the Add Age Verification pop-up section.
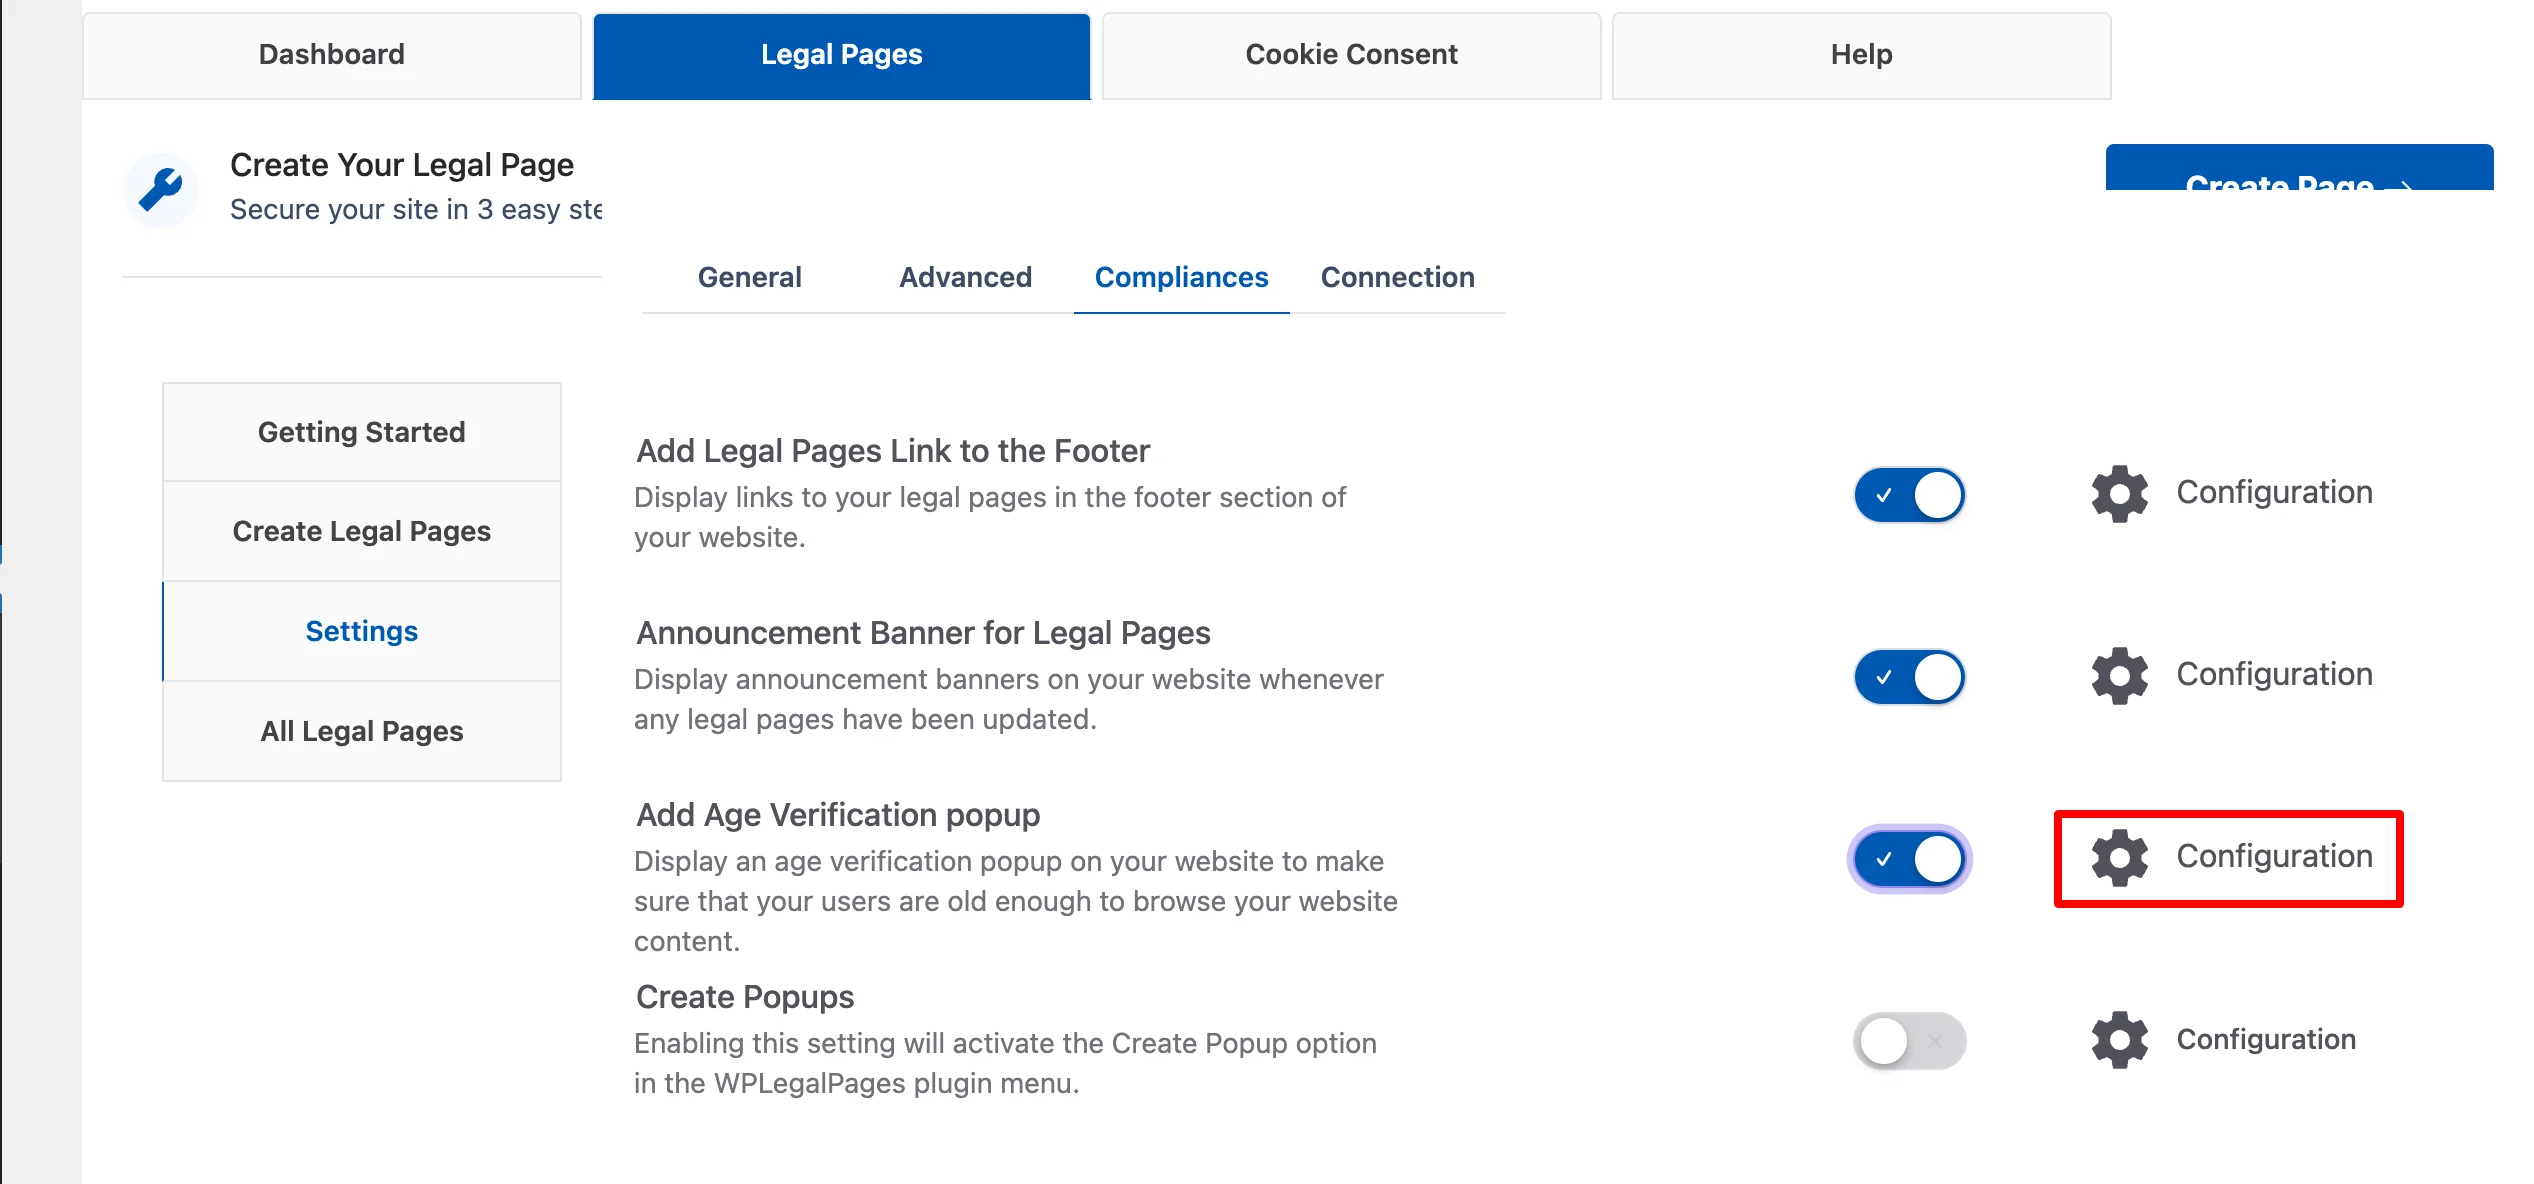
Now that you are in the configuration tab, you can enable this feature by switching on the Enabled toggle button.

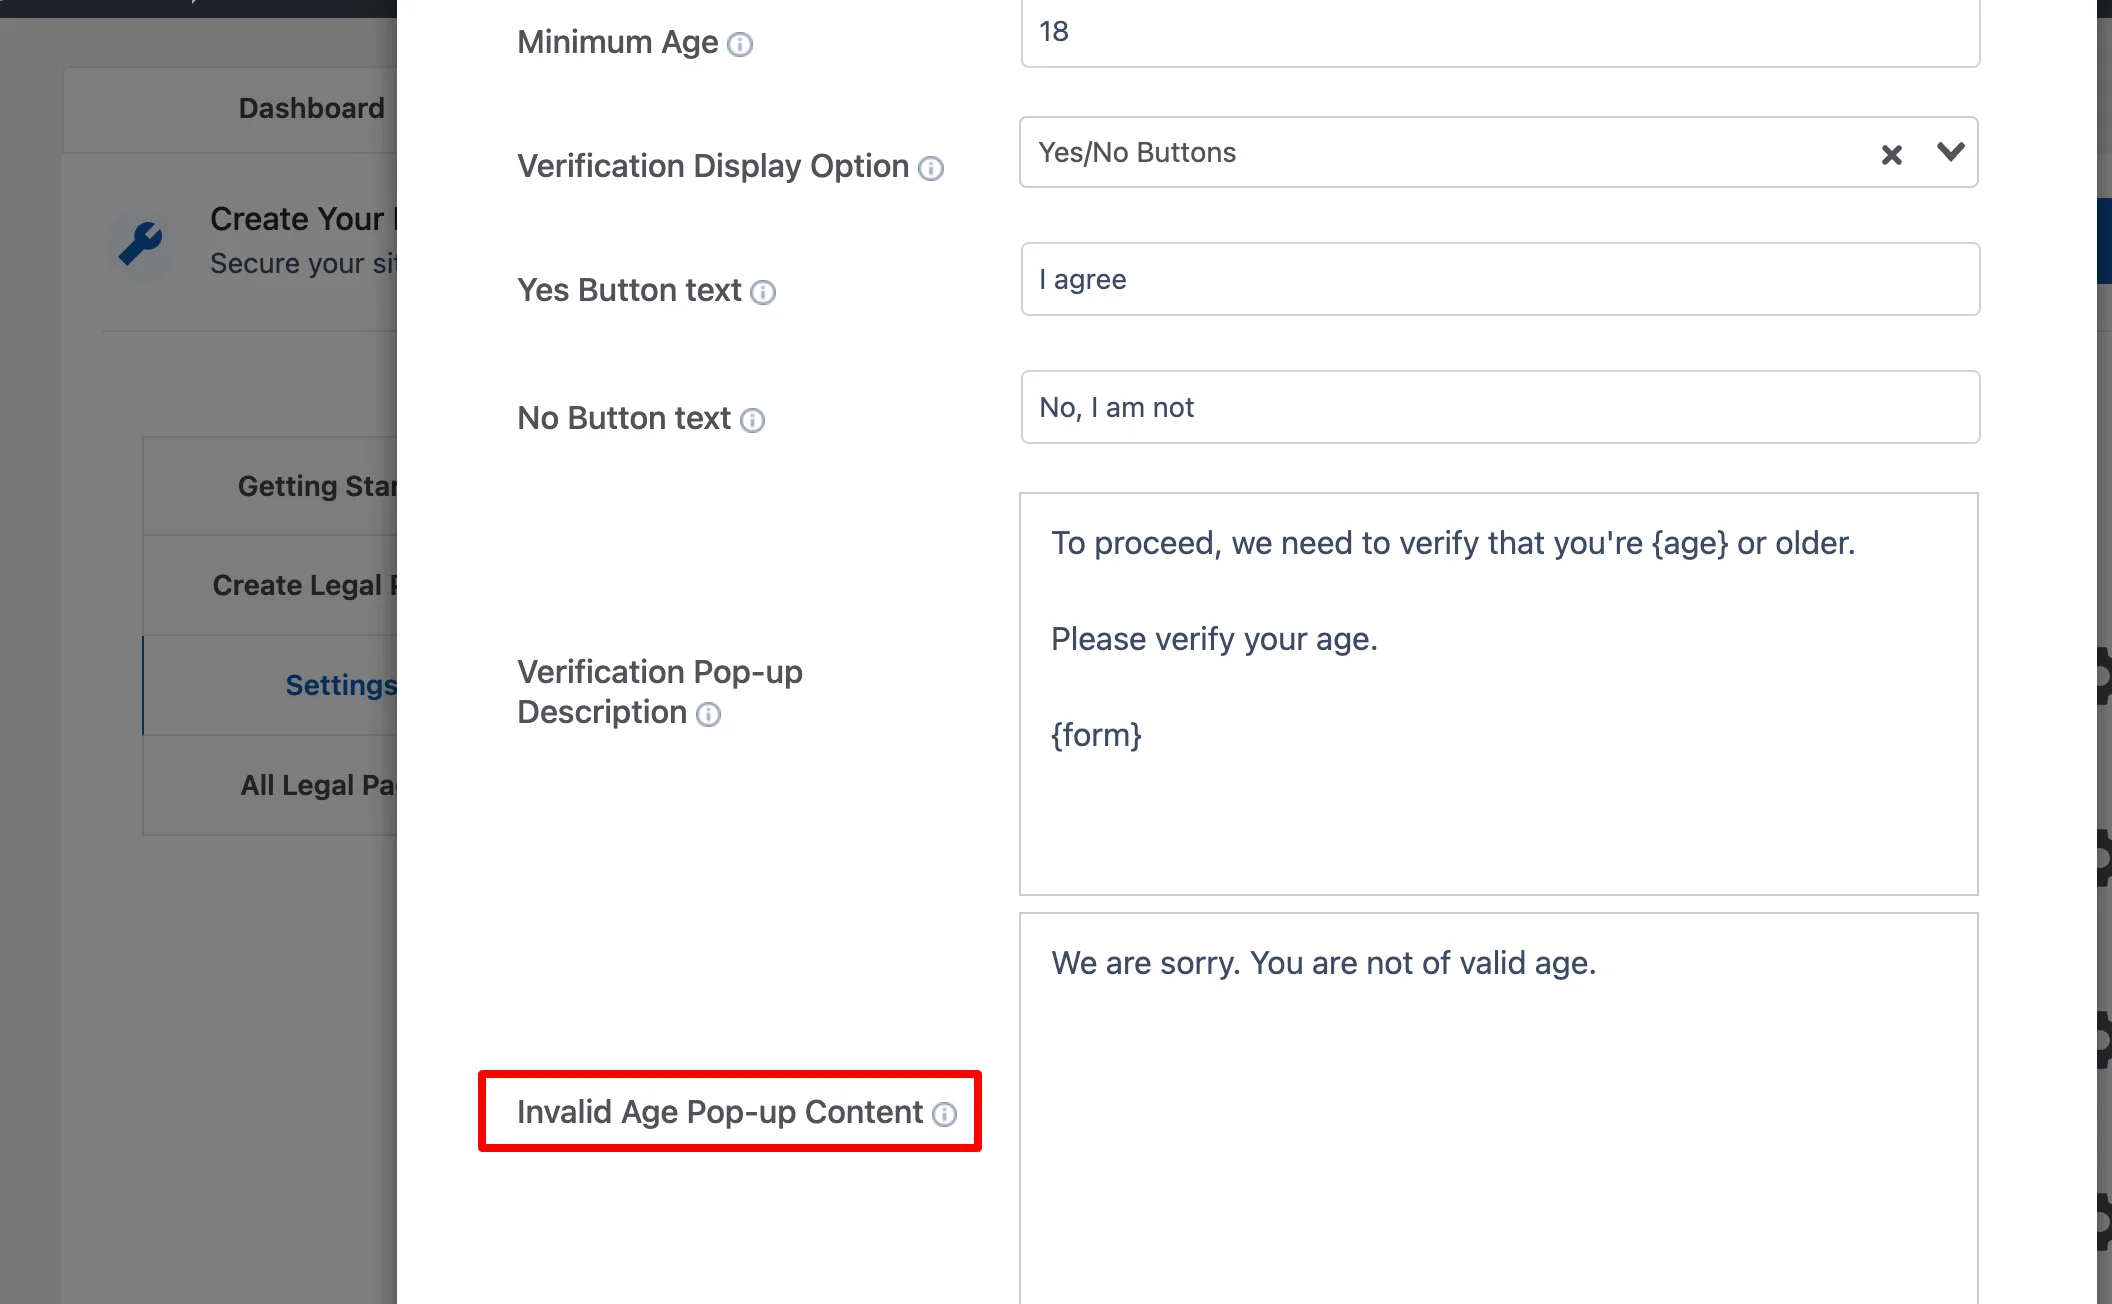
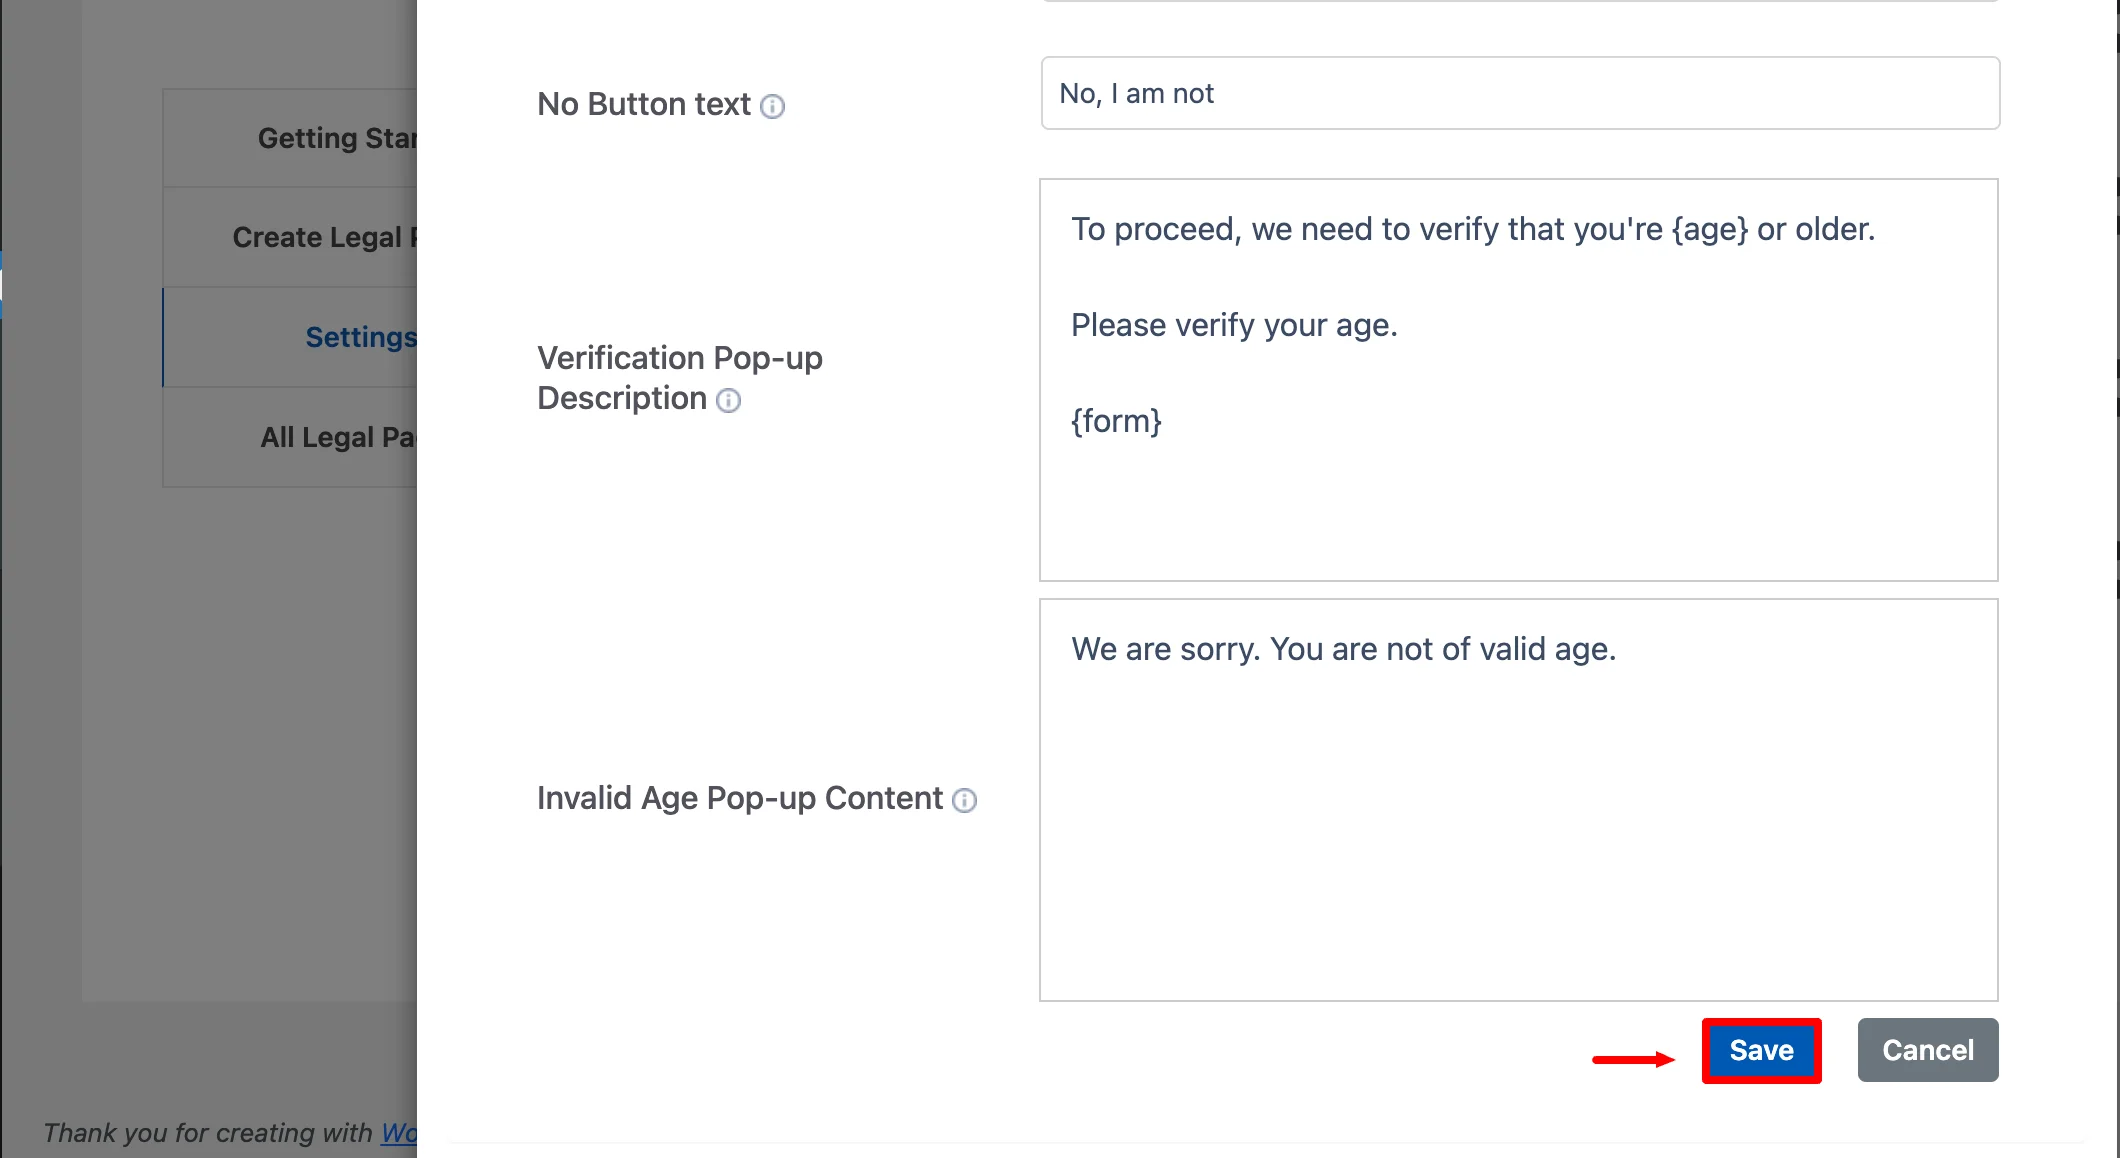
You can verify the age of guests by setting a minimum age requirement. Additionally, you can select one of two verification display options: Yes/No Buttons or Input Date of Birth.
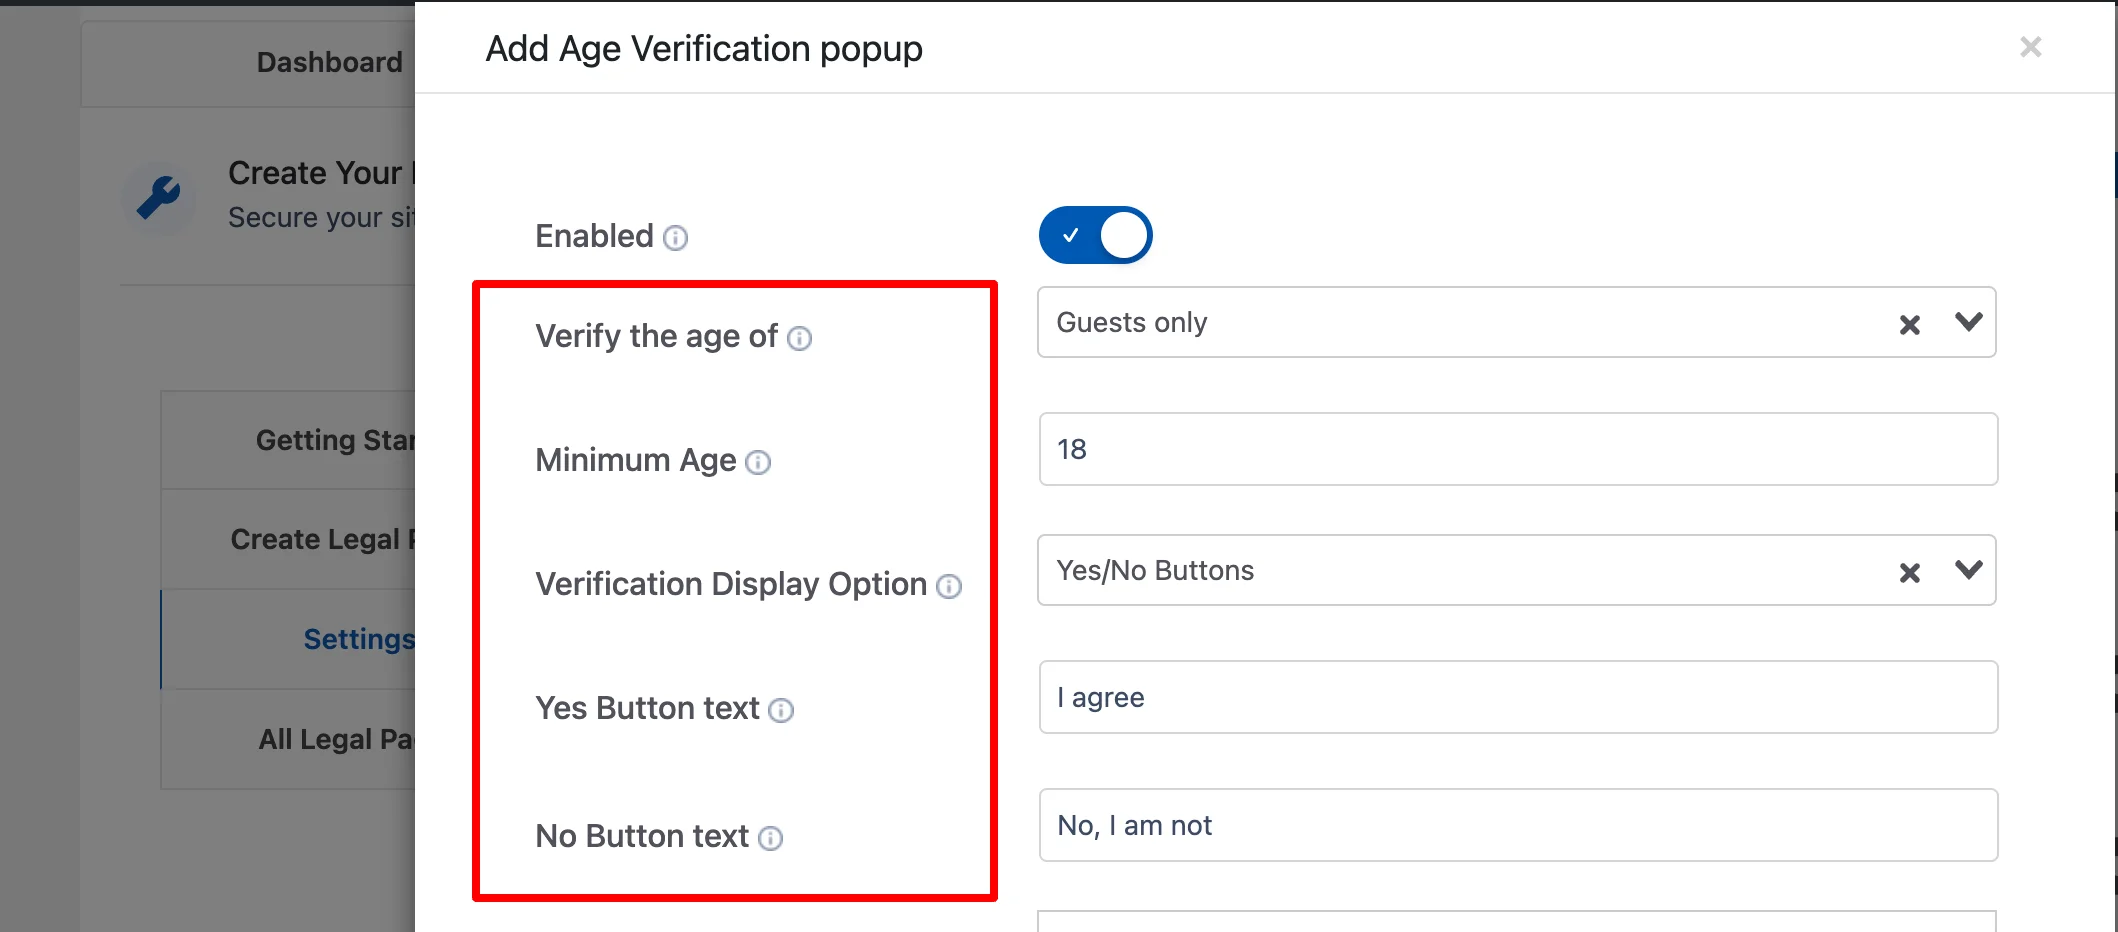
Now, add the verification message for the pop-up under Verification Pop-up Description.

Finally, add a message to display on the pop-up if the visitor doesn’t fulfill the age requirement, under the Invalid Age Pop-up Content section.
Now, click on the Save button to save the changes.
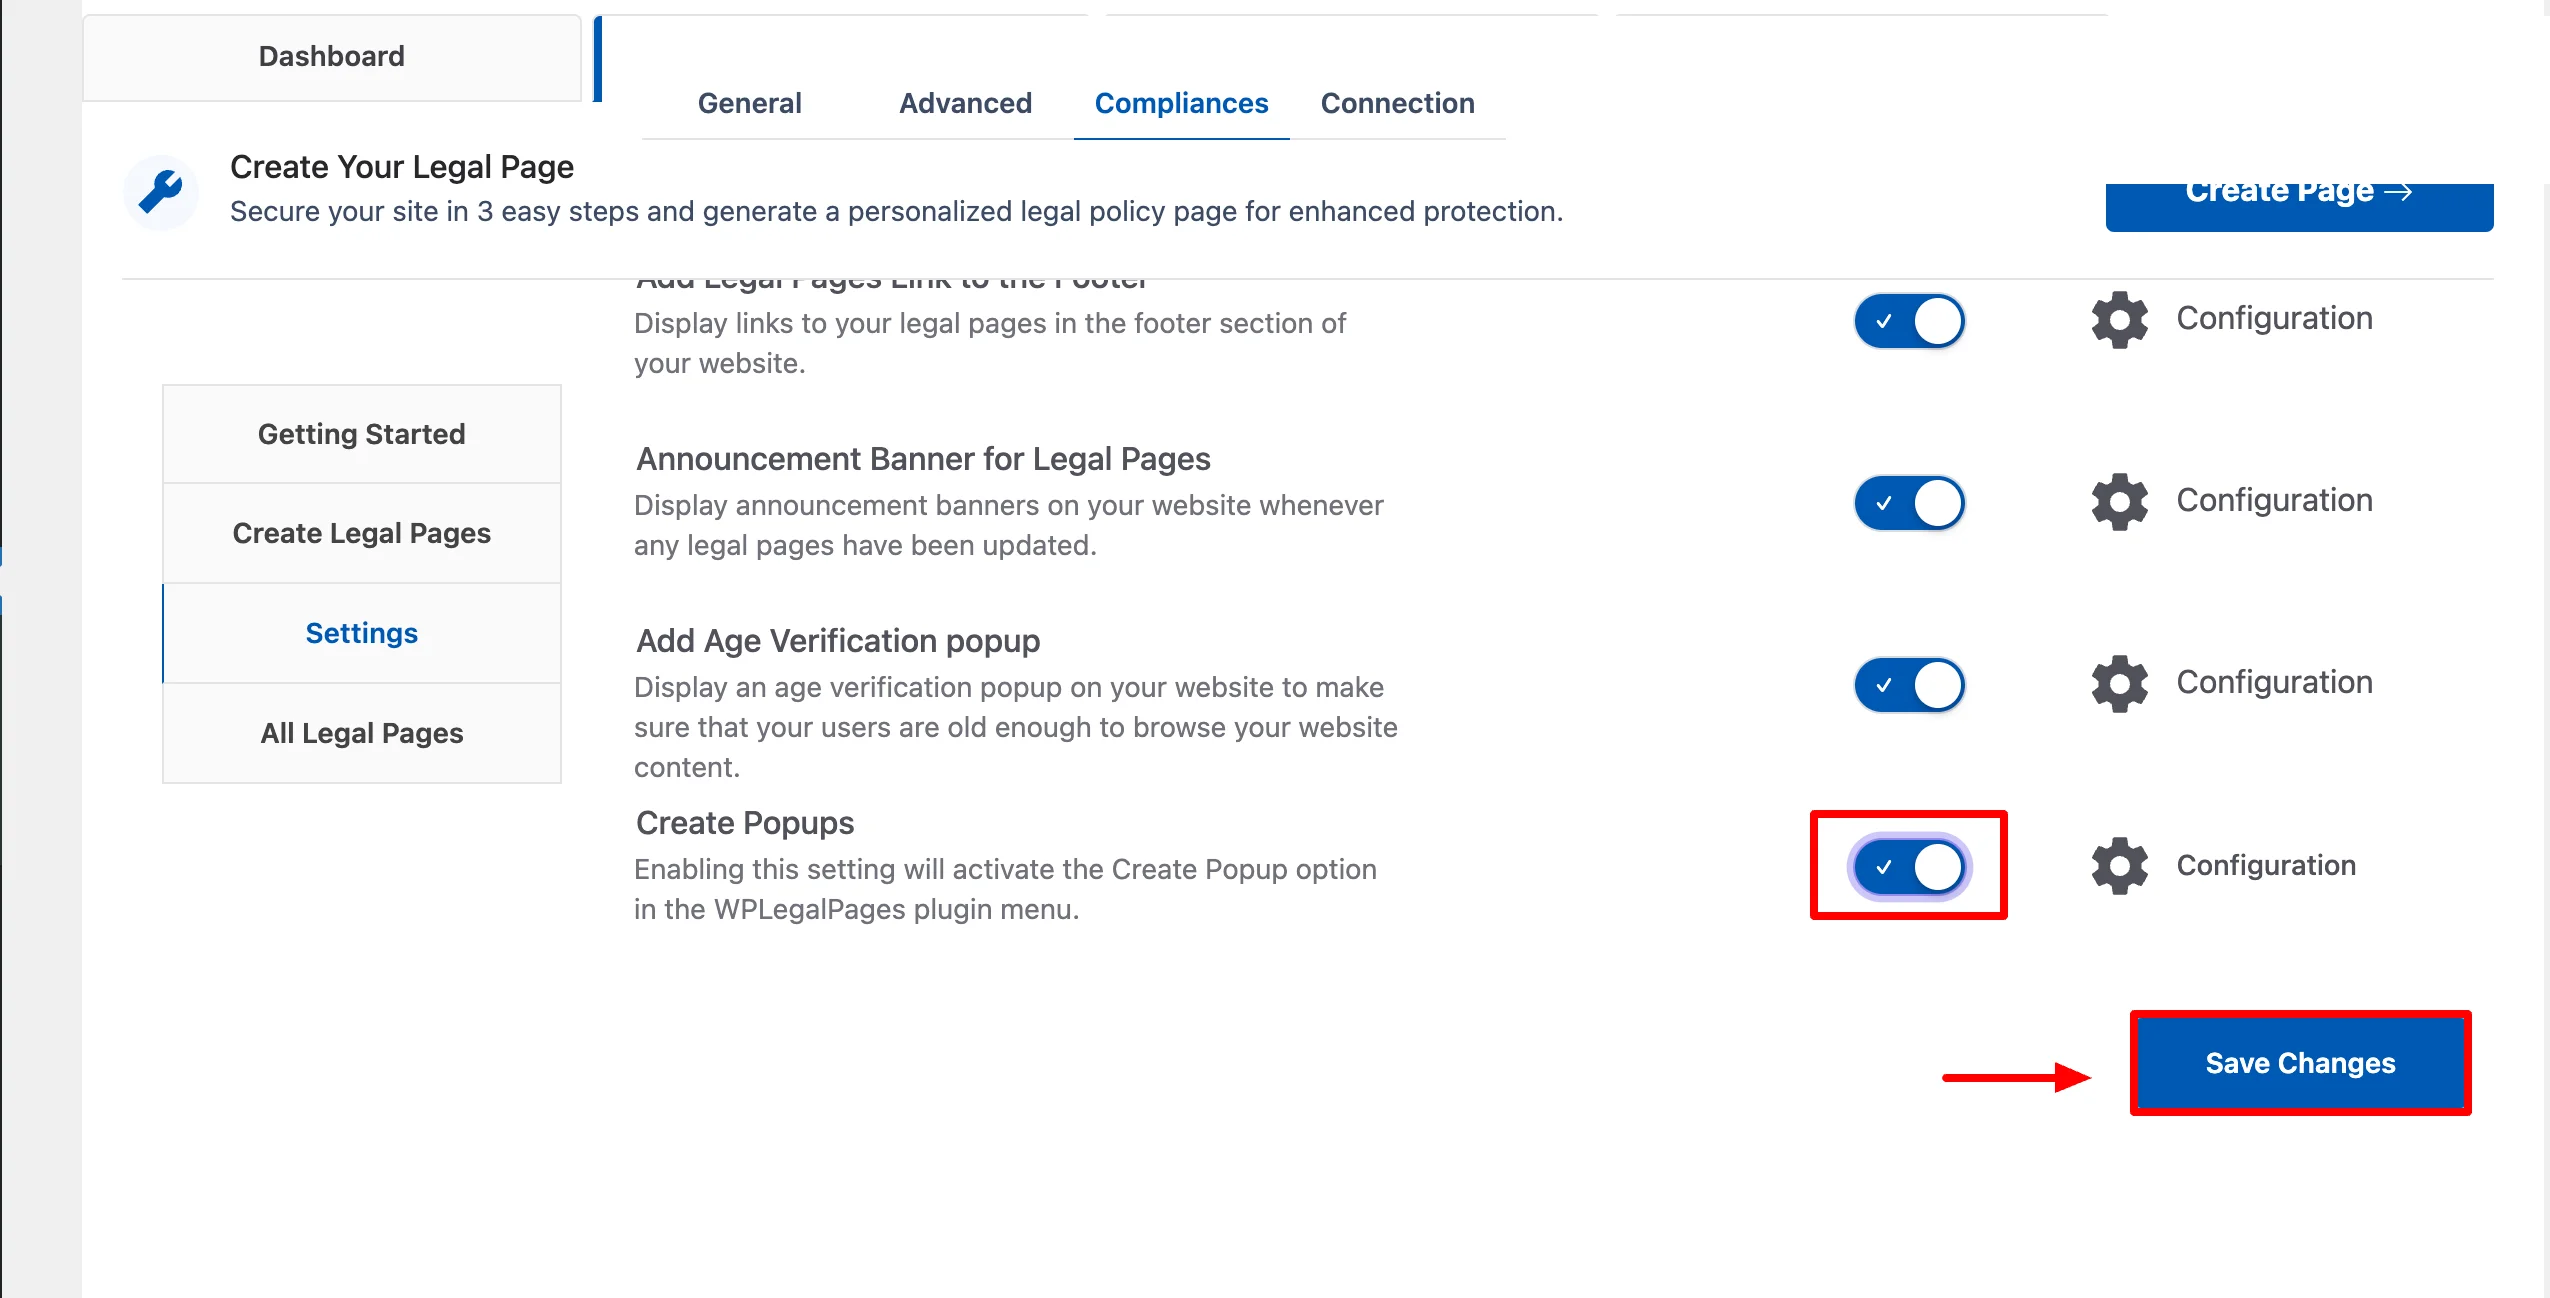
4. Create Popups #
To add pop-up messages to your website, click the Enable button in the Create Popups section and then click the Save Changes button.
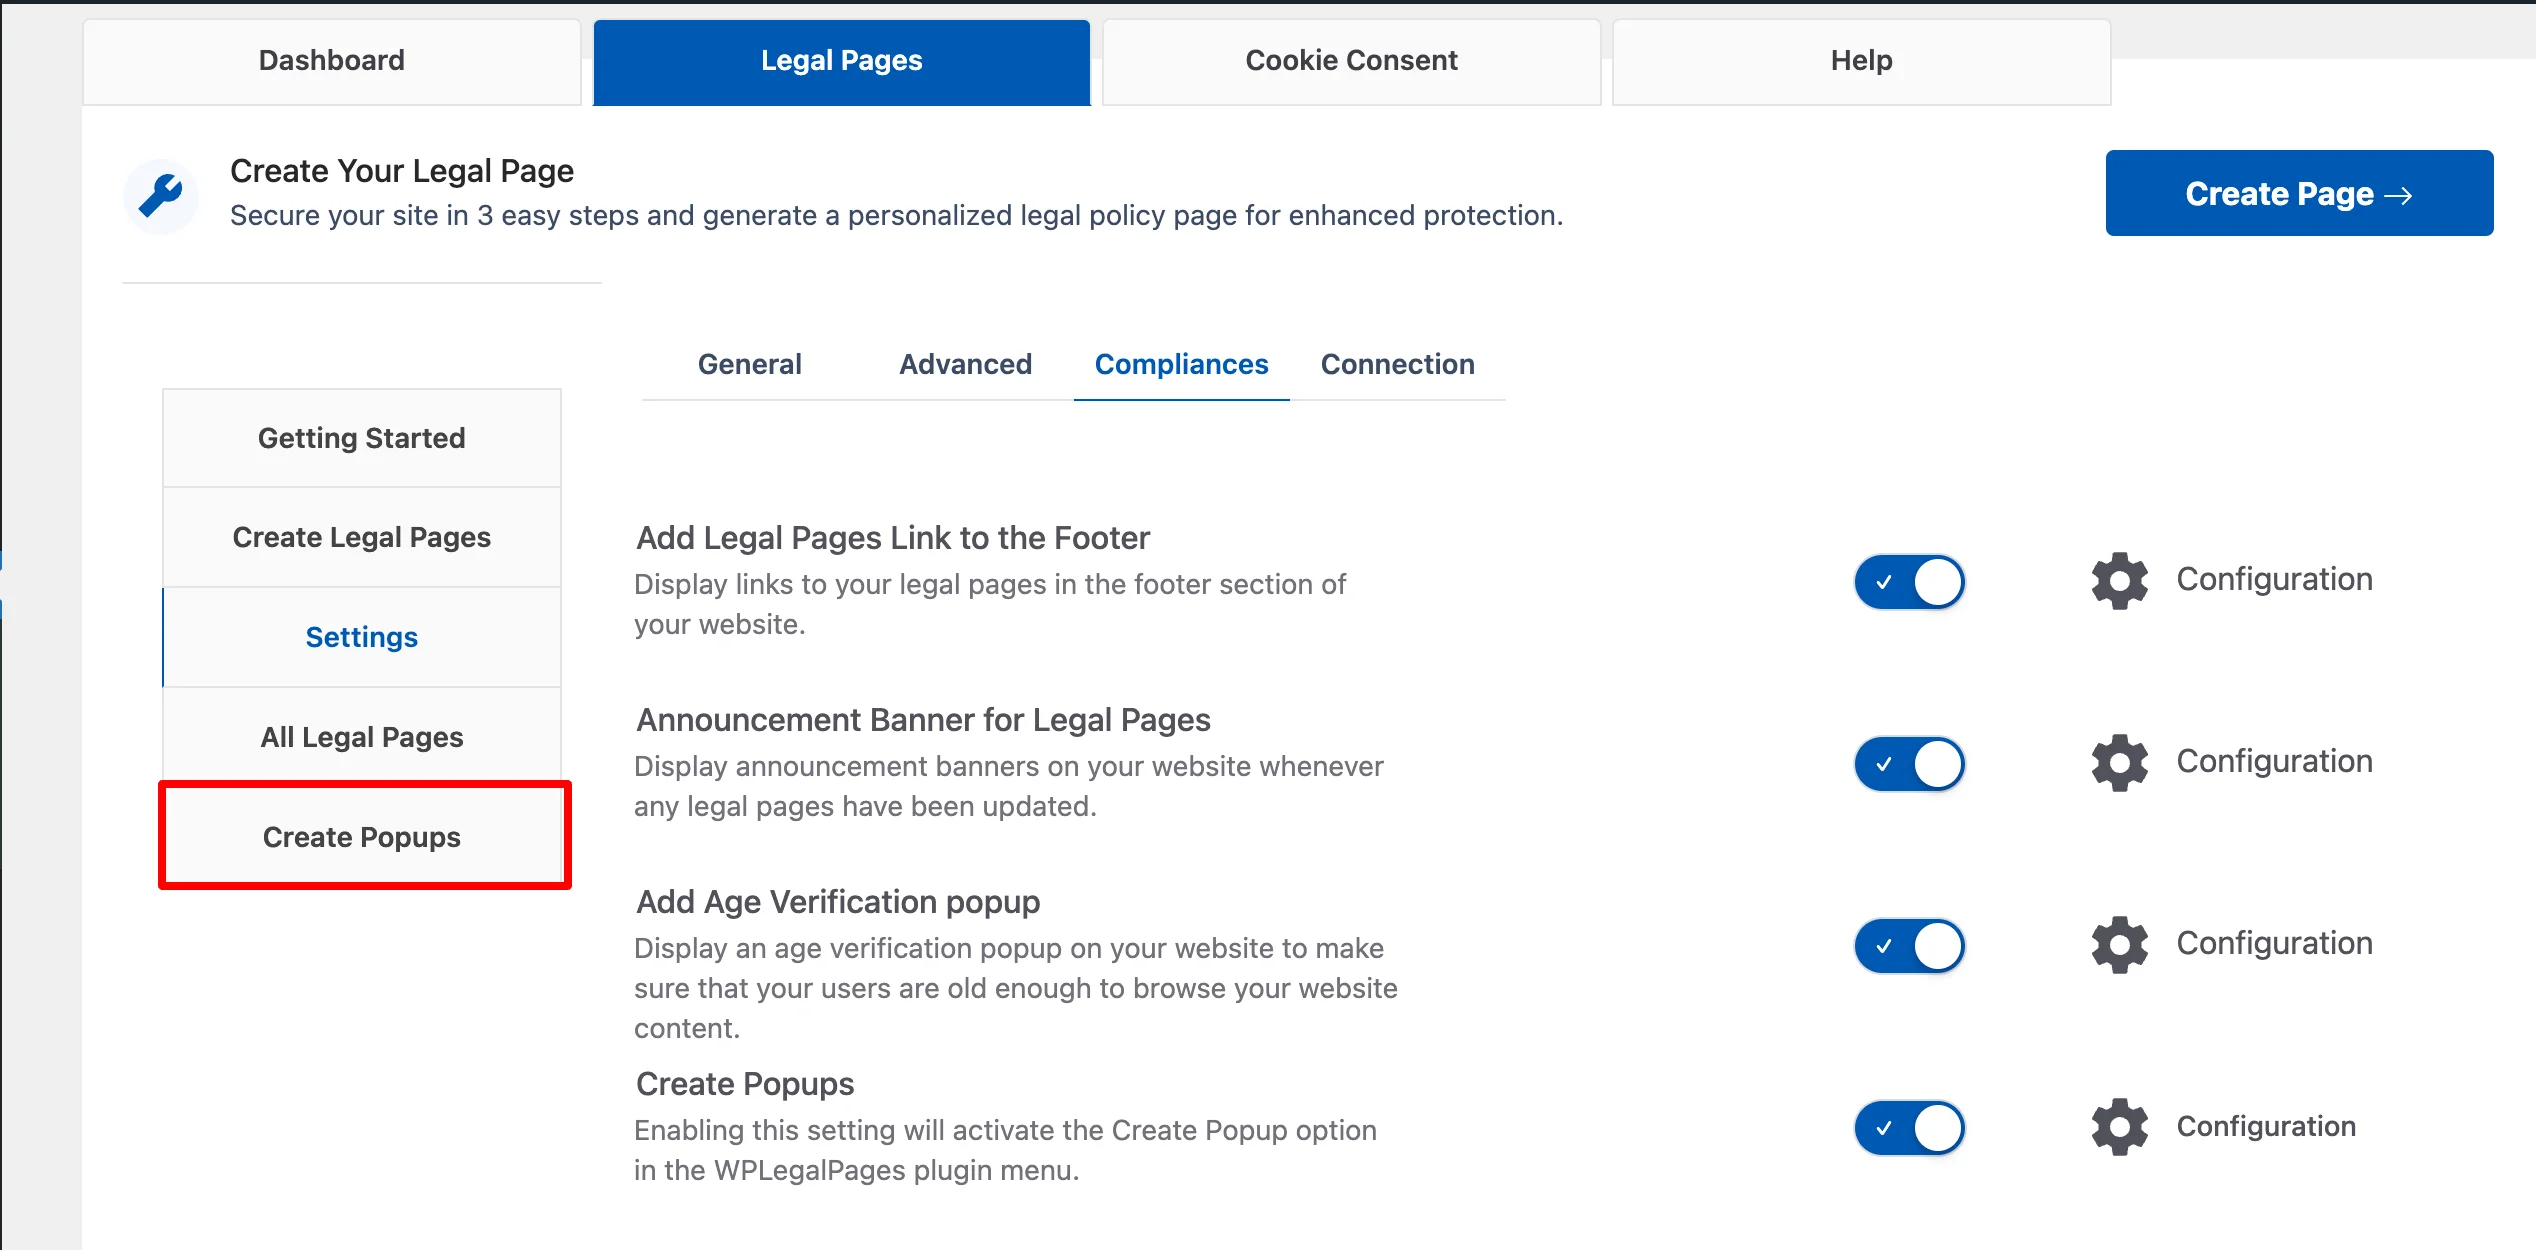
After enabling this option, you will see a Create Popups option on the left-side panel.
You can add Legal Pages to popups by selecting a template from the dropdown menu labeled Use Template Shortcode.
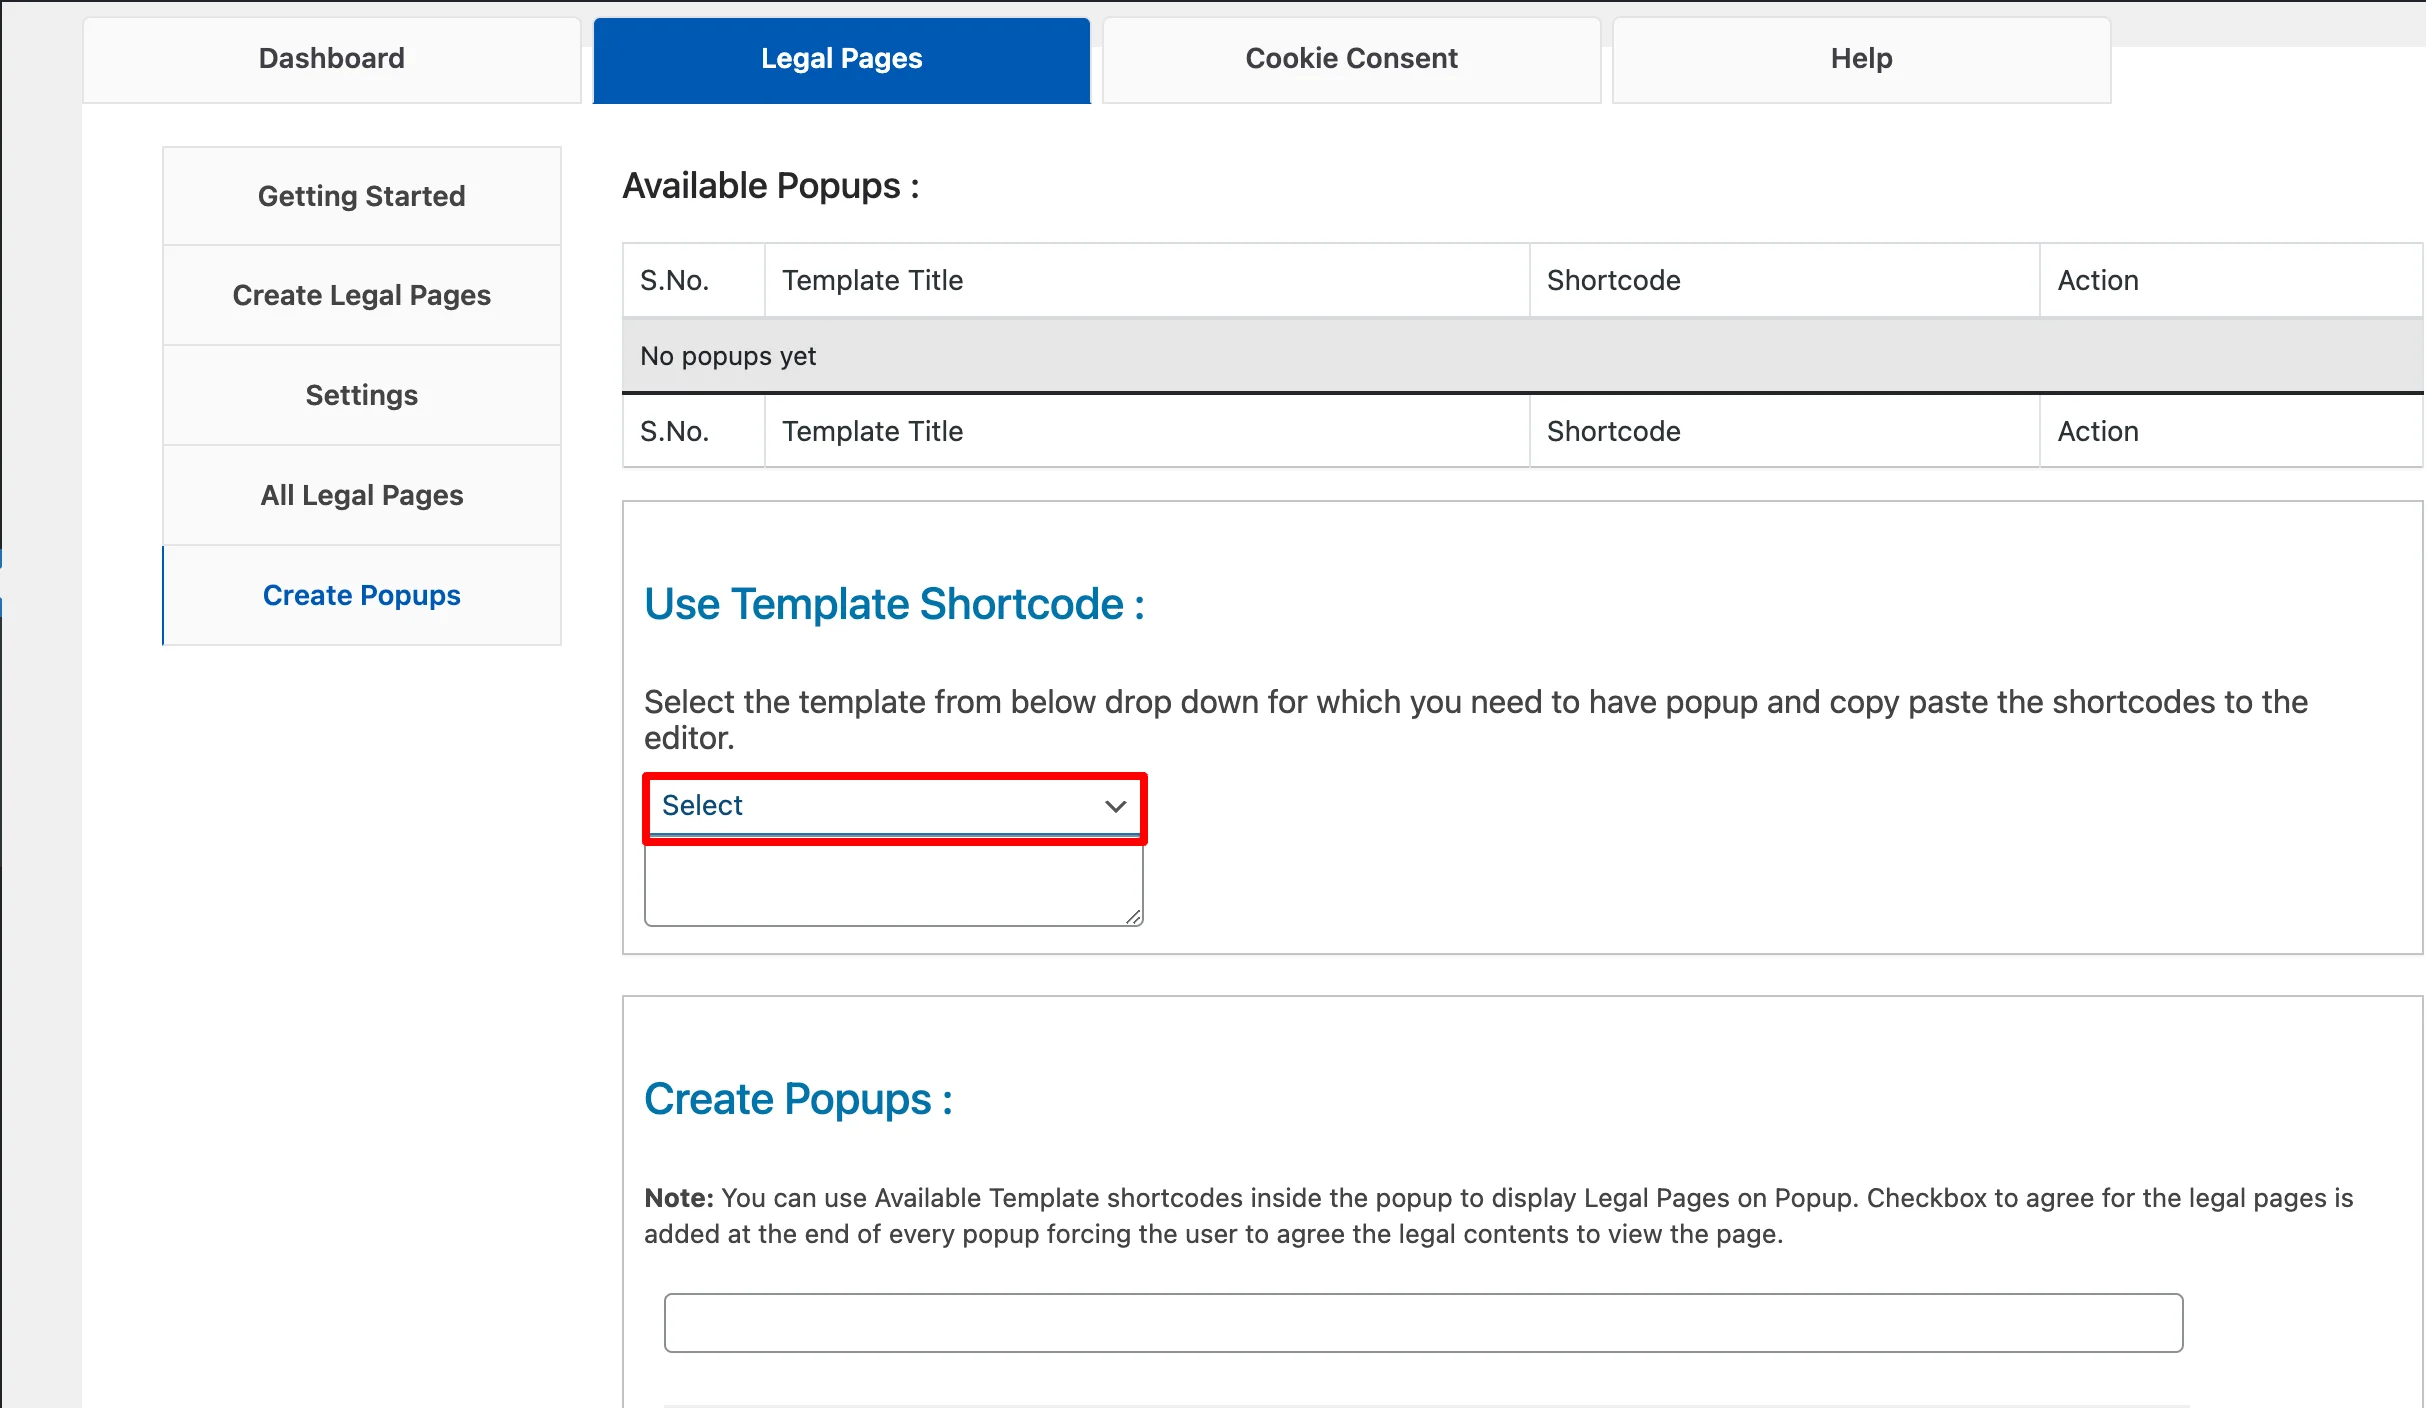
After selecting the template, copy and paste the generated shortcode to the editor.
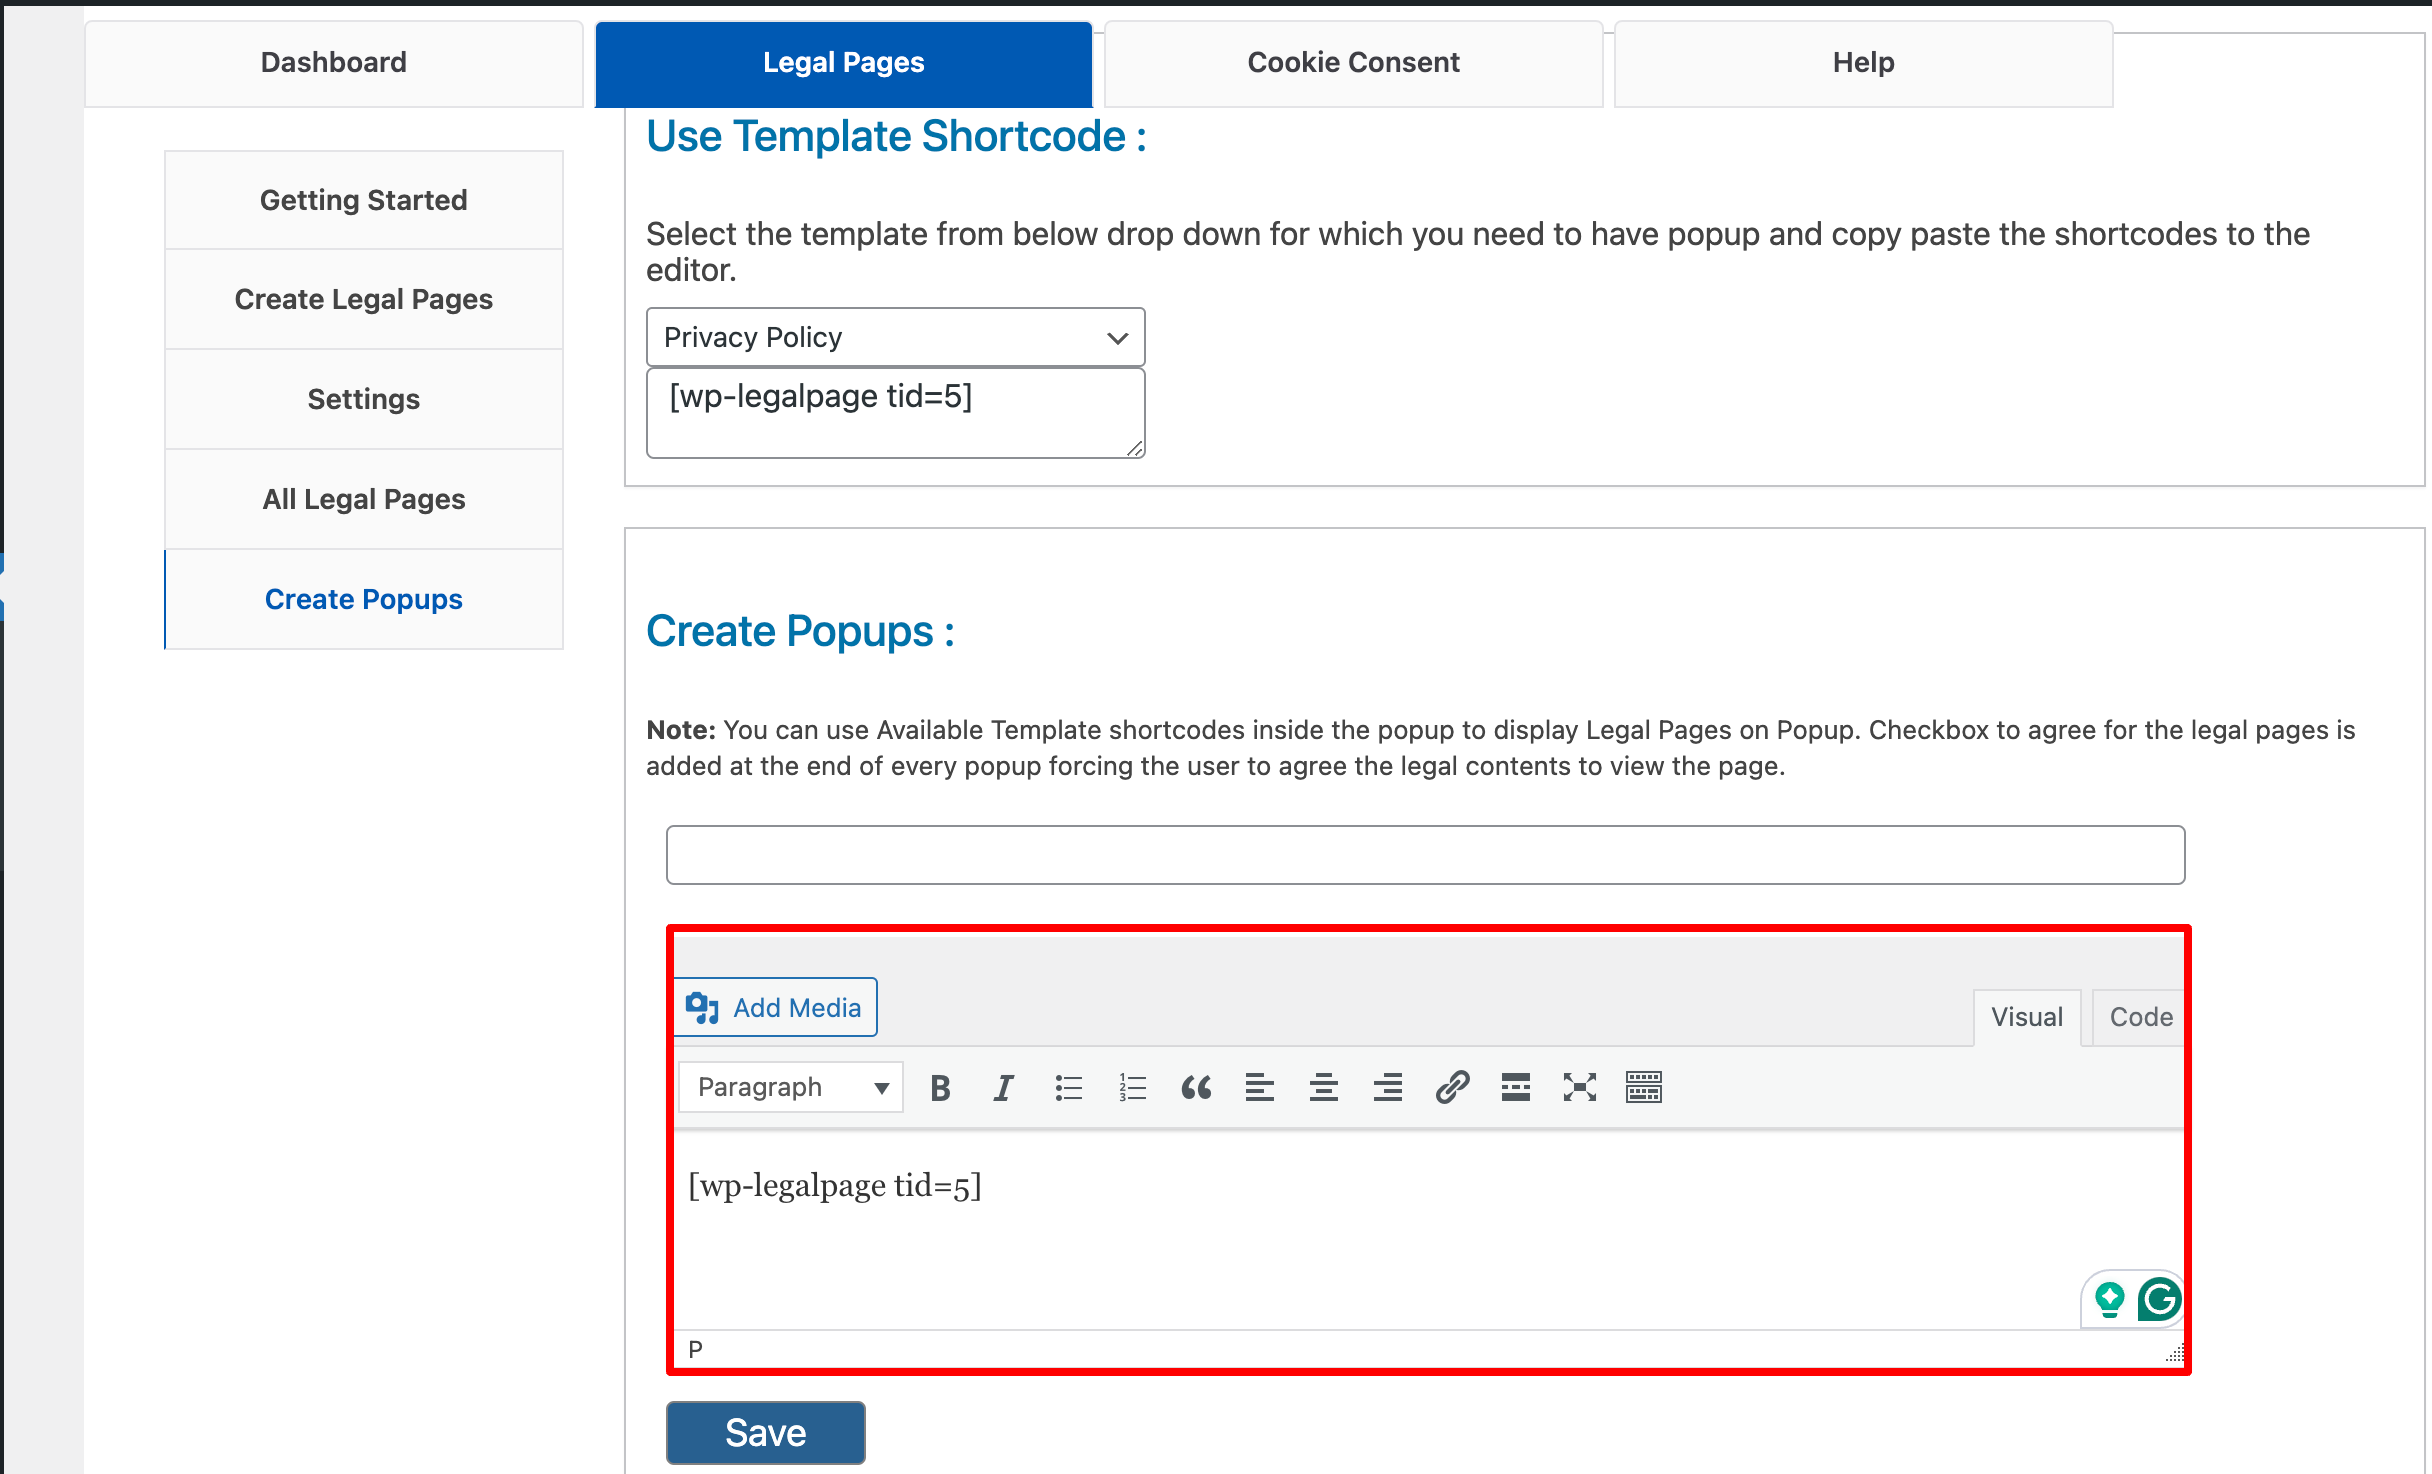
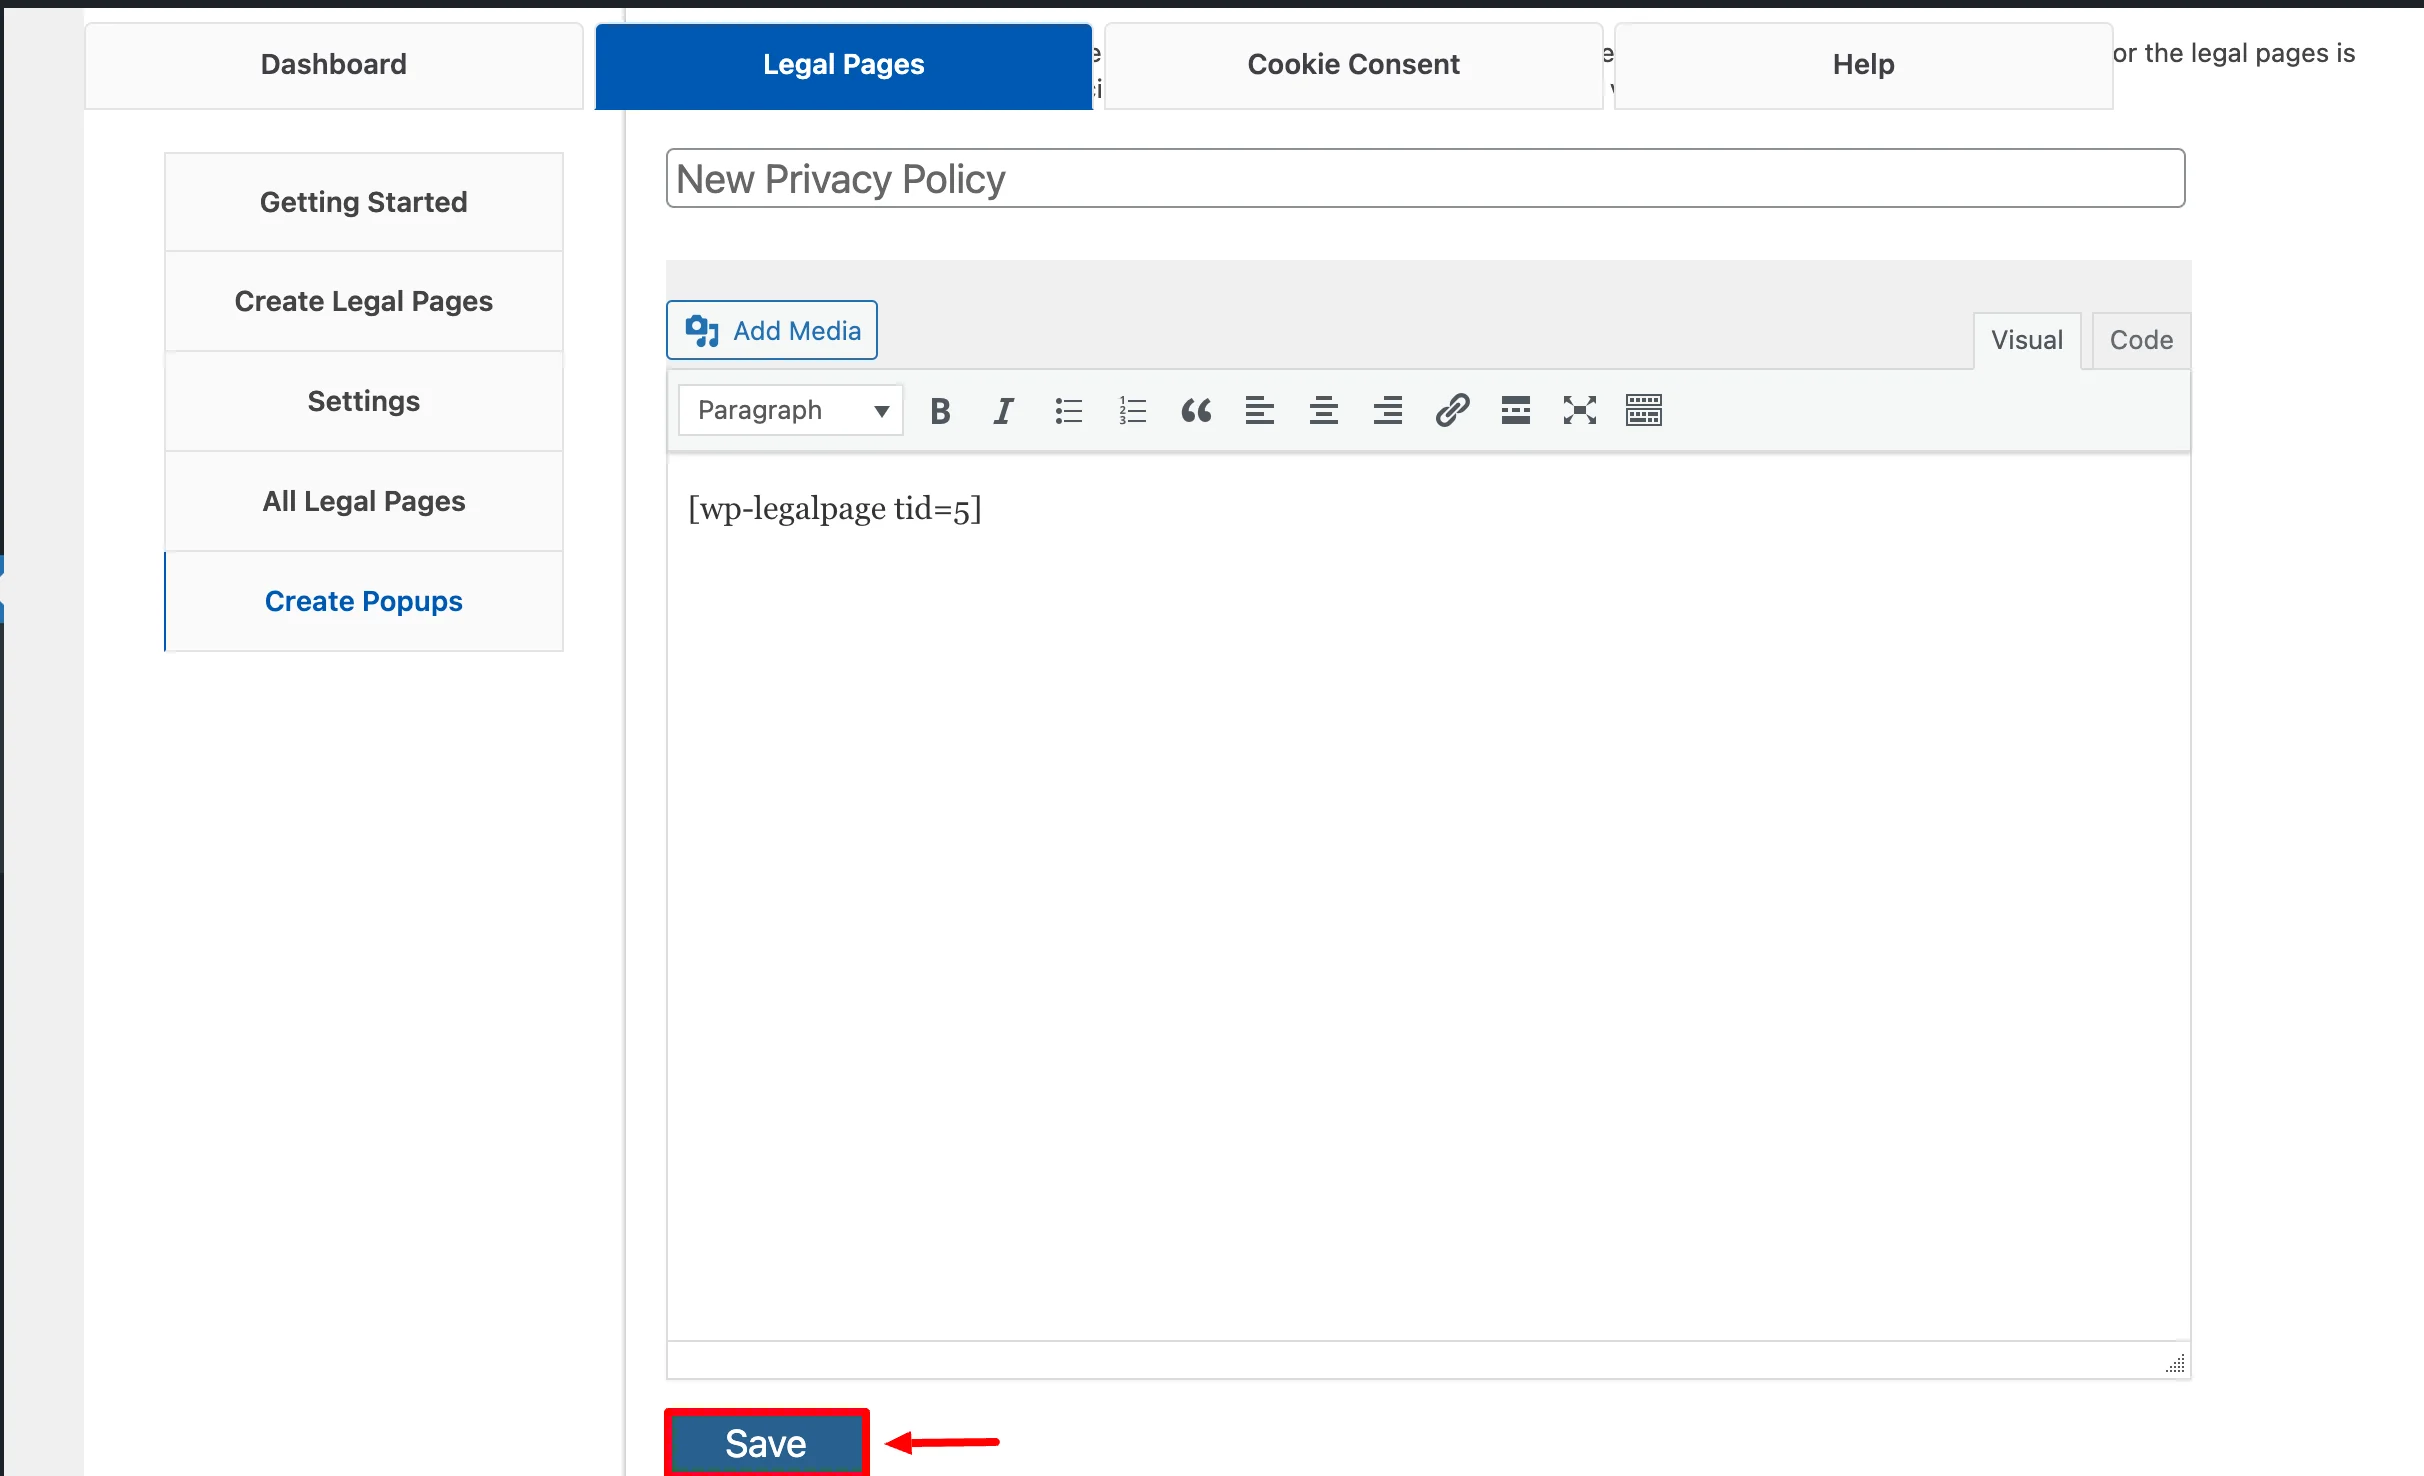
Now, add a title to the popup and click on the ‘Save’ button to generate the shortcode.
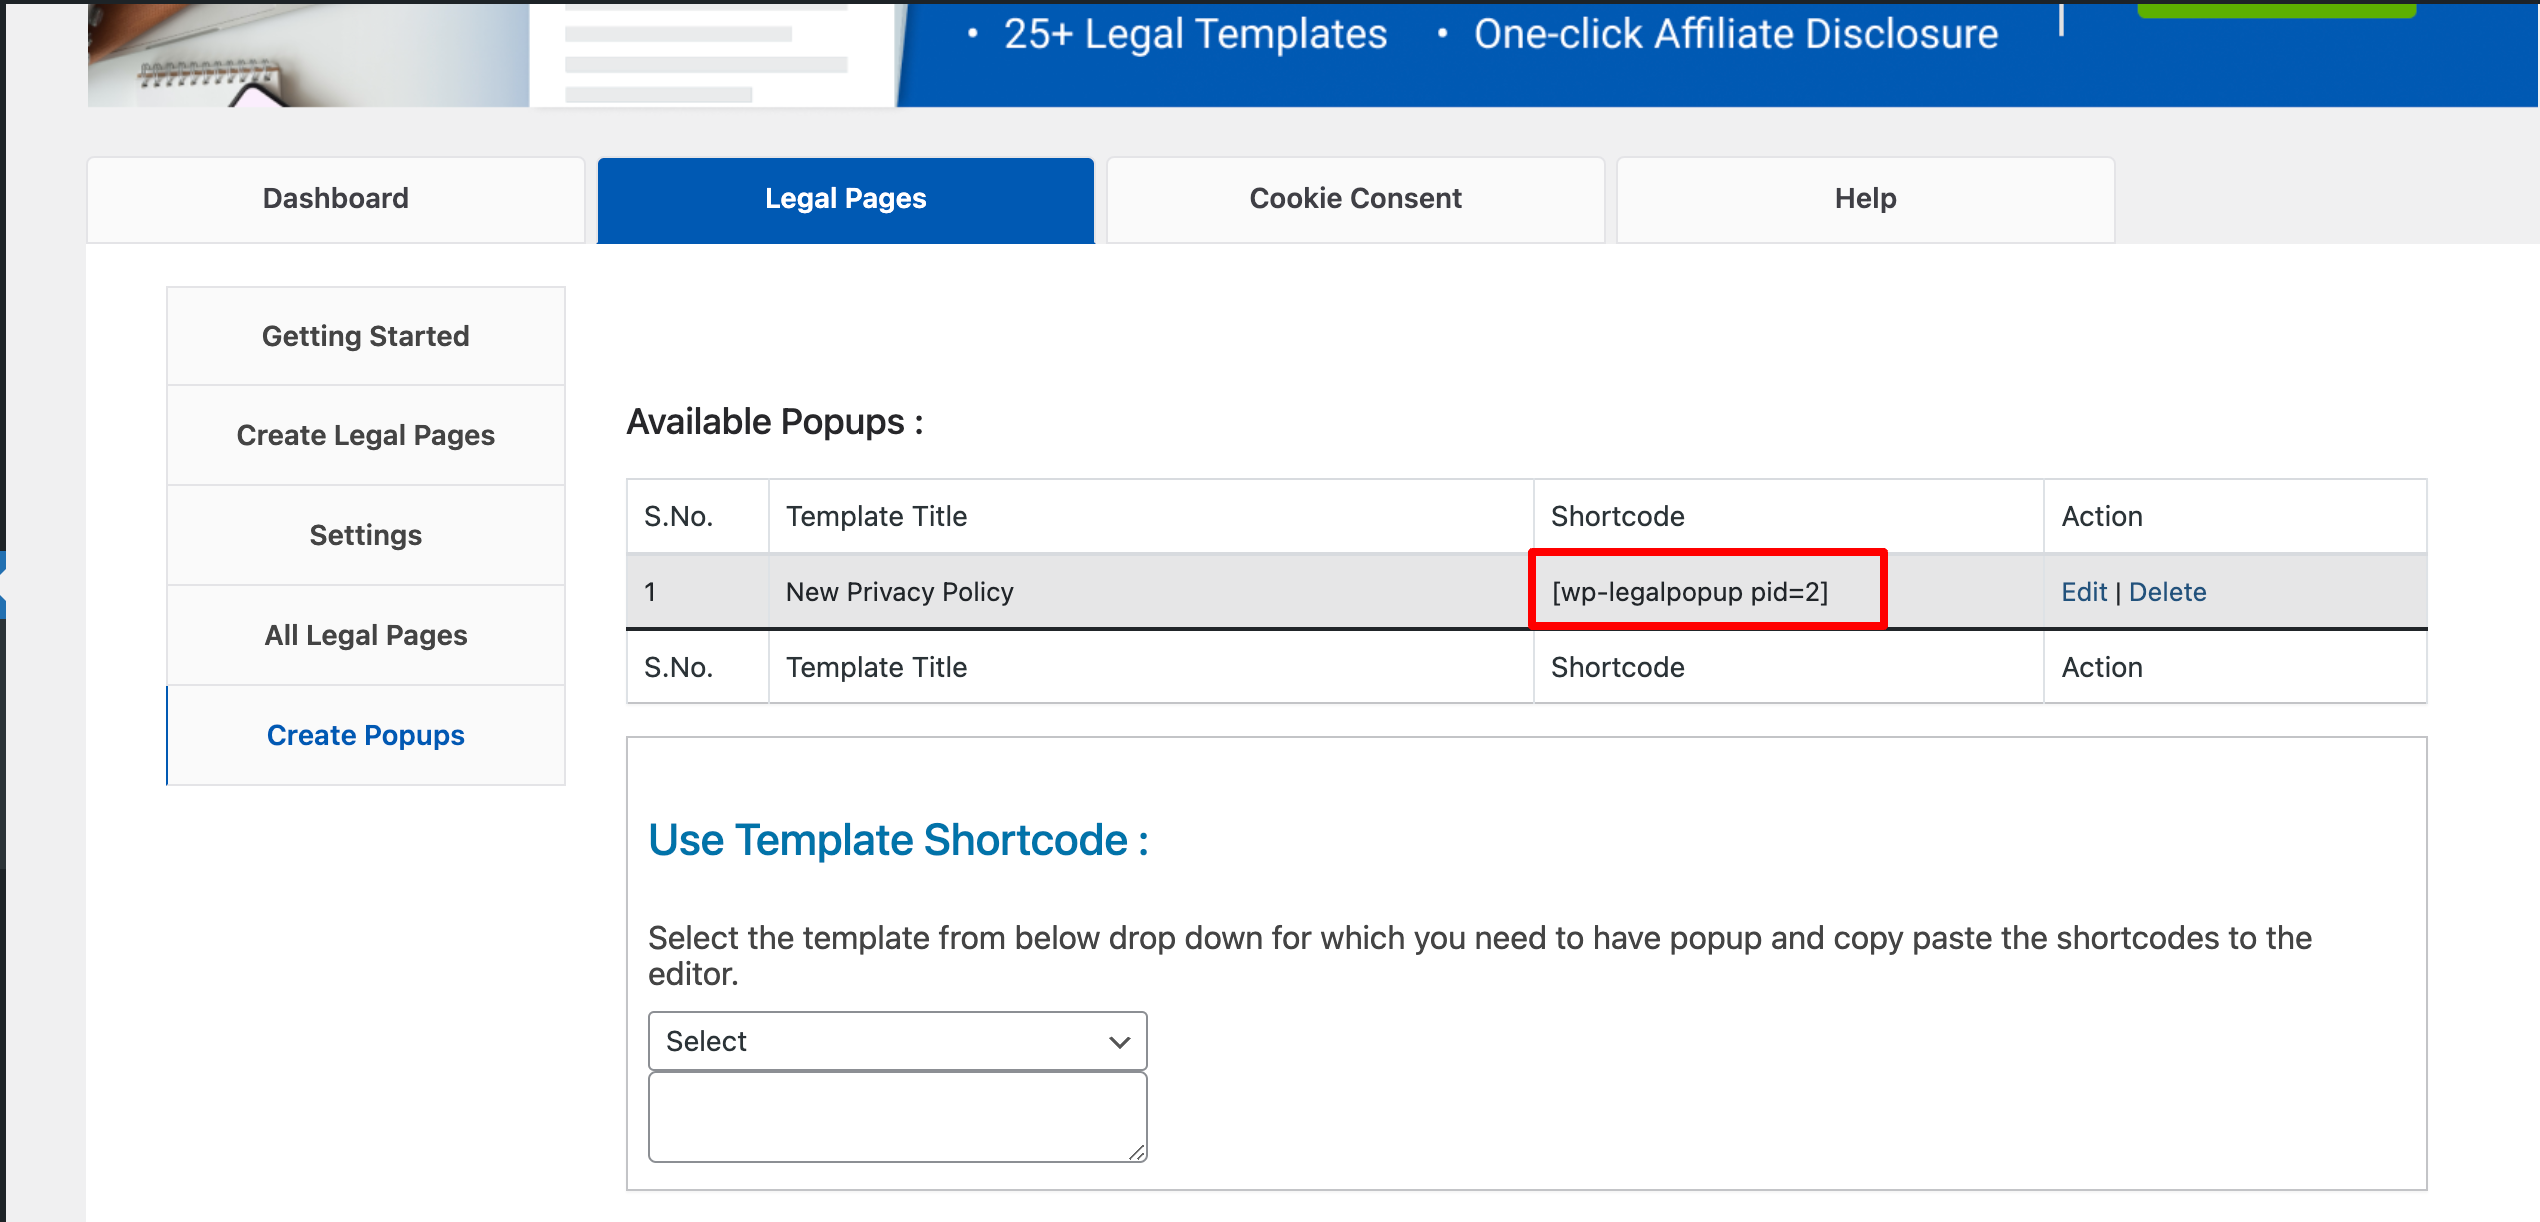
You can find the generated shortcode in the Available Popups section at the top of the page. Copy that shortcode and paste it into the necessary posts. In this way, you could add popups to the posts.
After configuring all the settings, click on the Save Changes button to save all changes.
Your legal pages are now set up correctly, helping you meet regulatory requirements with confidence.


